SOAR Automation
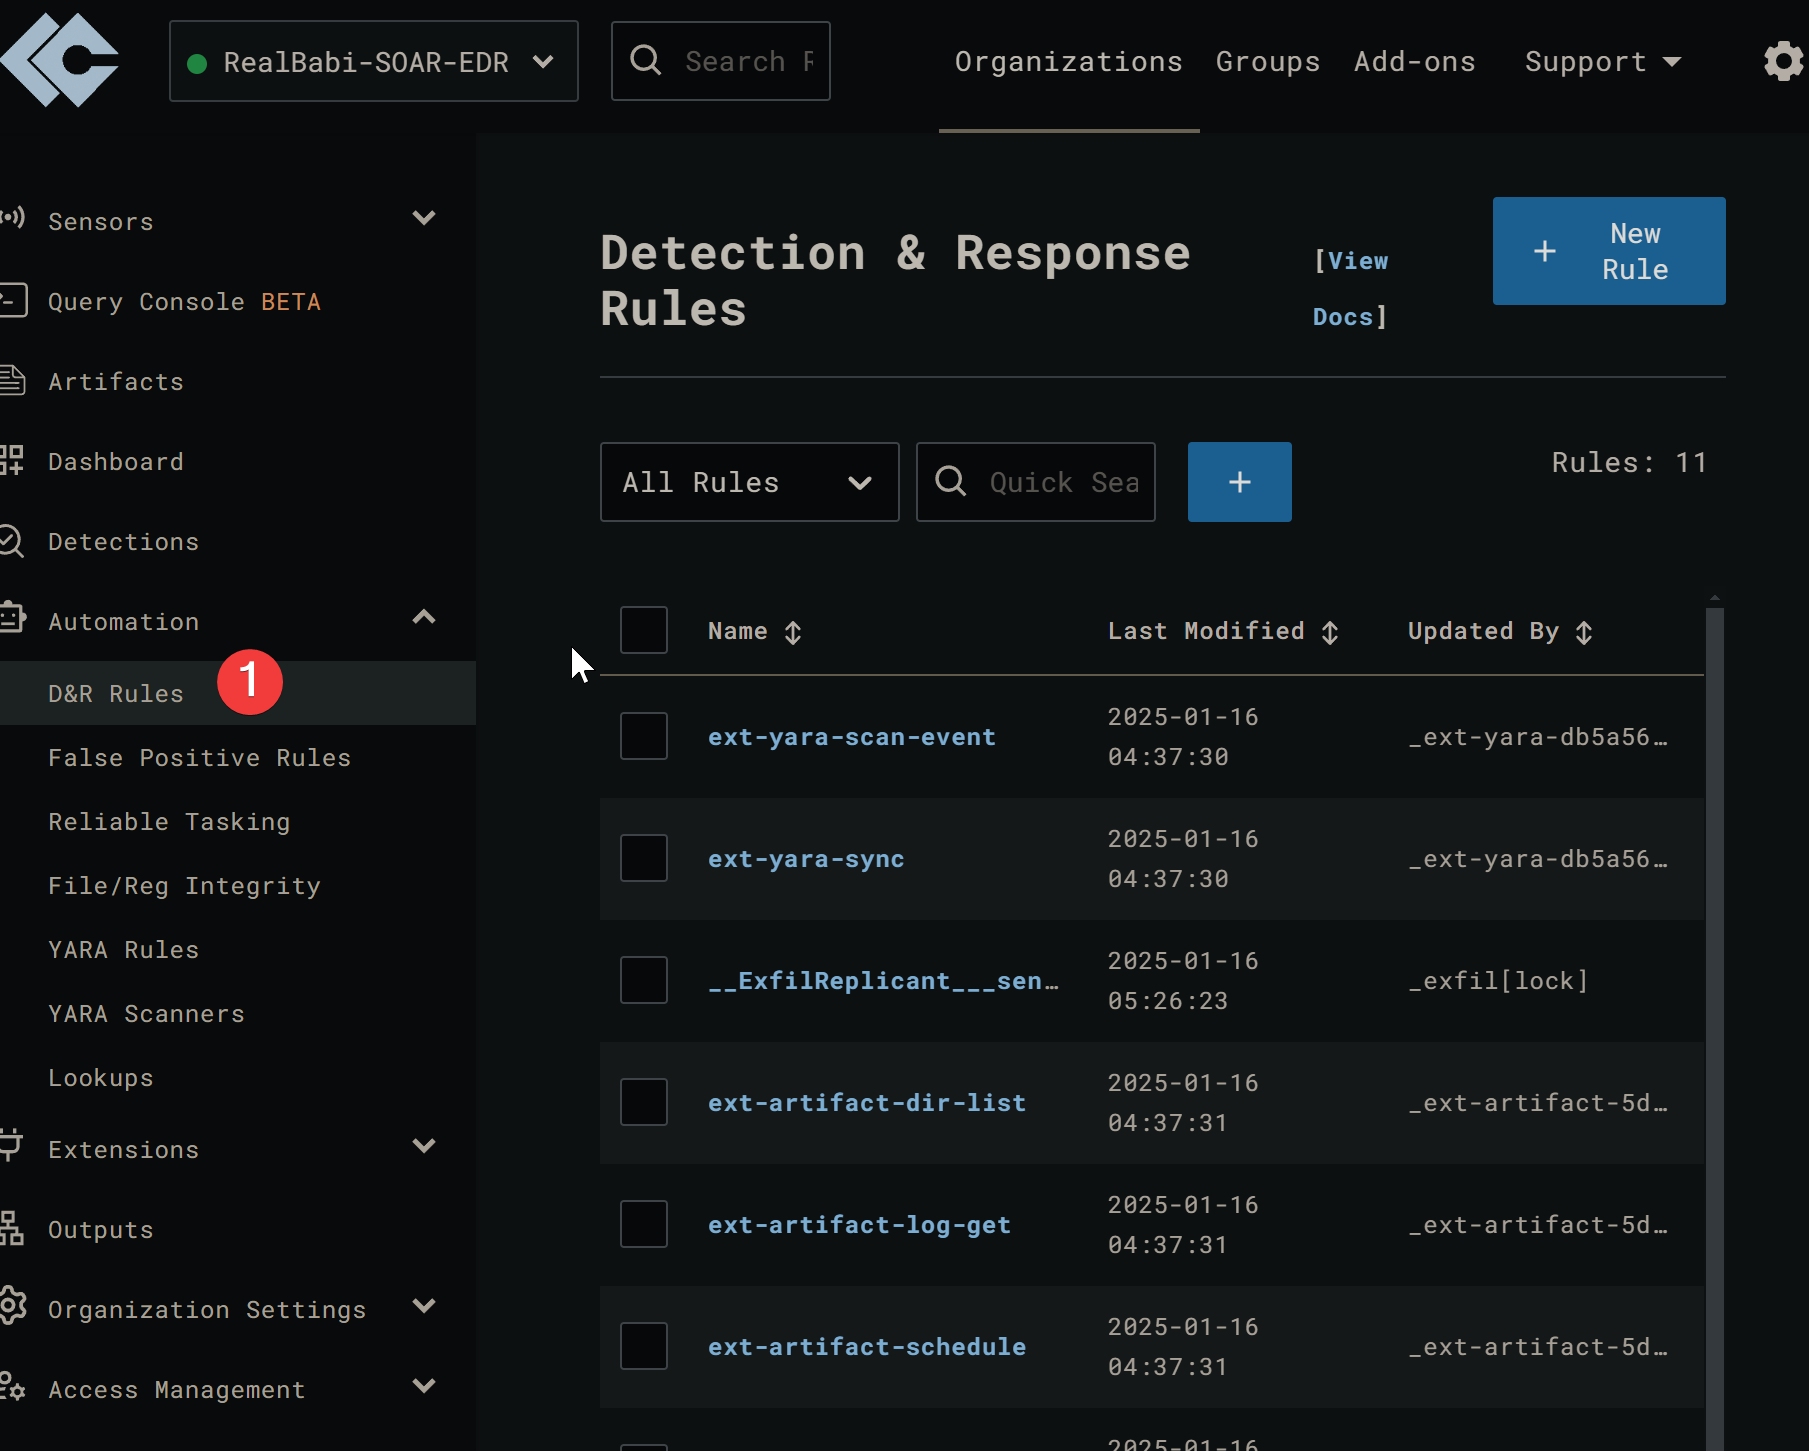
To create a new rule will head into Automation > D&R for the endpoint.
!
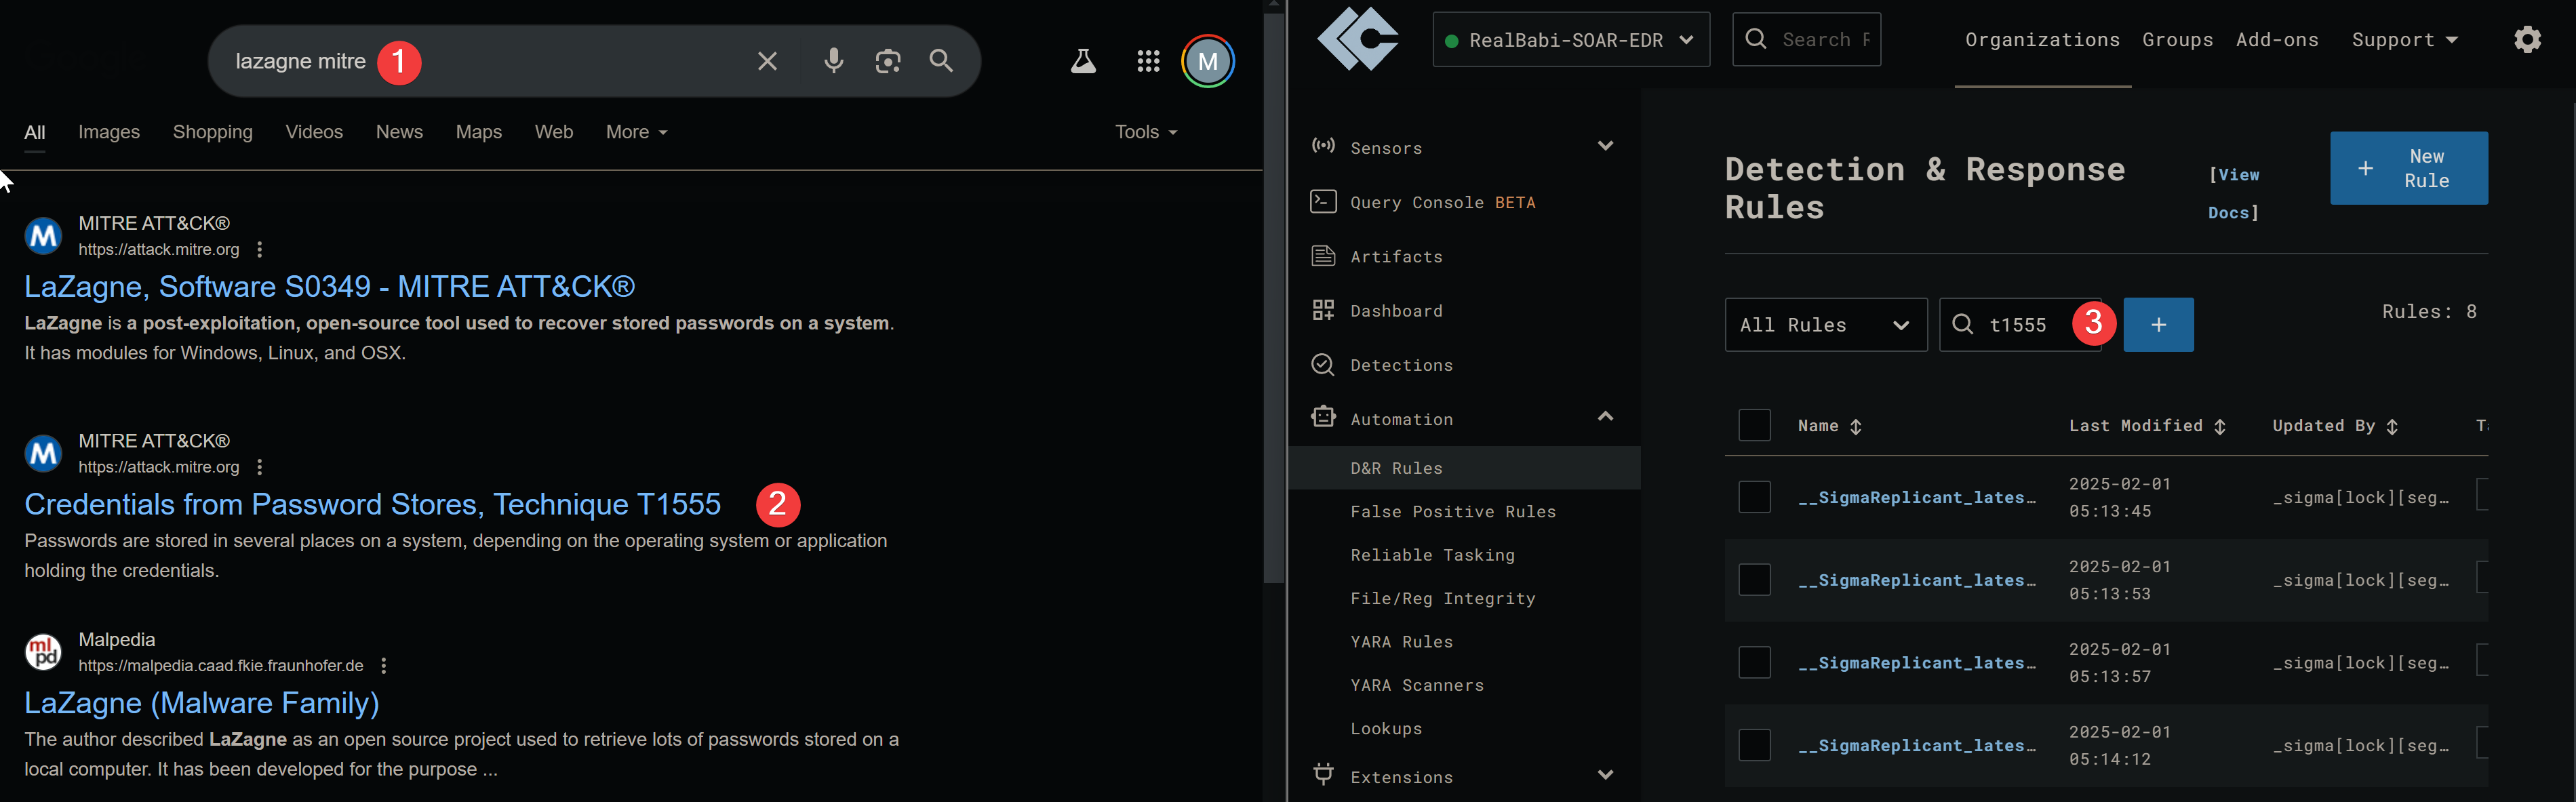
To find a previously created rule to match LaZagne, let’s search for the tactic designated by MITRE to narrow down our results. Since we will edit the rule to our needs, will select the first option.
!
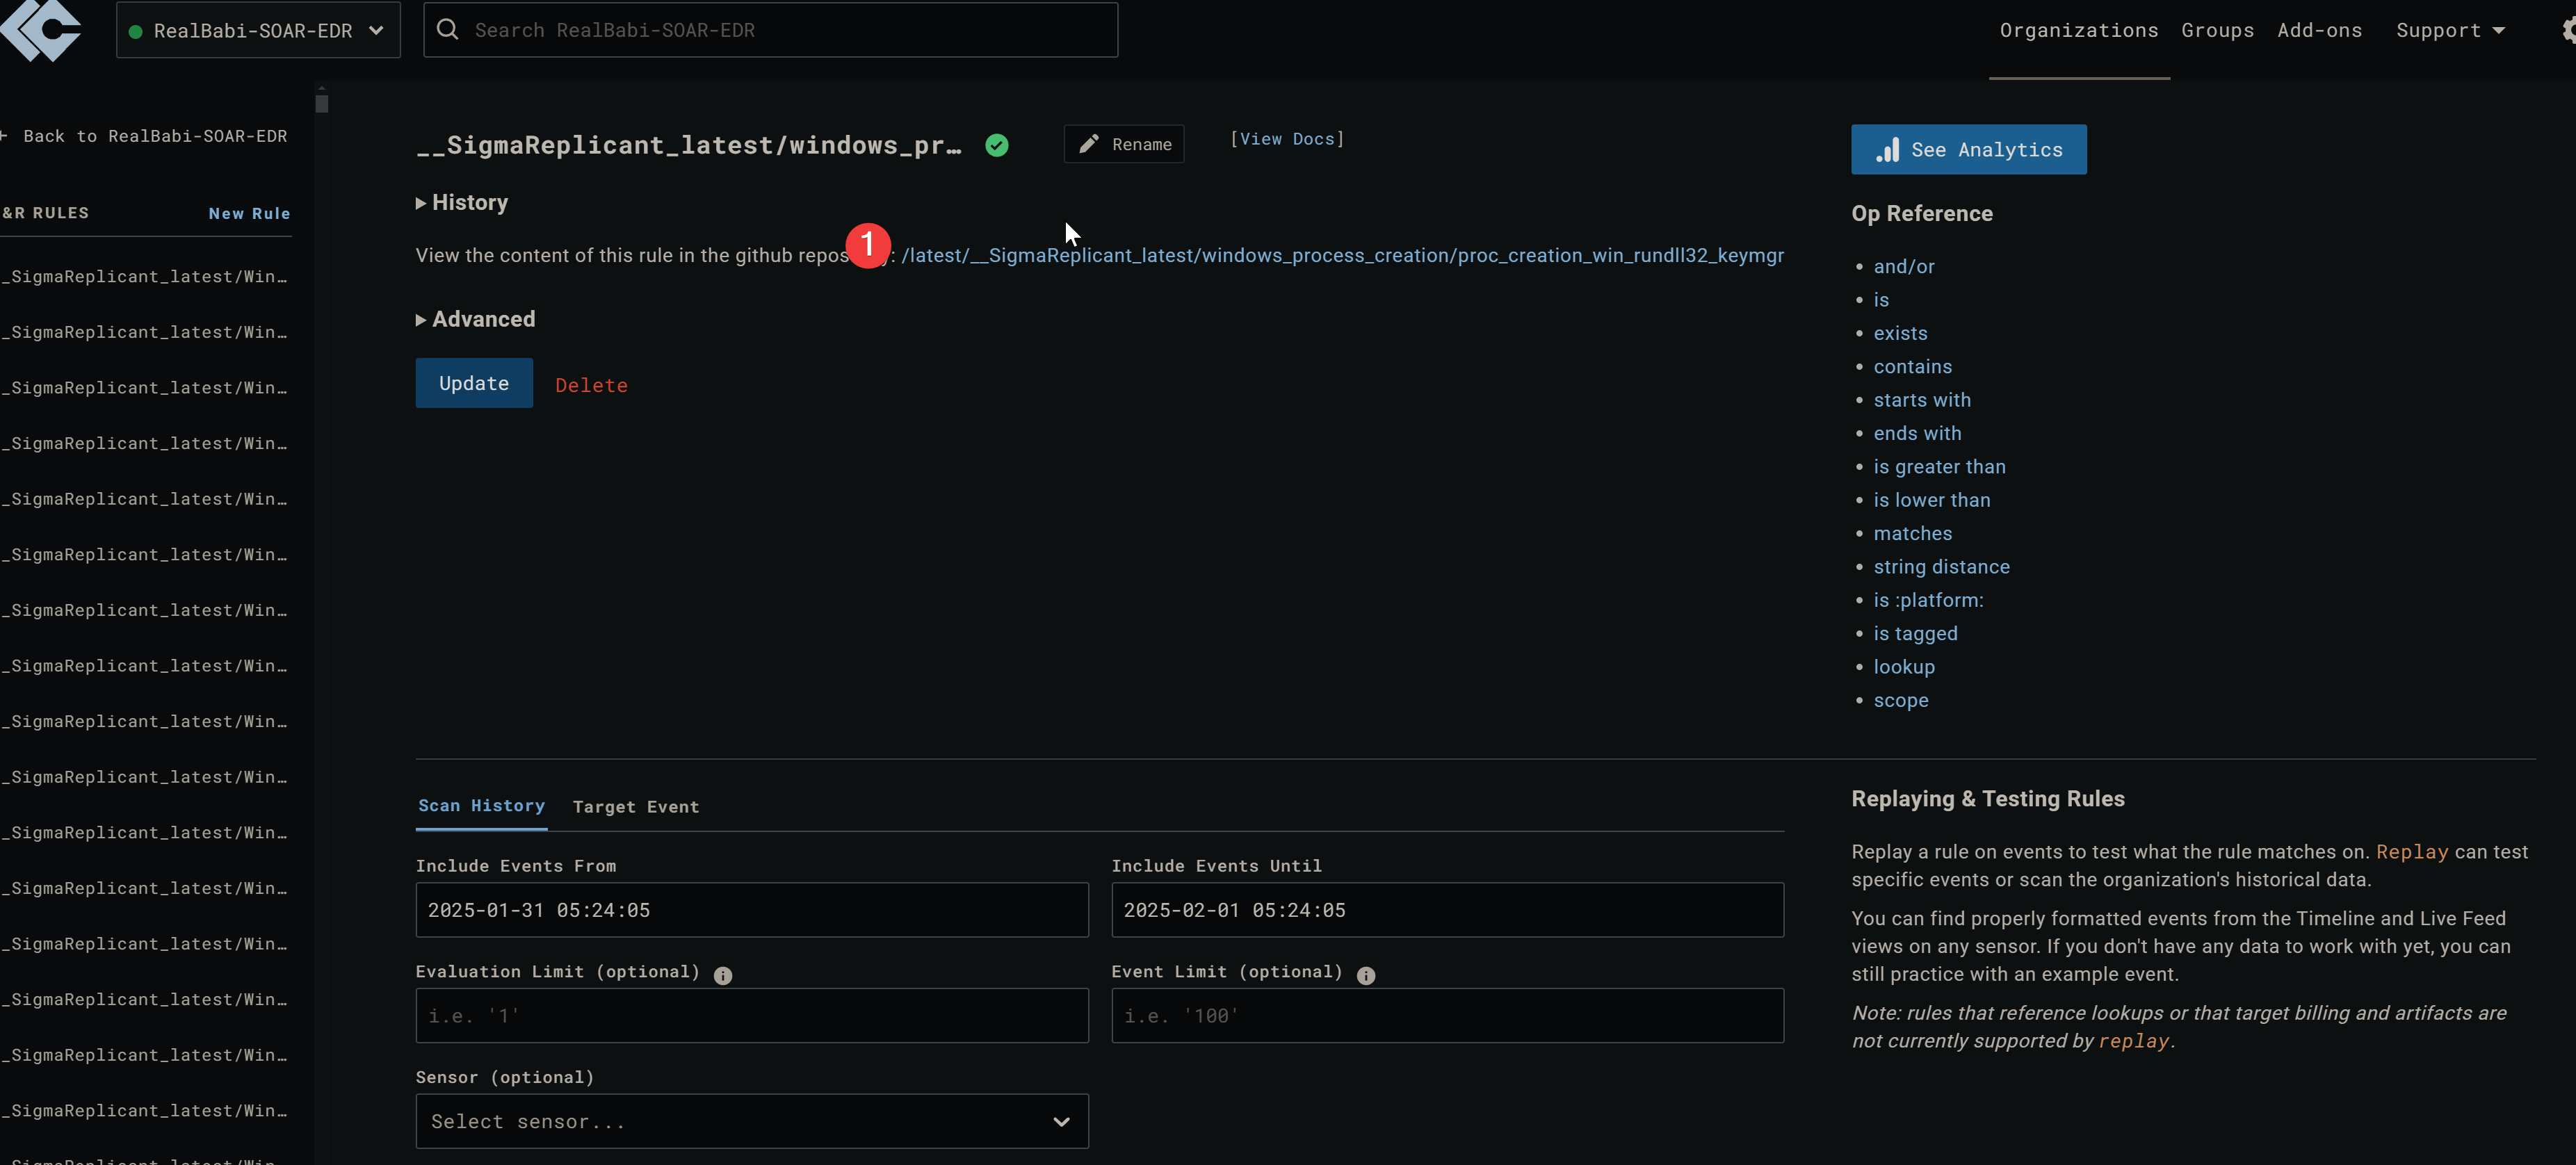
Then follow the github link where the rule definition is.
!
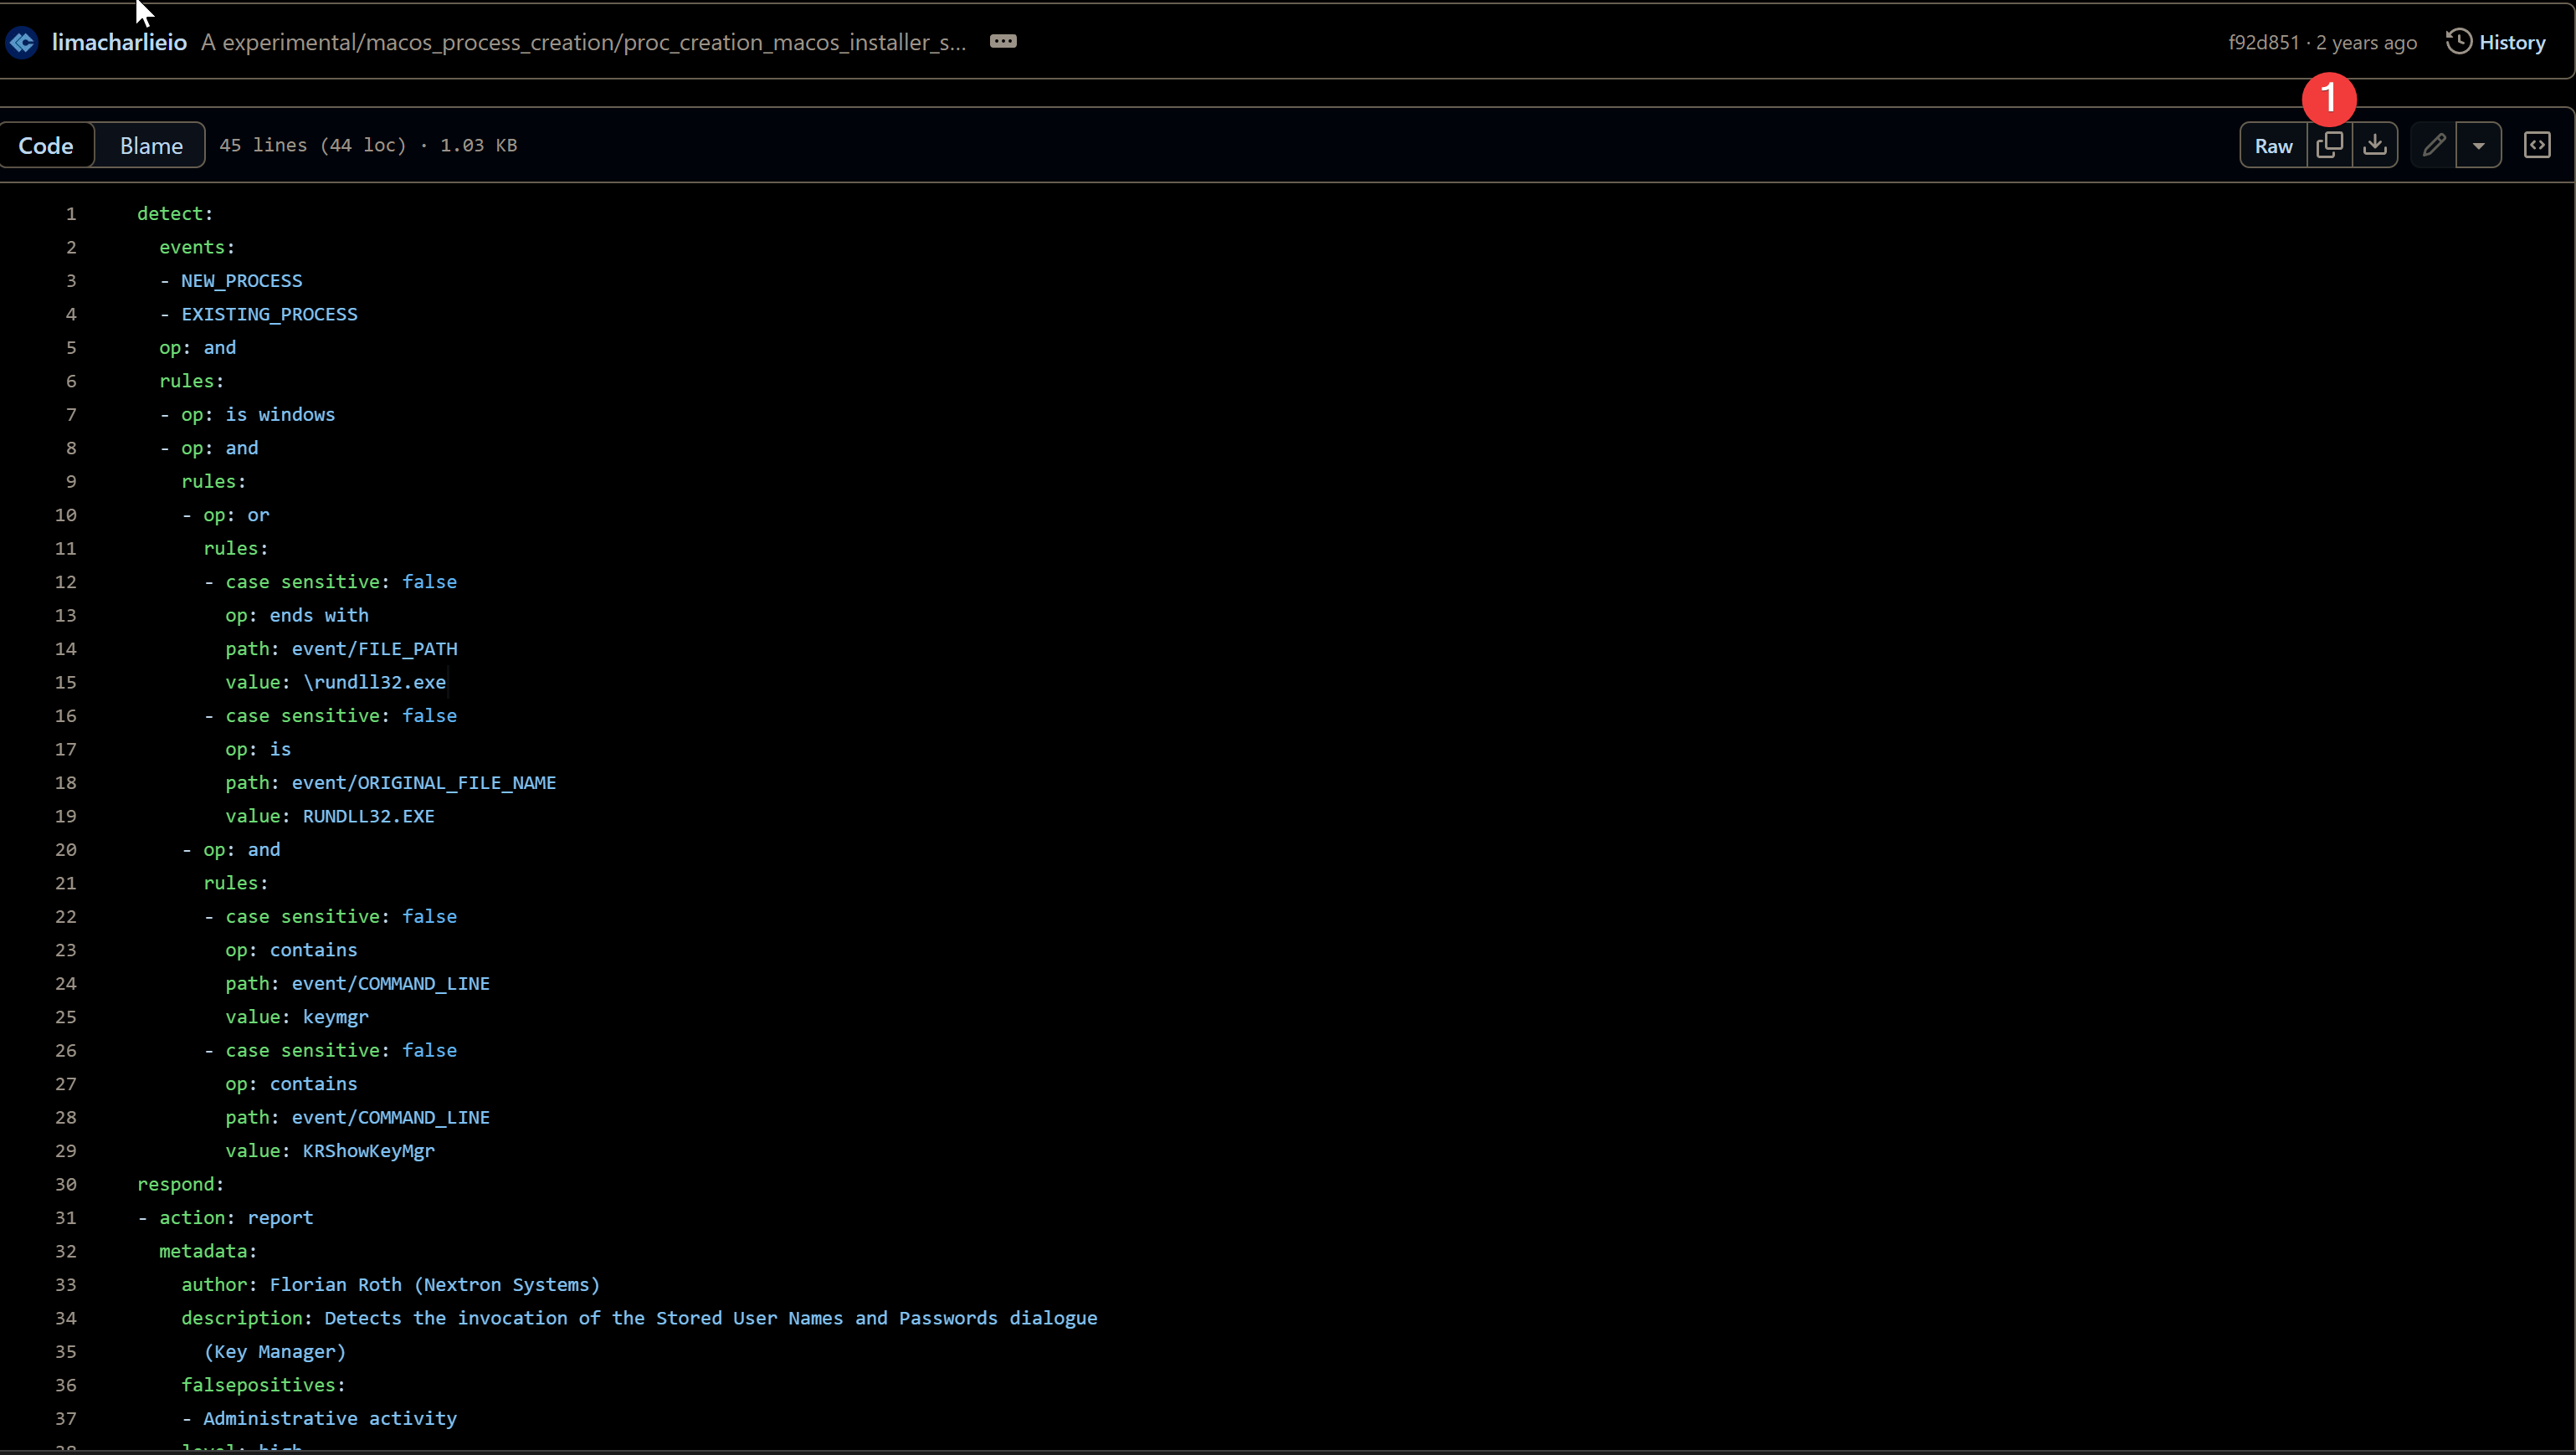
Copy Raw file.
!
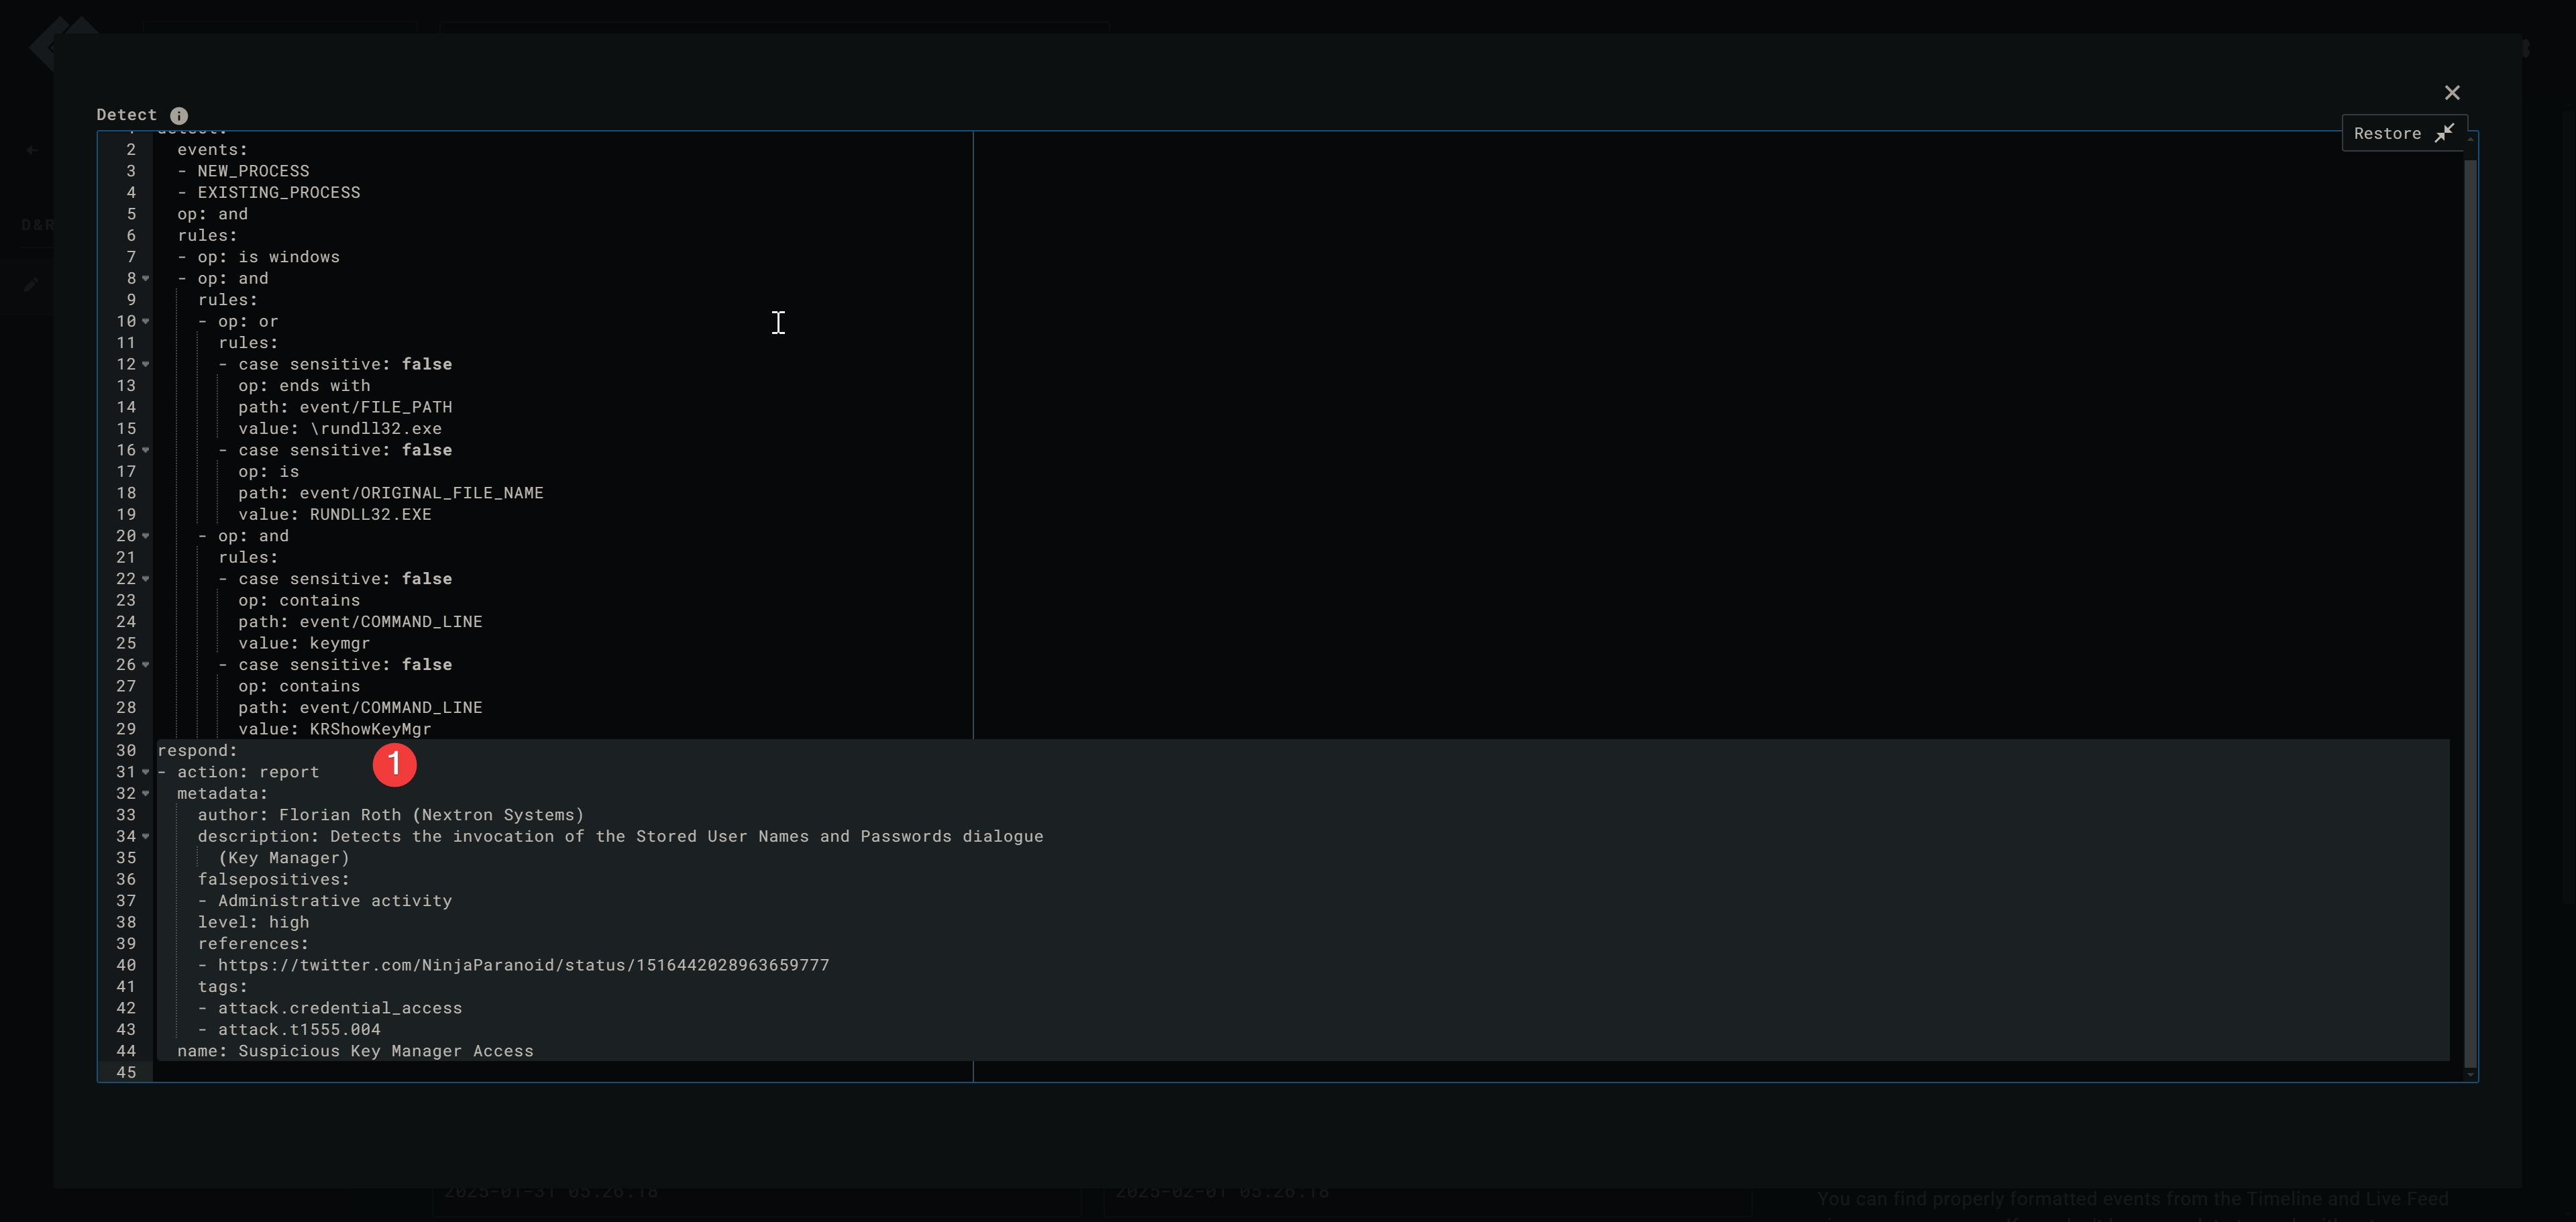
Paste the rule into the new Ruleset and move the Respond section to the Respond section of the LimaCharlie rule.
!
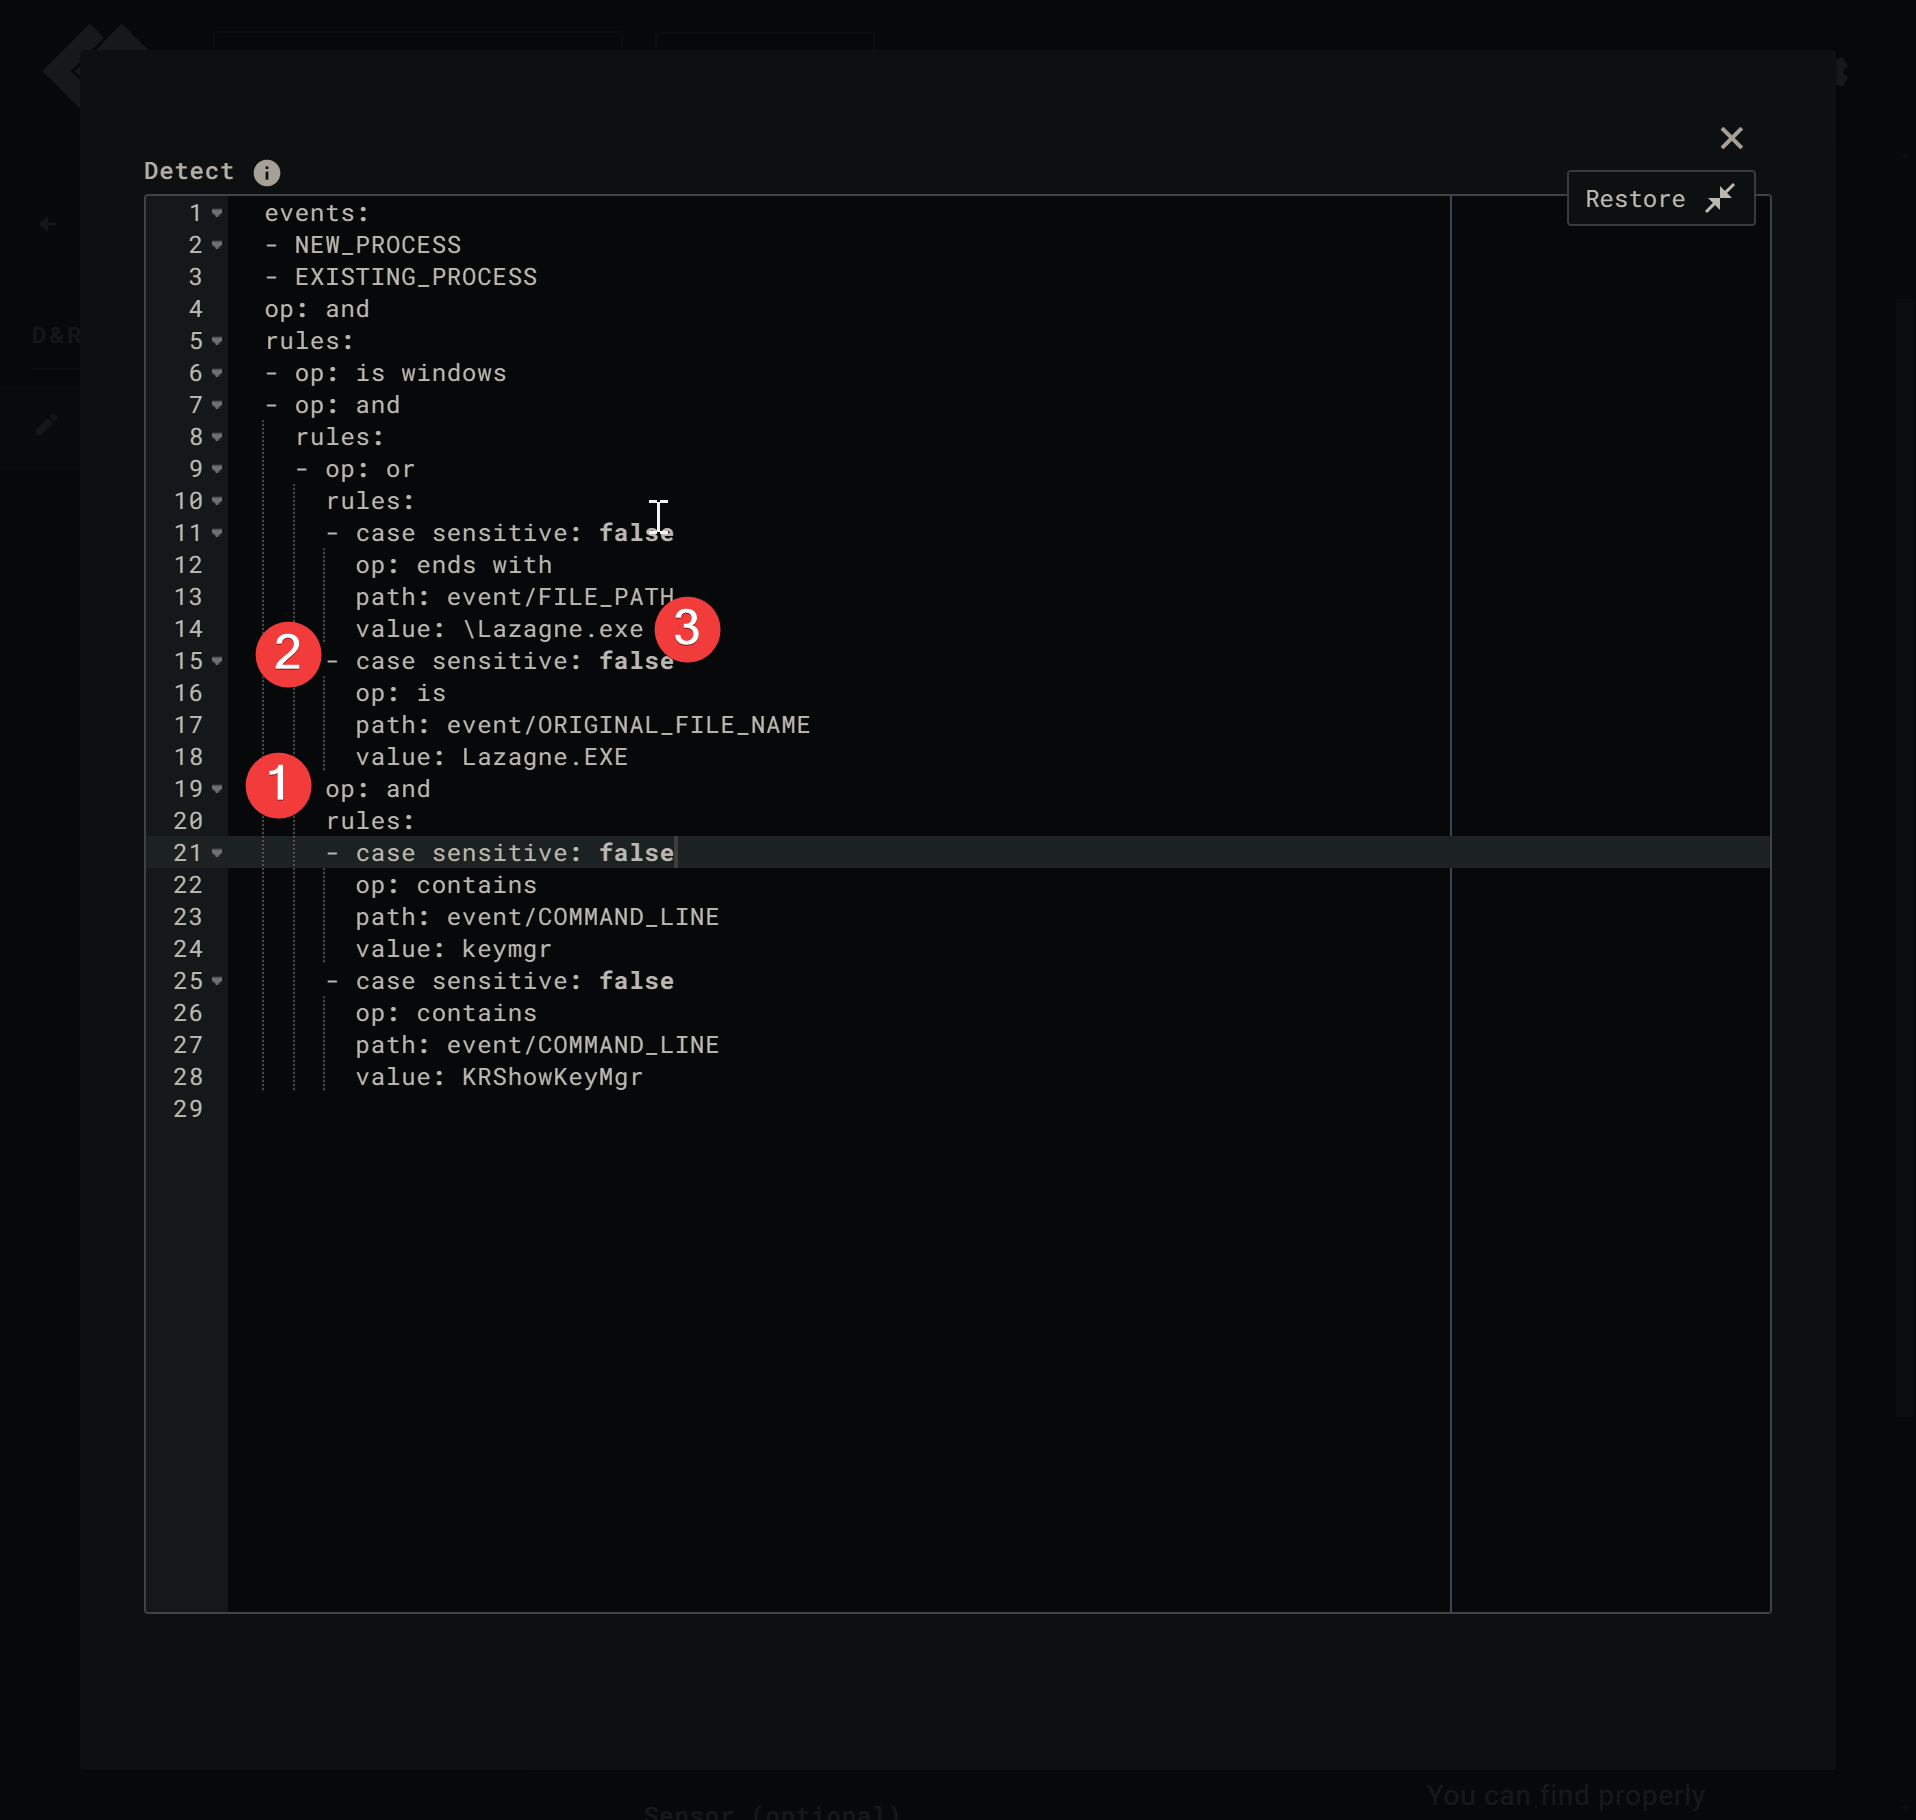
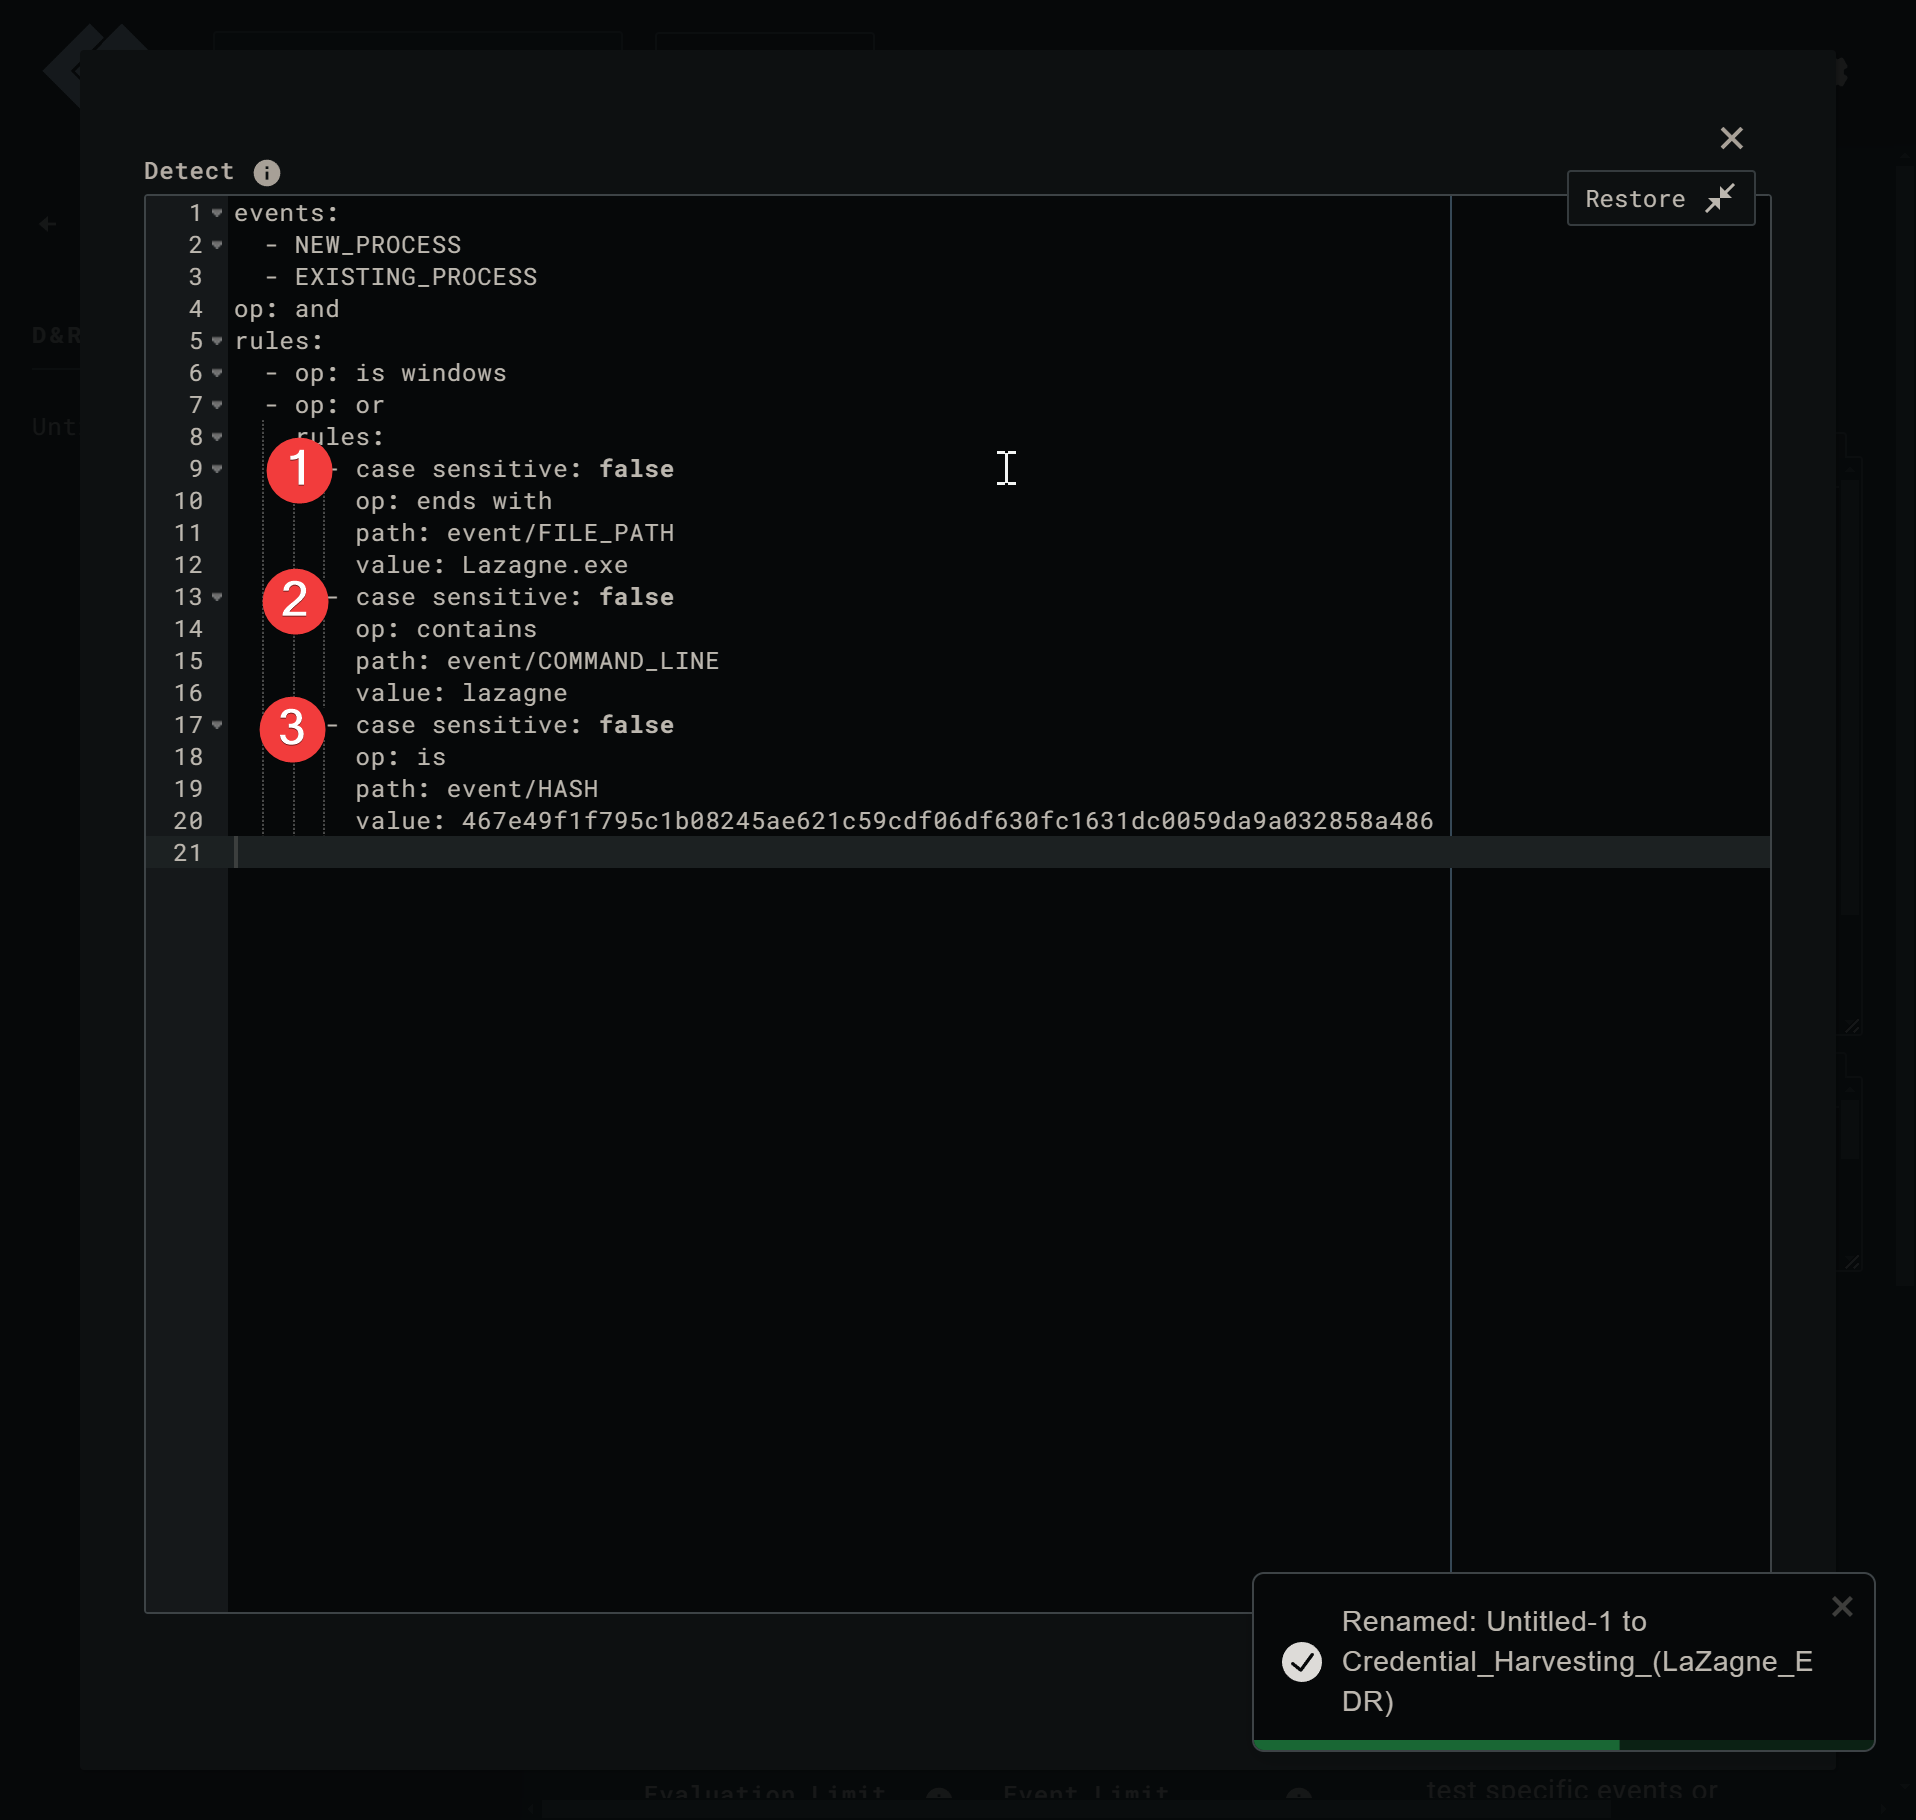
Will remove the keymgr portion (1) and Original_File_Name (2) section since we don’t need it. Then change the “value: " portion to Lazagne (3). The case sensitive flag lets us use any case to find matching values.
!
After changes are made
!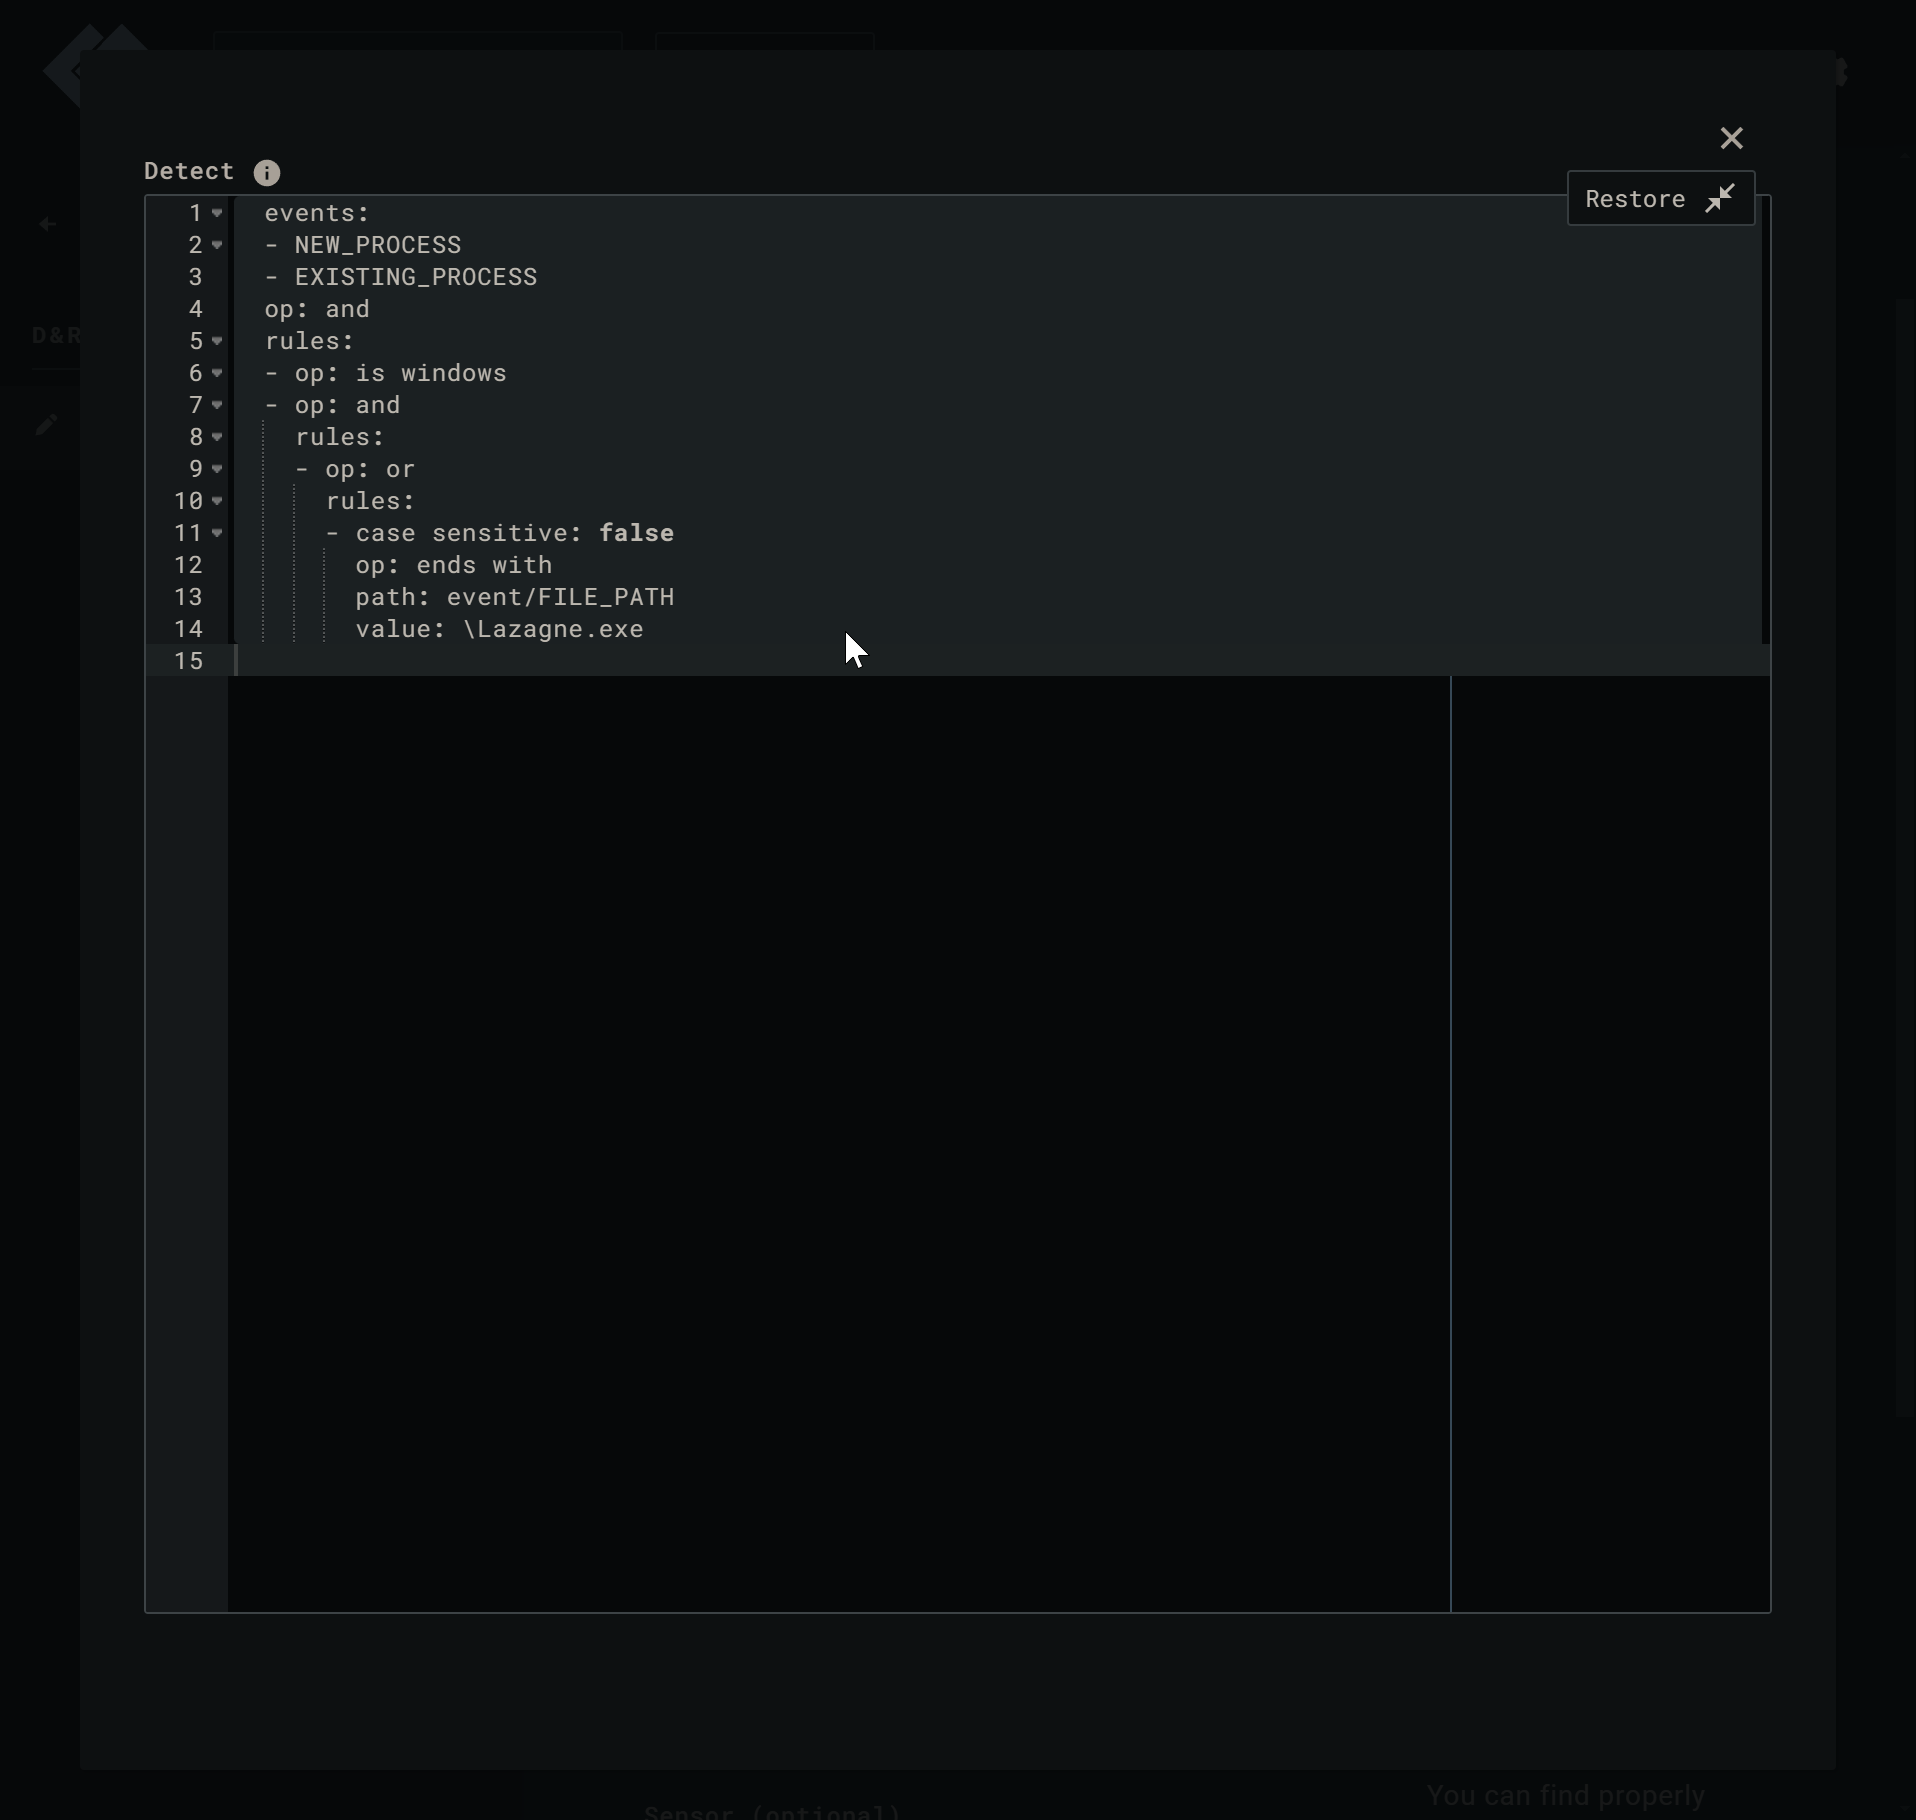
This rule will now match the event recorded by LimaCharlie. The FILE_PATH parameter shows LaZagne.exe which will trigger the new rule.
!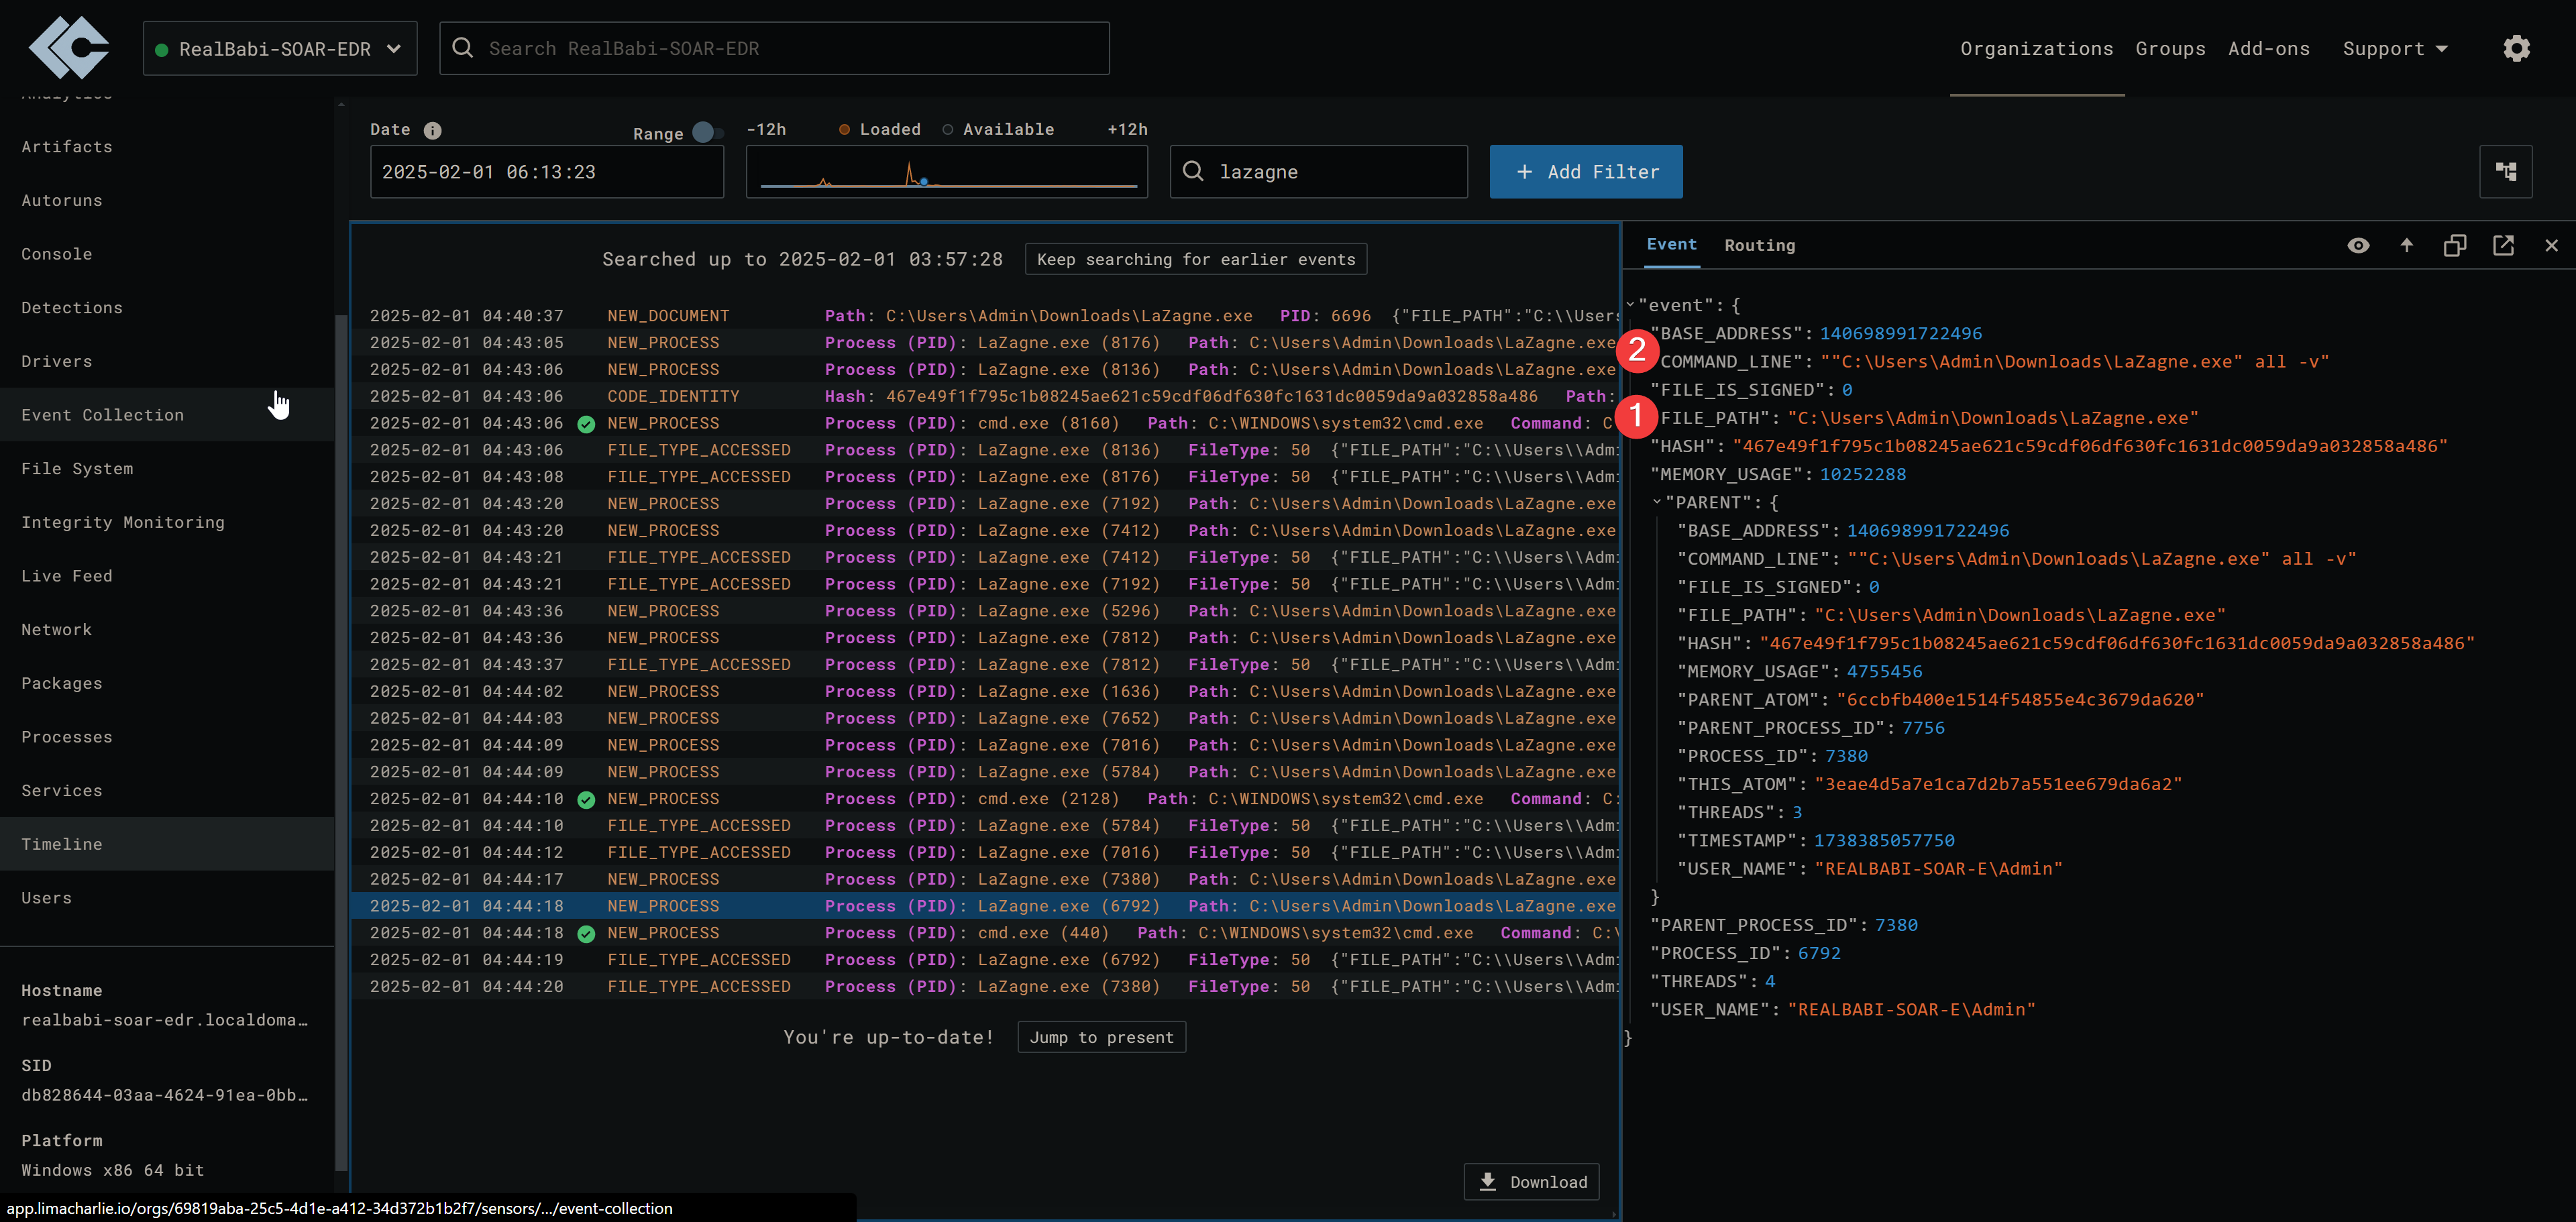
Now will include additional information for the rule to look for using the same format
Will make sure to include (1) File Path, (2) Command Line, and (3) Hash.
!
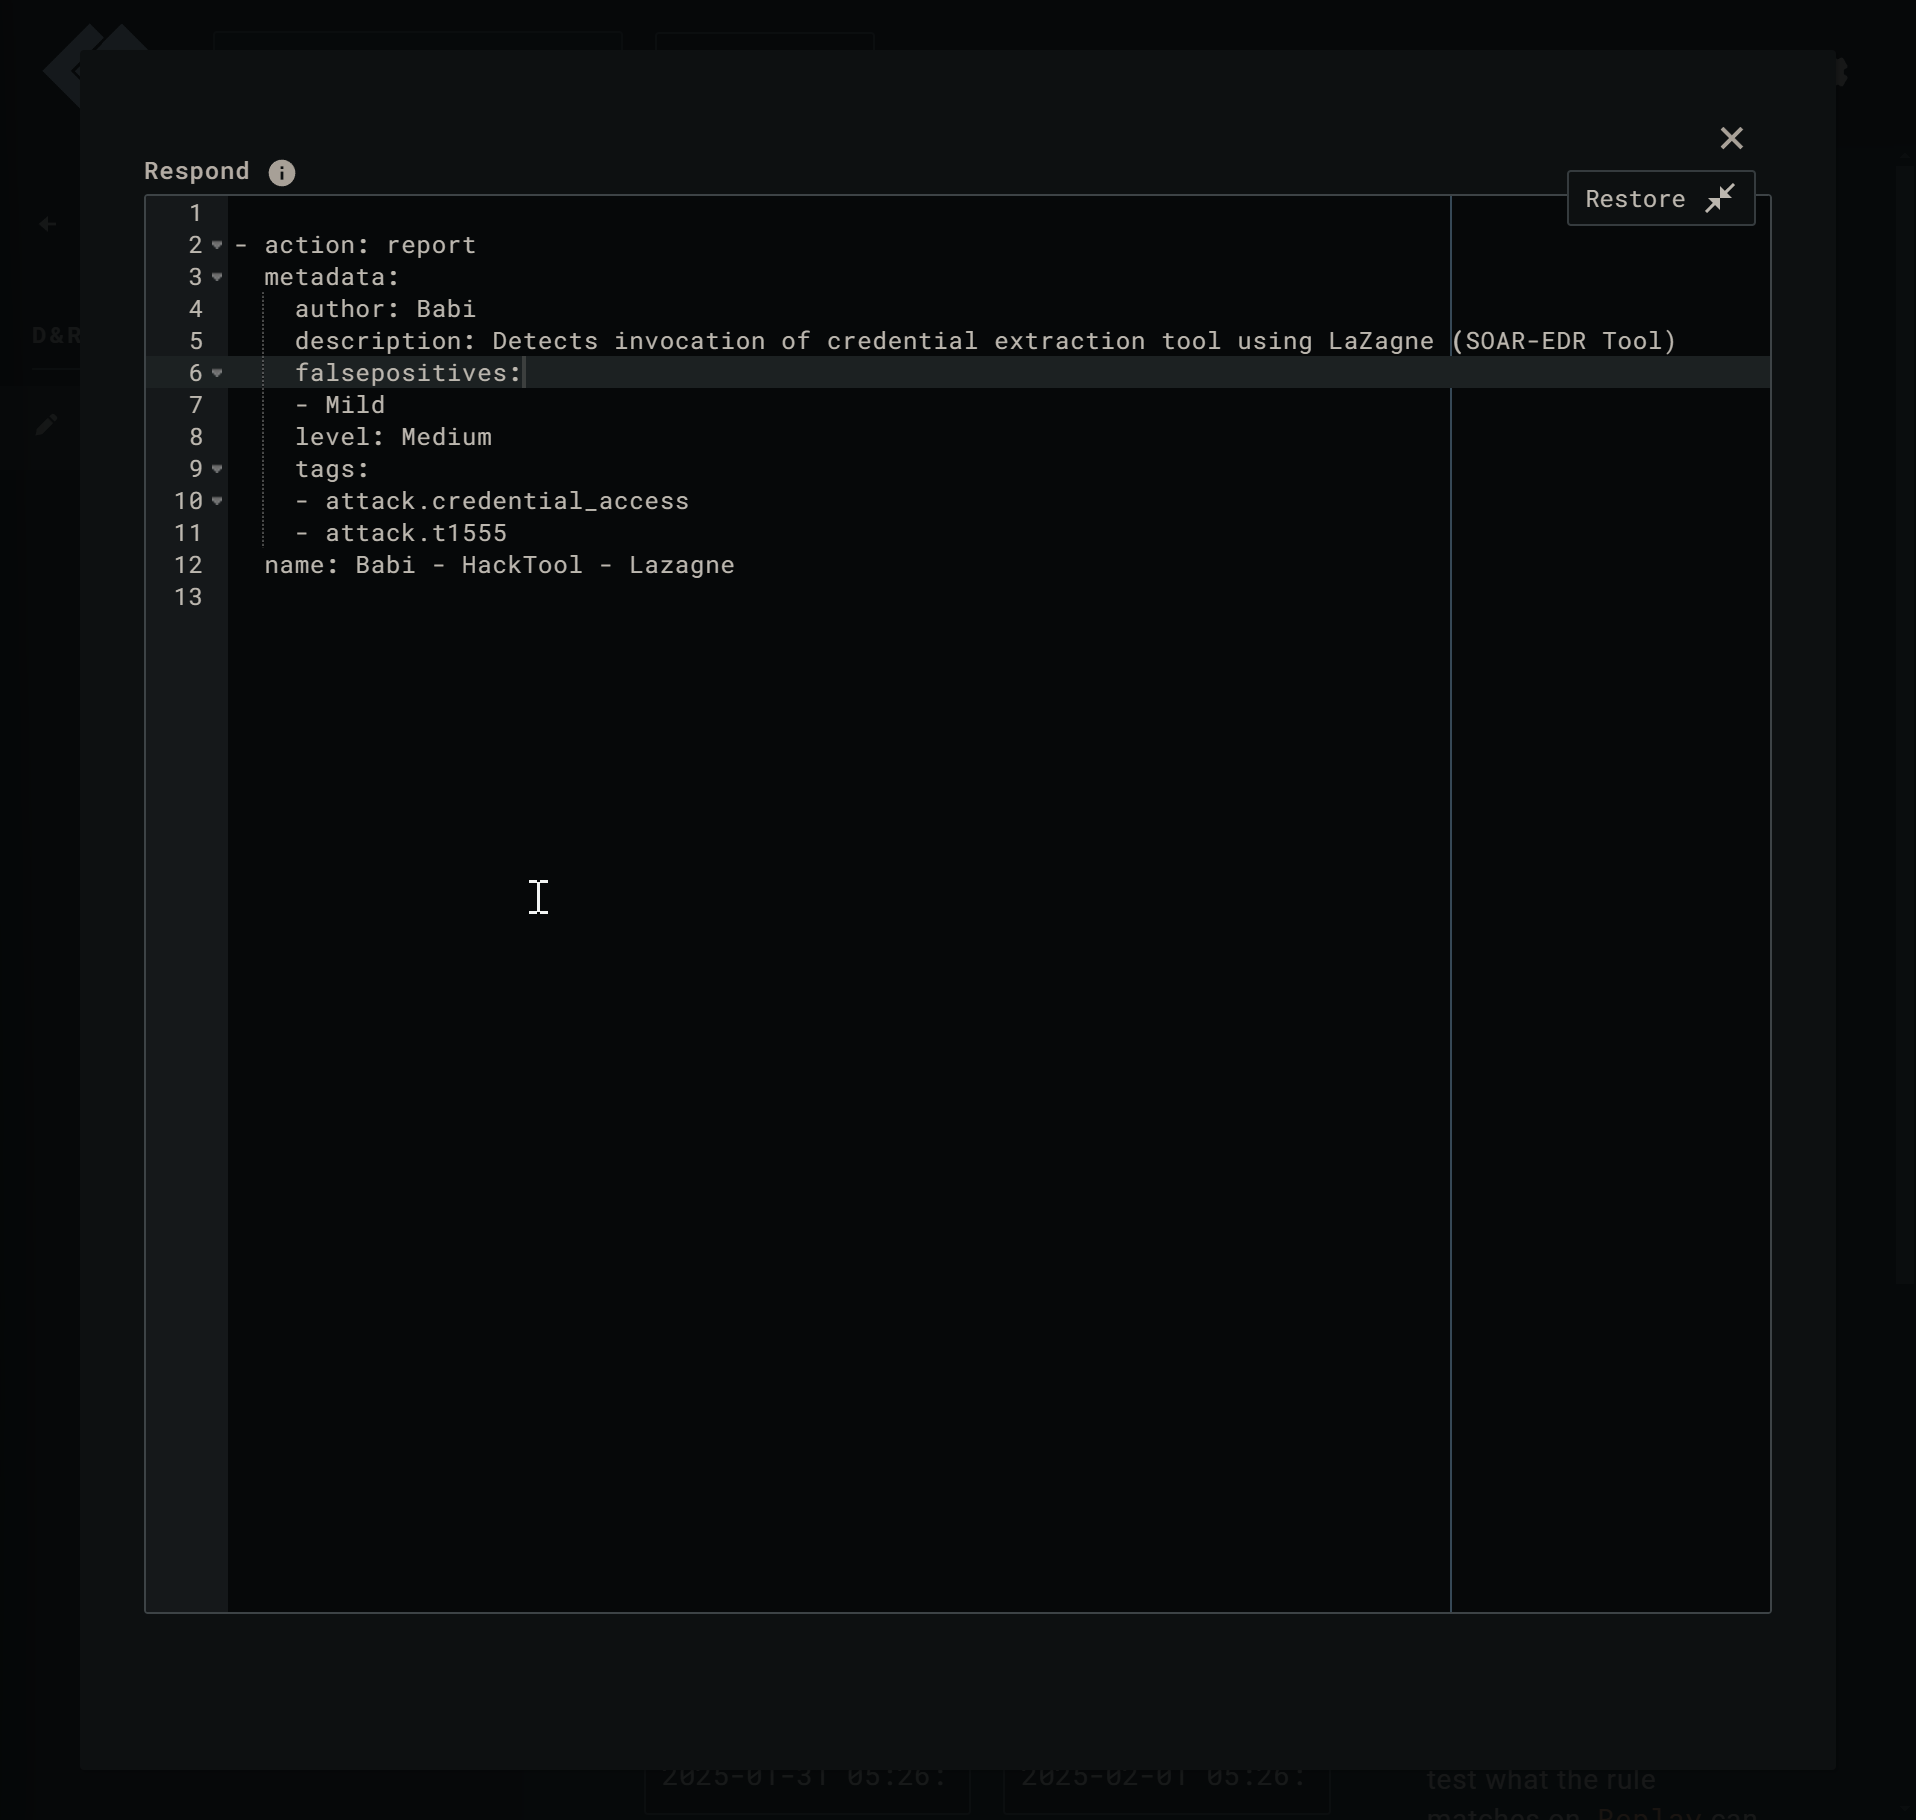
Lets update the Response section.
(1)Will leave the action as report to only report the event without further action. (This can be changed to automatically isolate the endpoint with the “isolate” argument)
(2) Change the Author, Description, False Positives, Level, and Name sections for clarity.
(3) Will leave Tags the same so the rule is appropriately tagged.
!
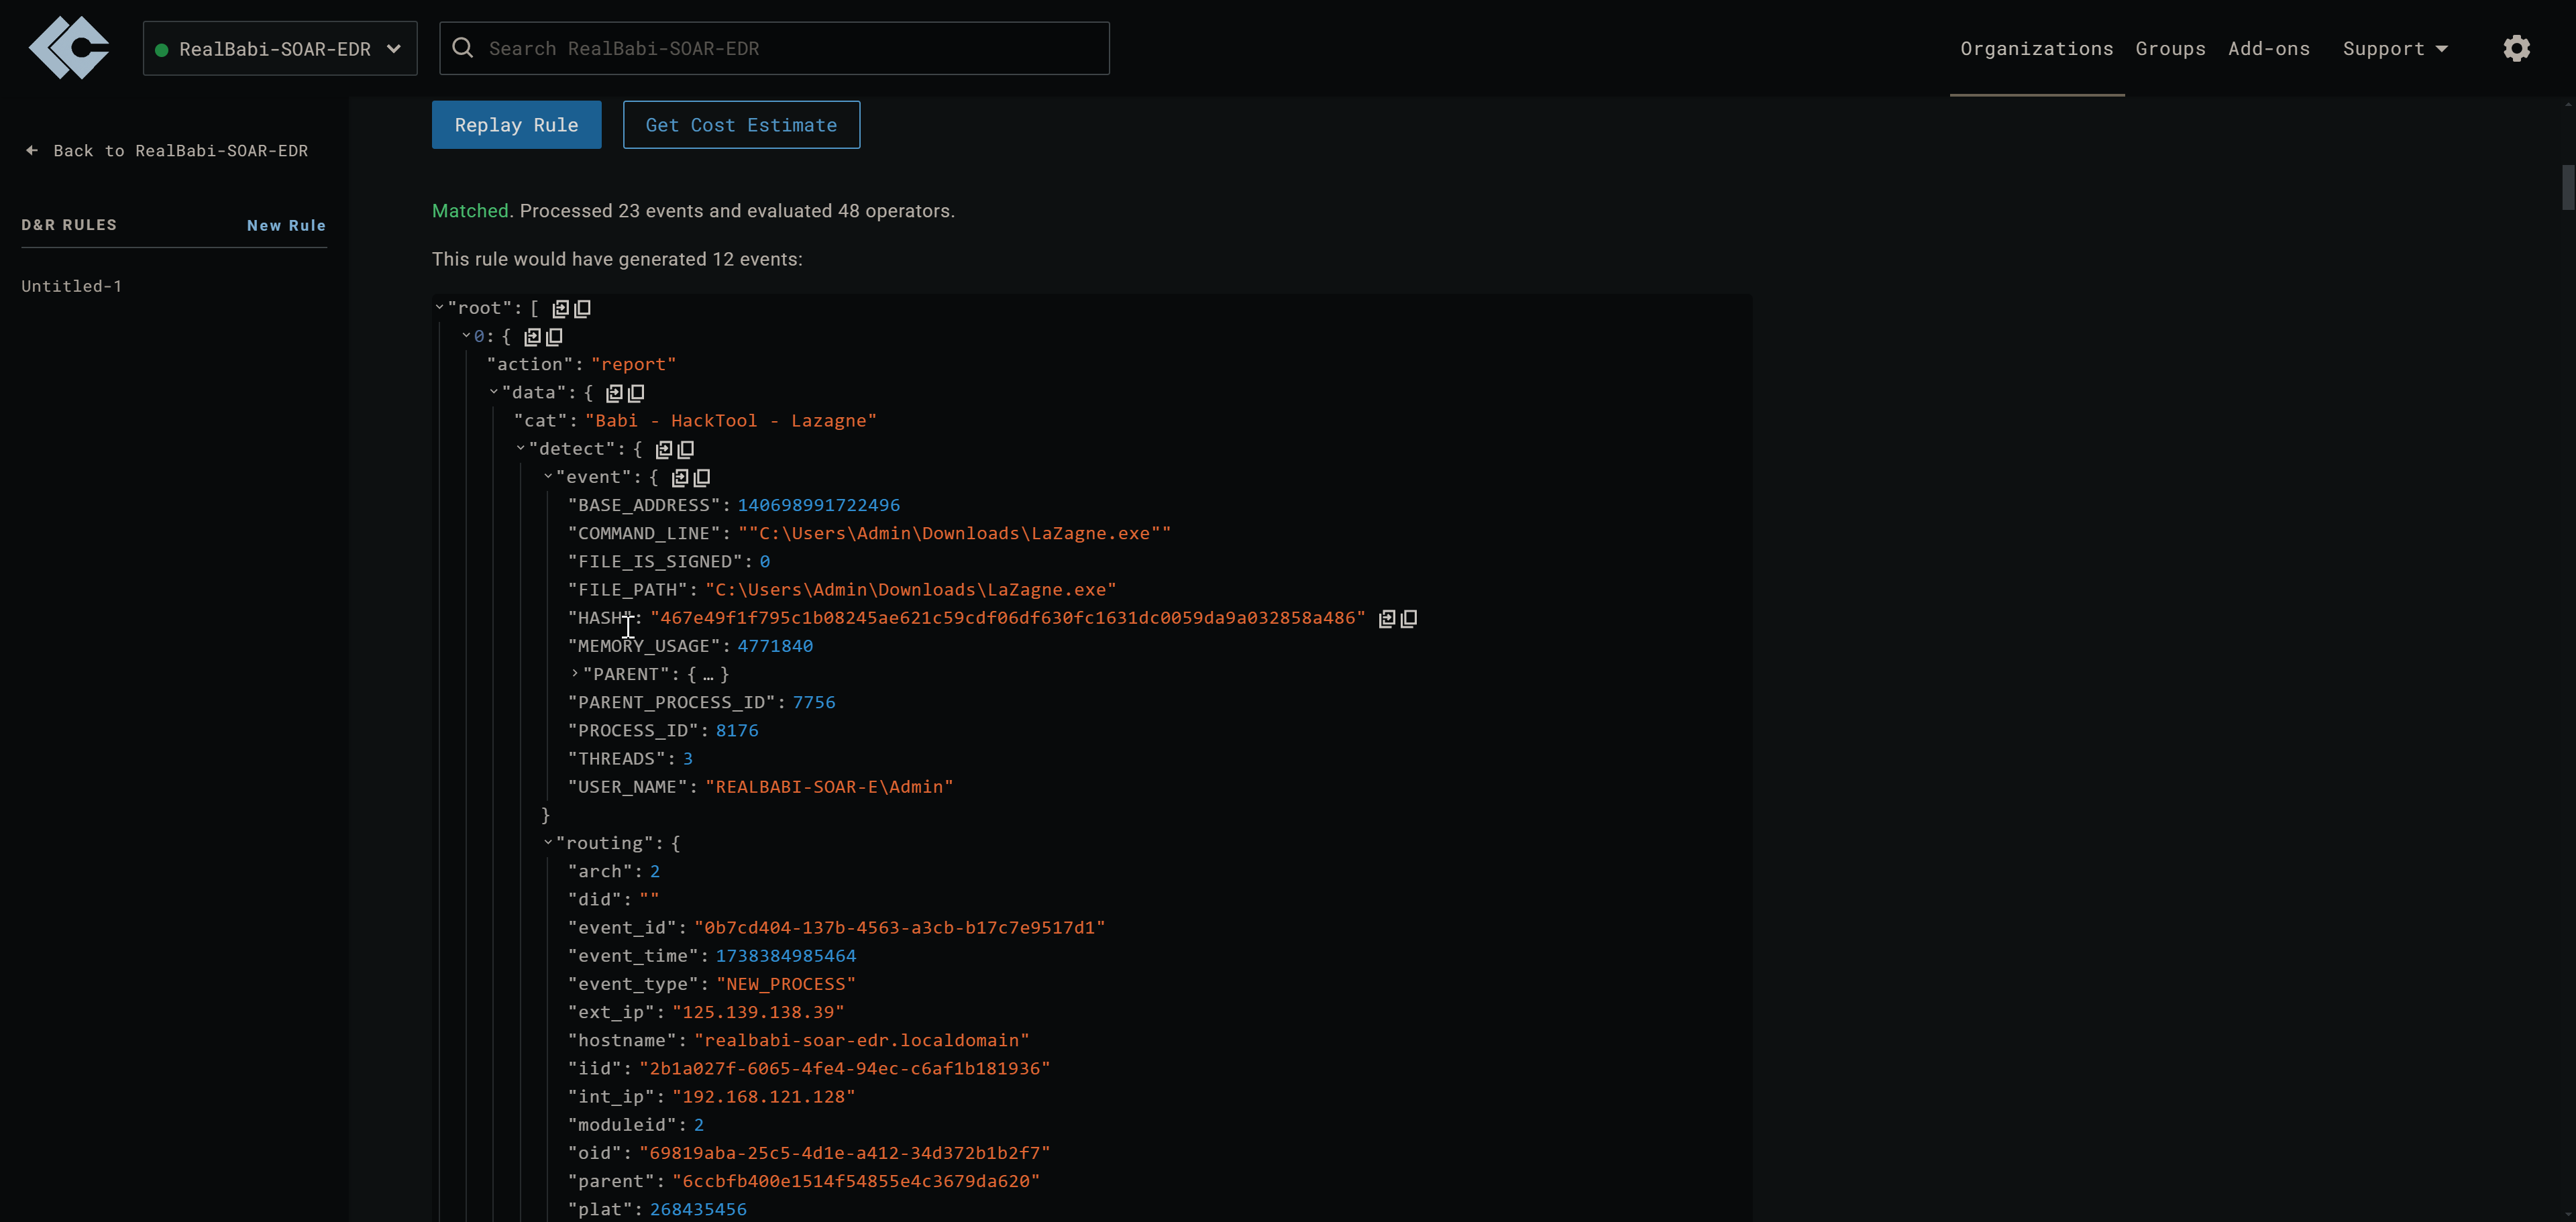
Scroll down to Replay Rule and execute to verify the rule is working appropriately.
!
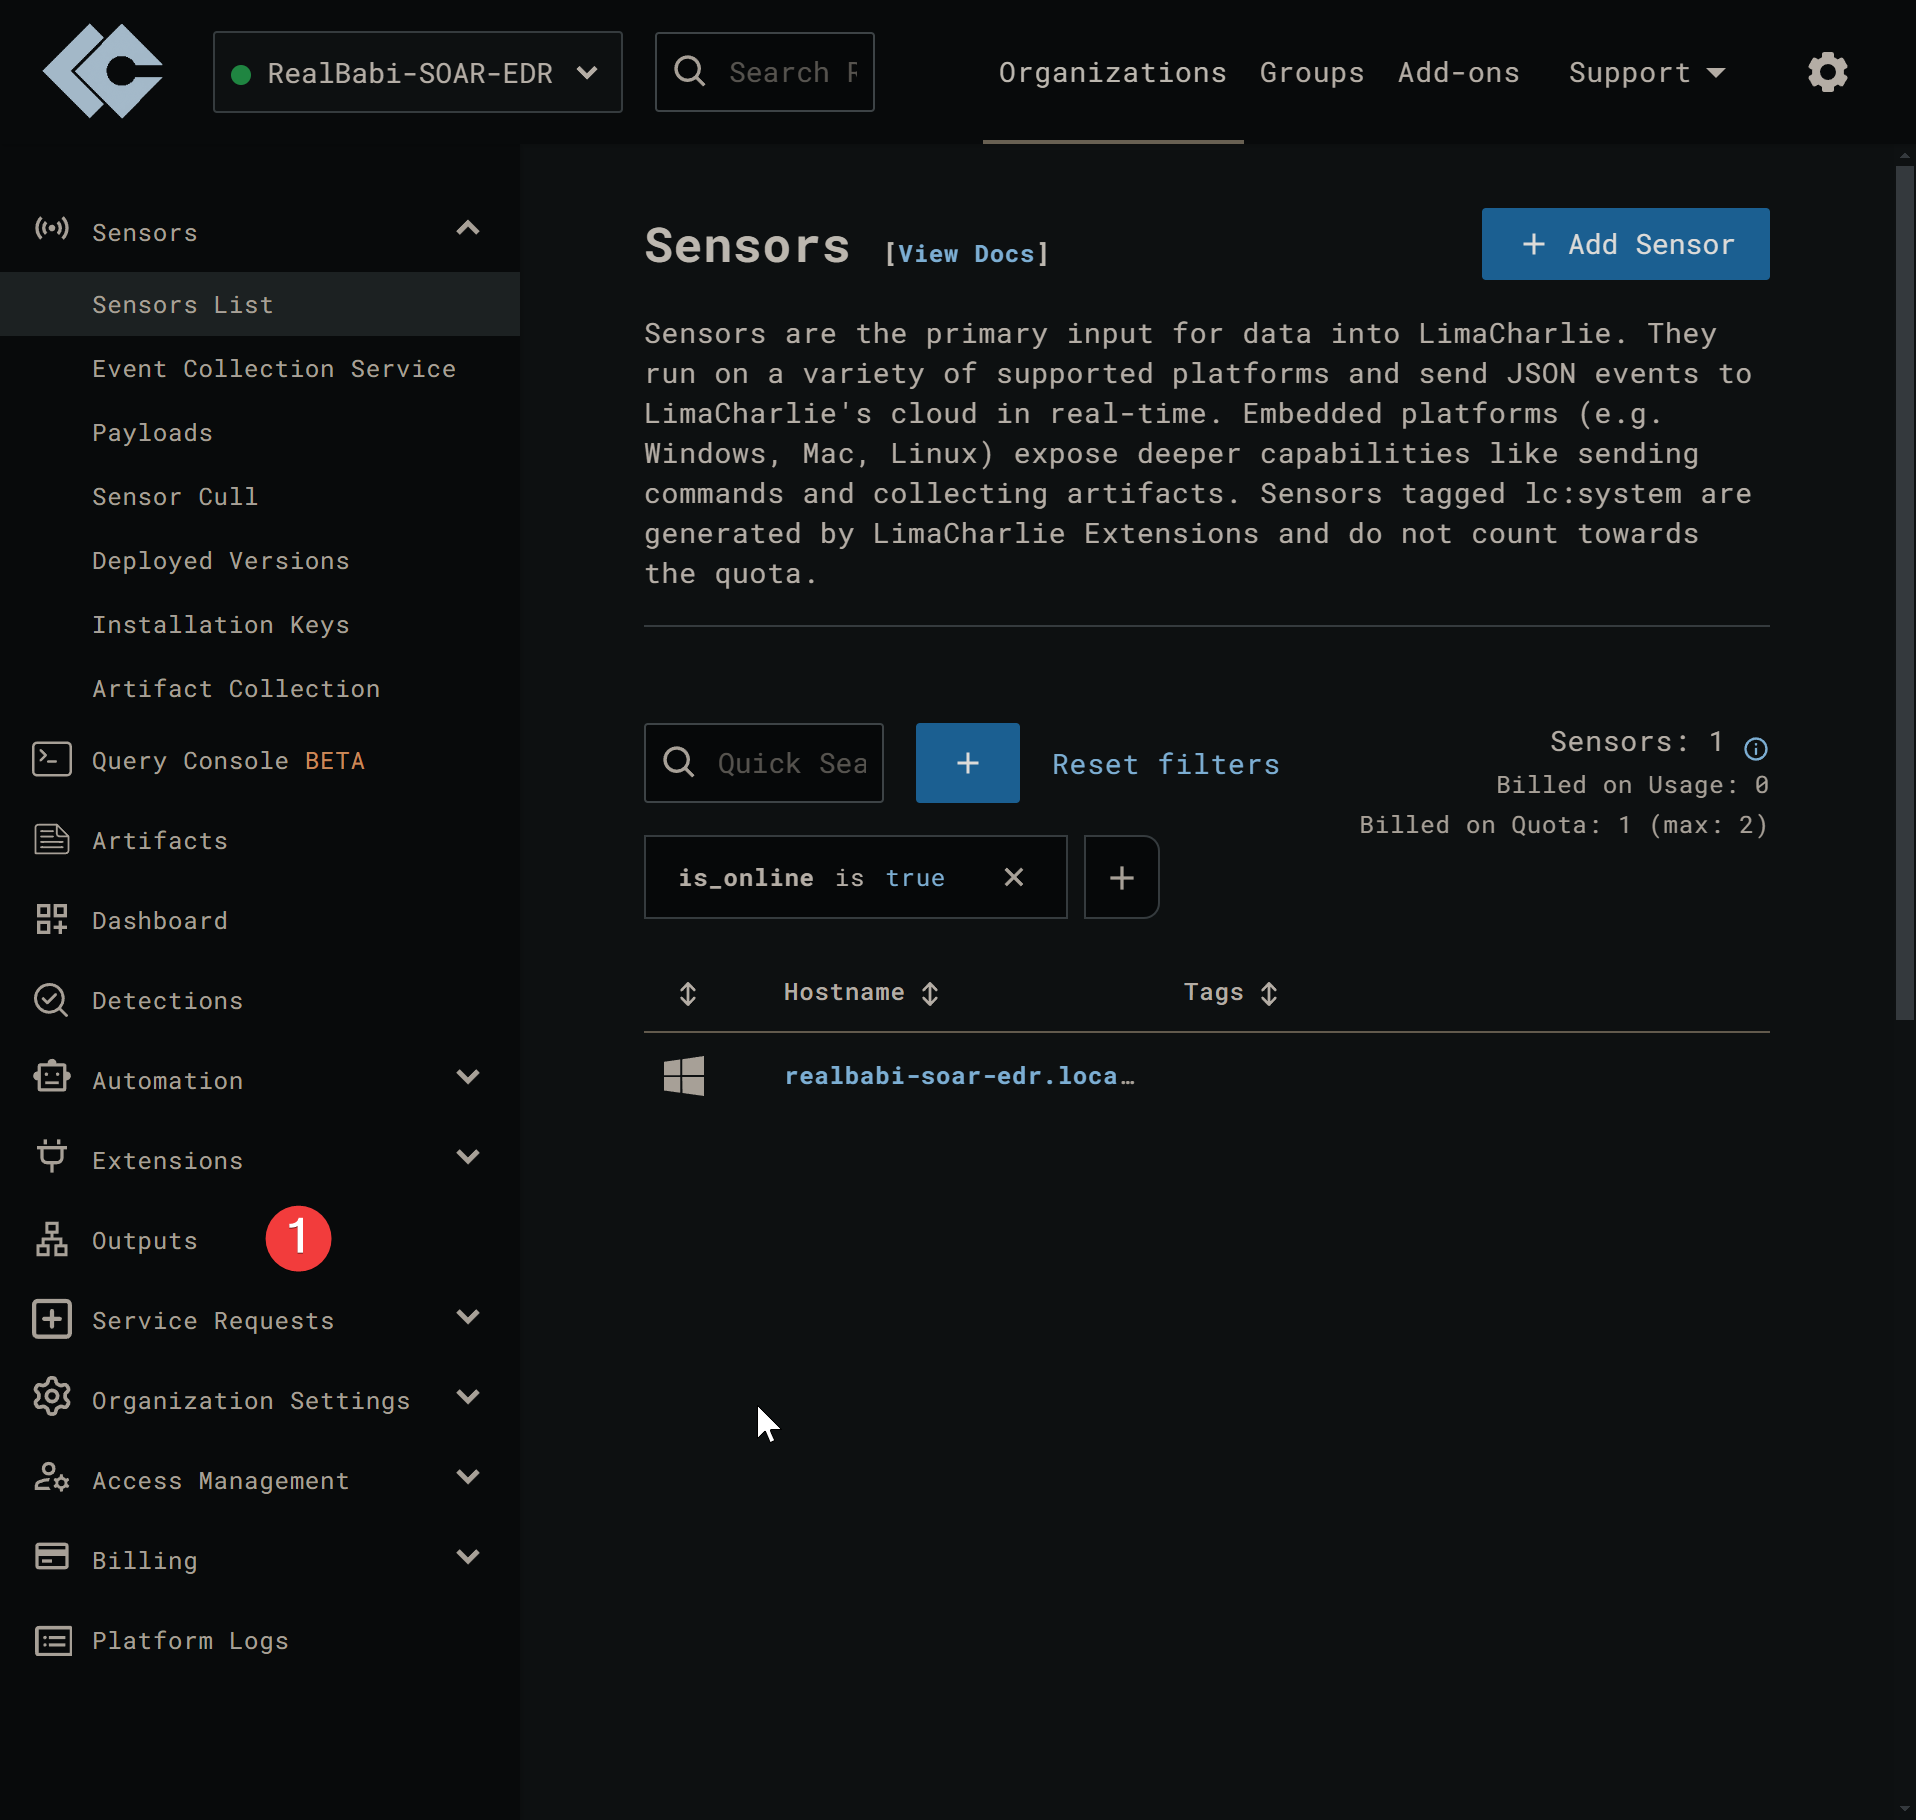
Configuring Tines With LimaCharlie#
Head to Ouputs in LimaCharlie to create an output for Tines to access
!
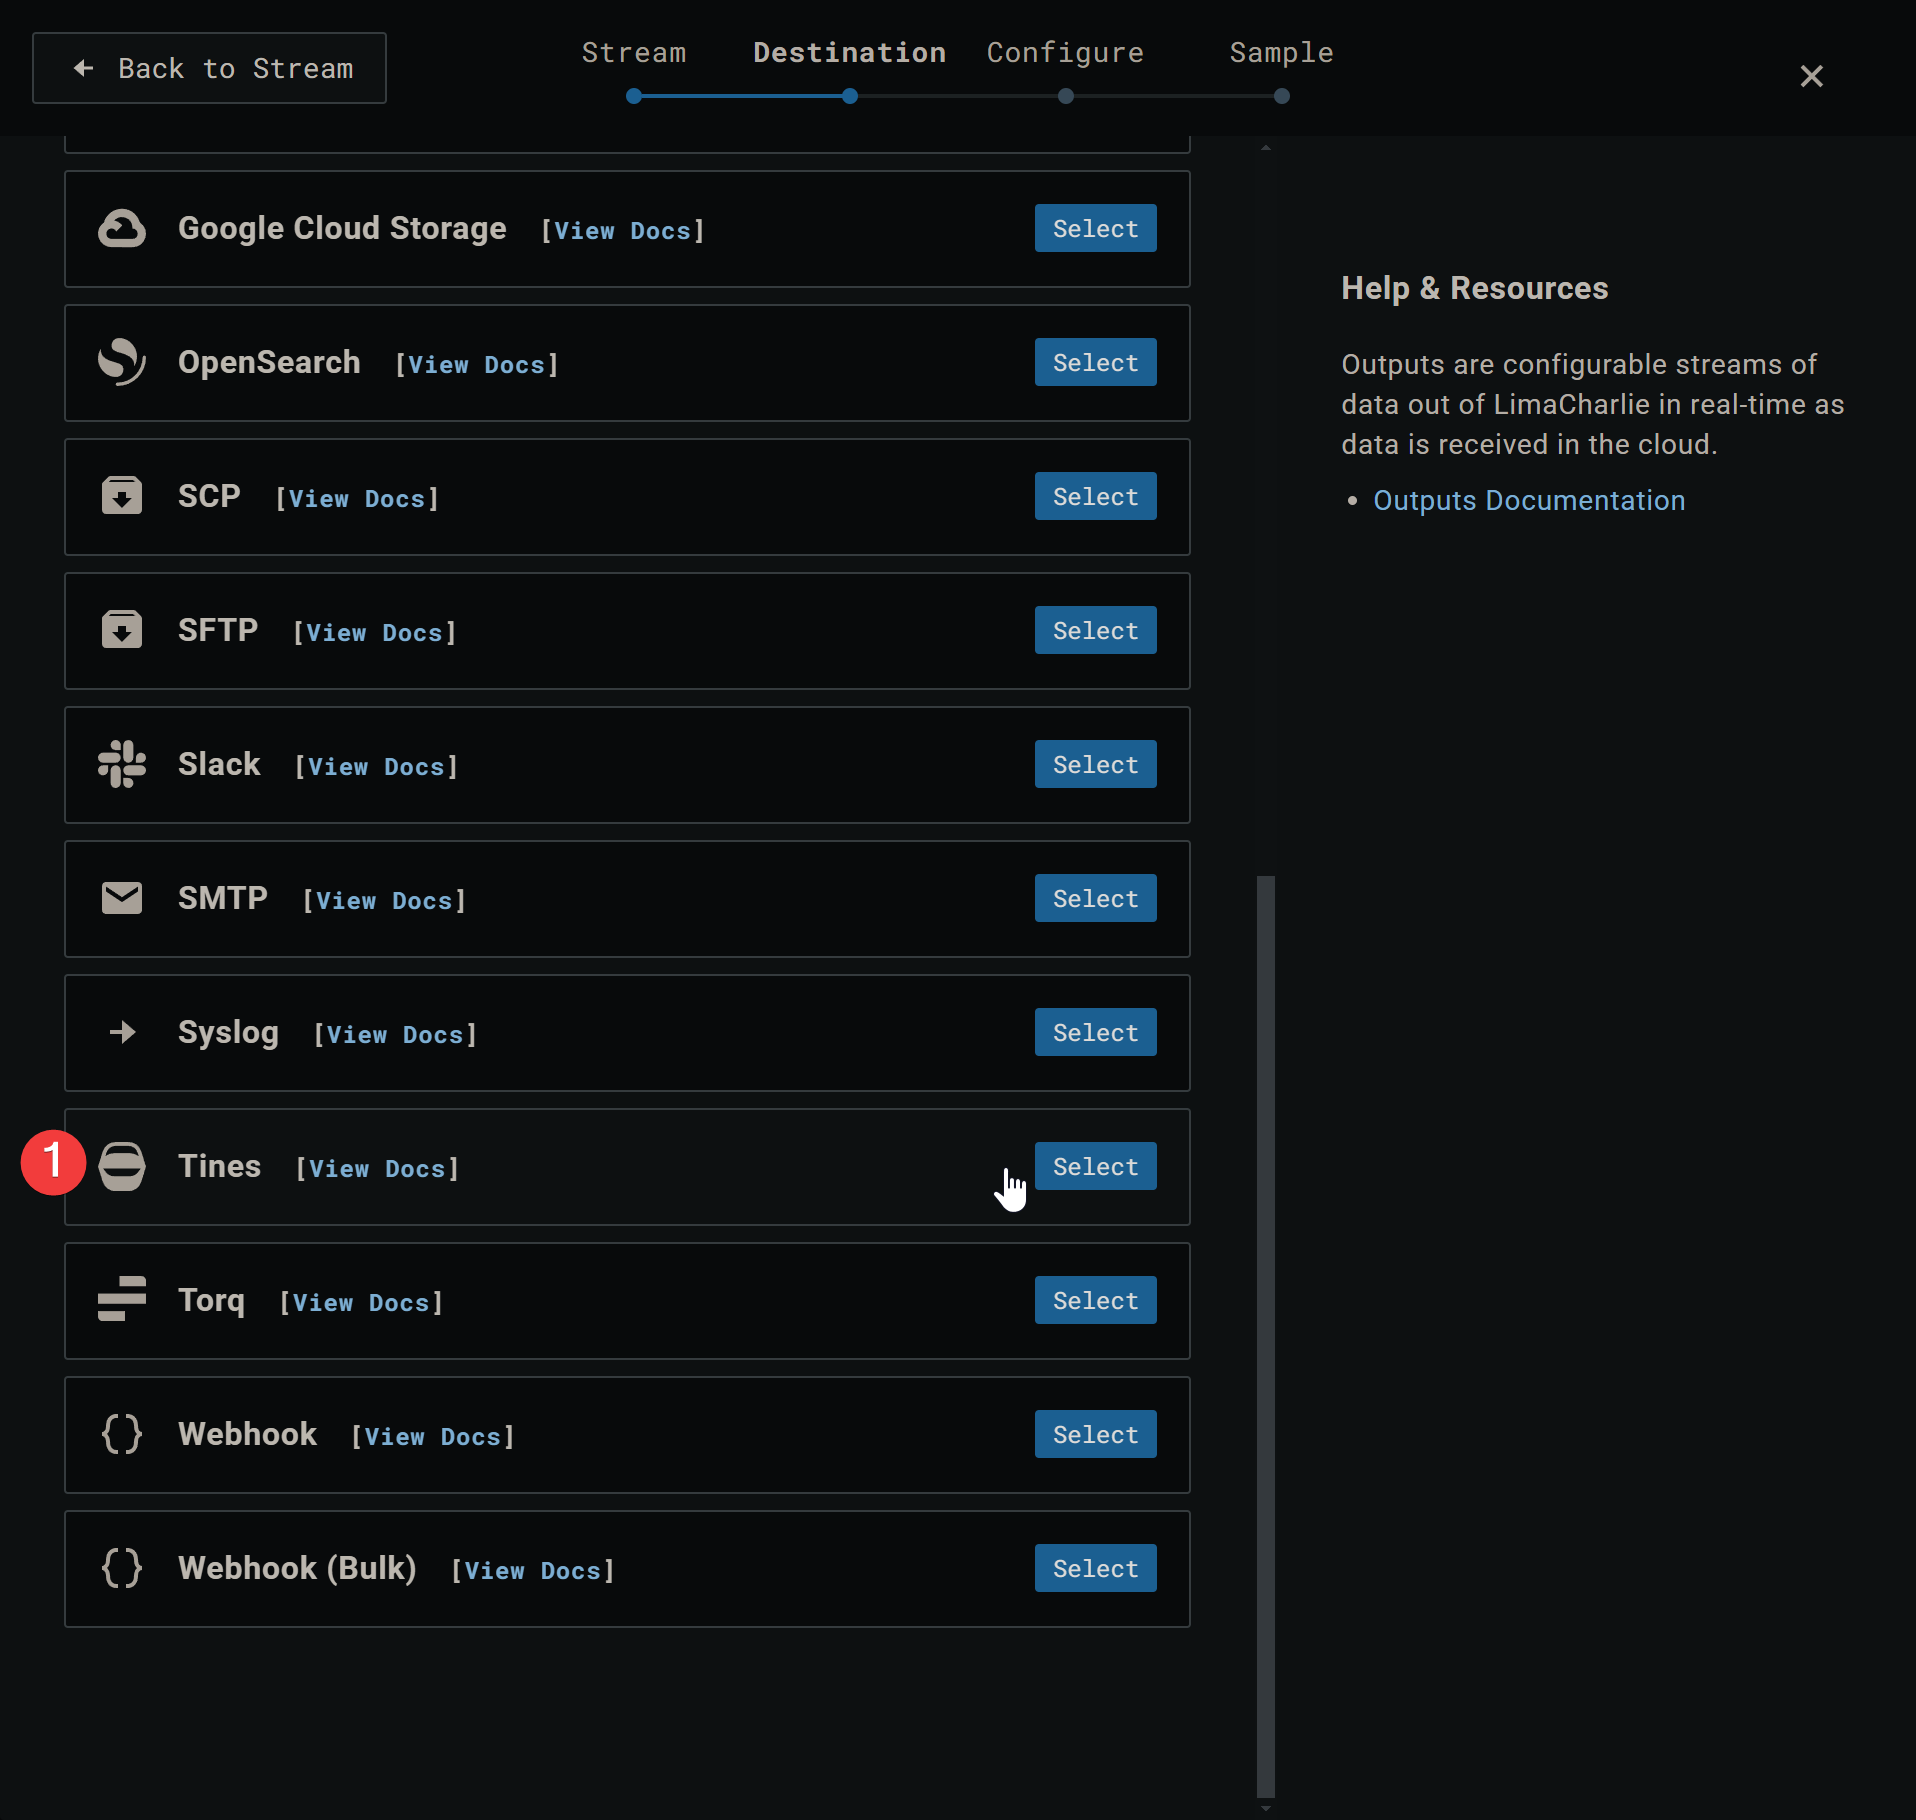
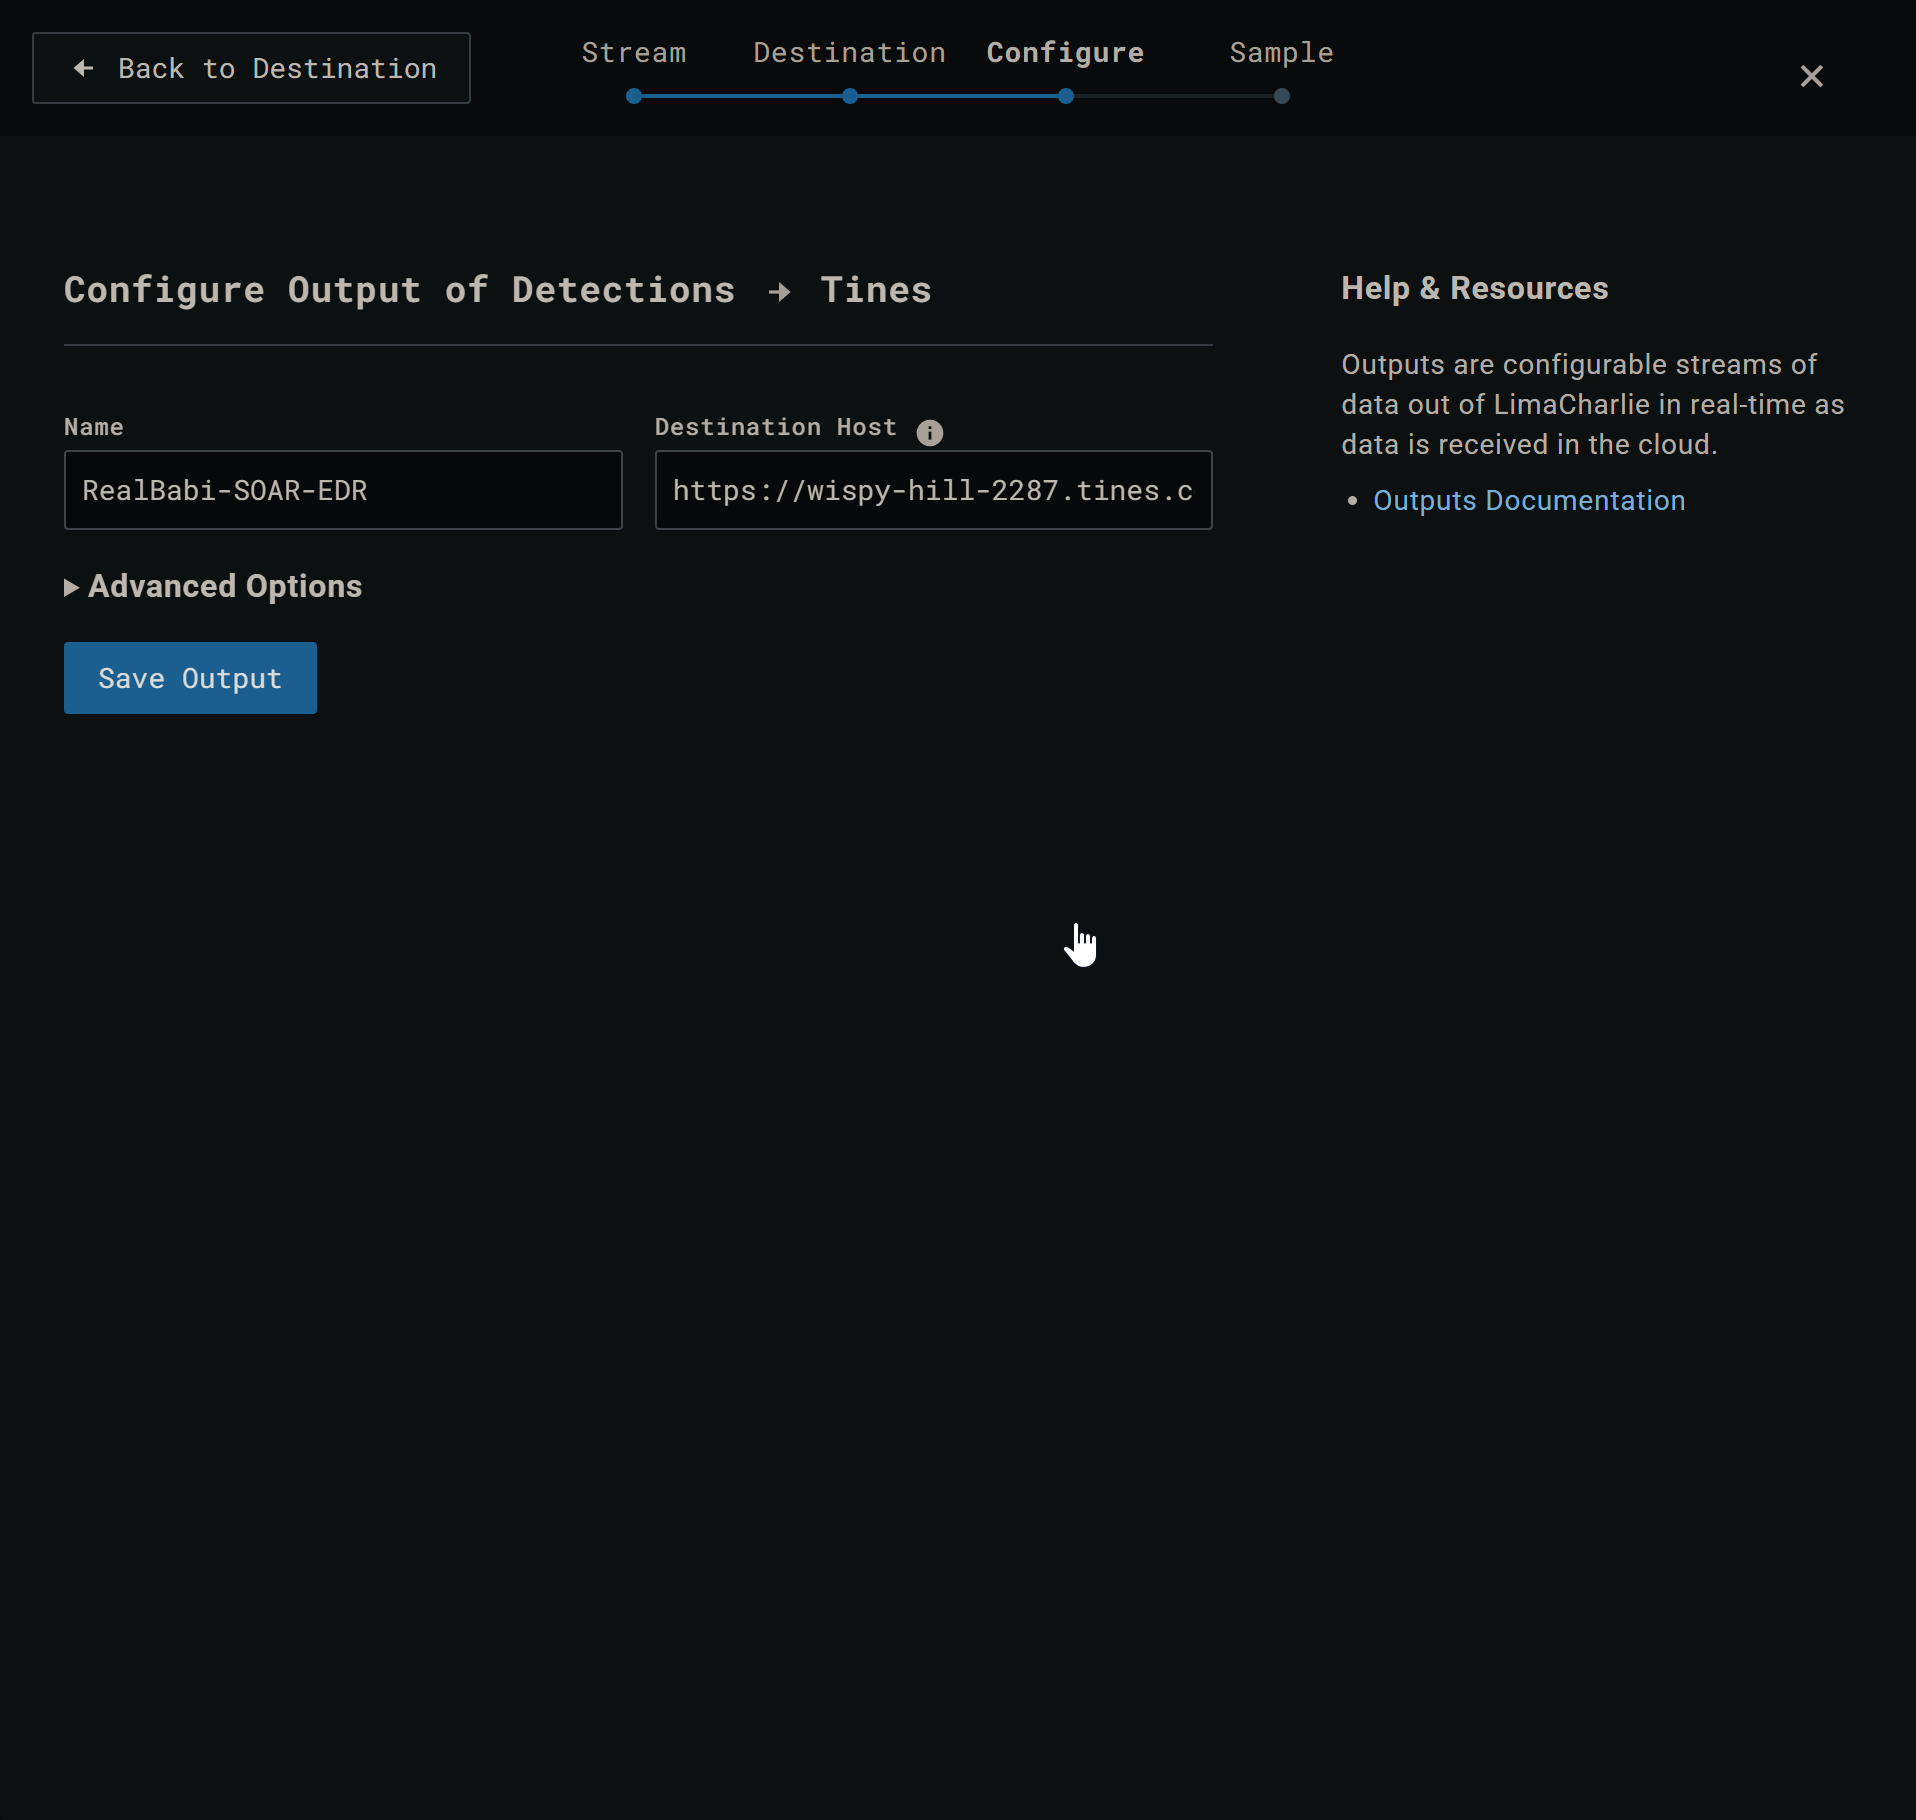
Access Detections and select Tines for outputs
!
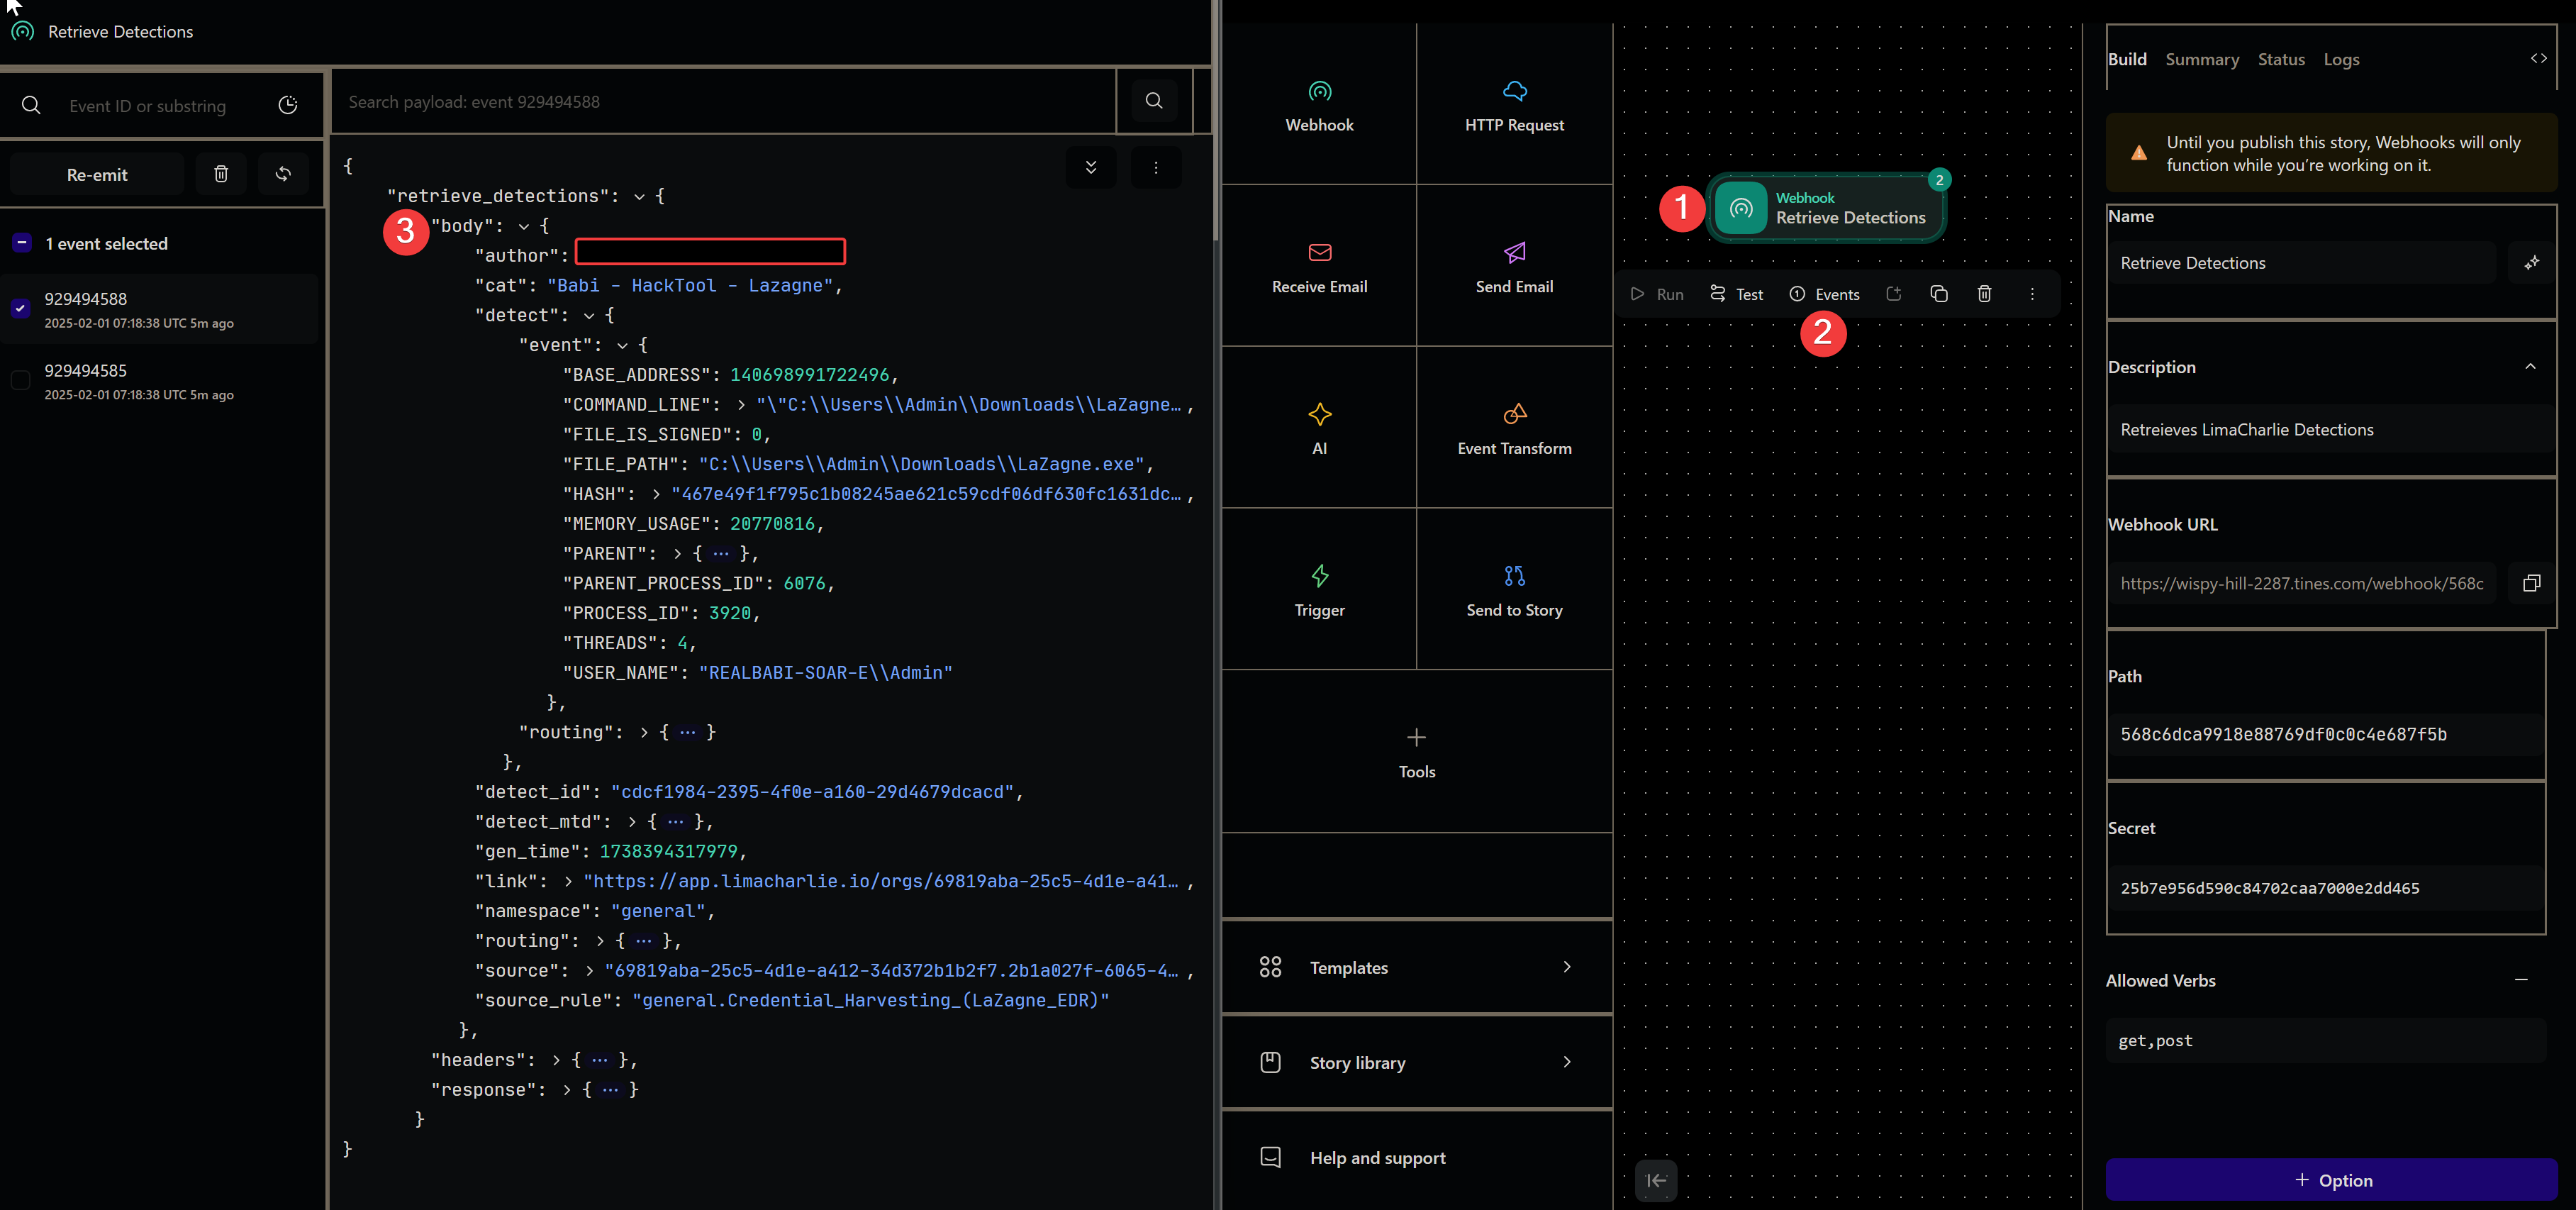
In Tines
(1) Drag a webhook to the screen
(2) Access it by clicking
(3) Input Name and Descritption
(4) Copy the hook address to place into LimaCharlie
!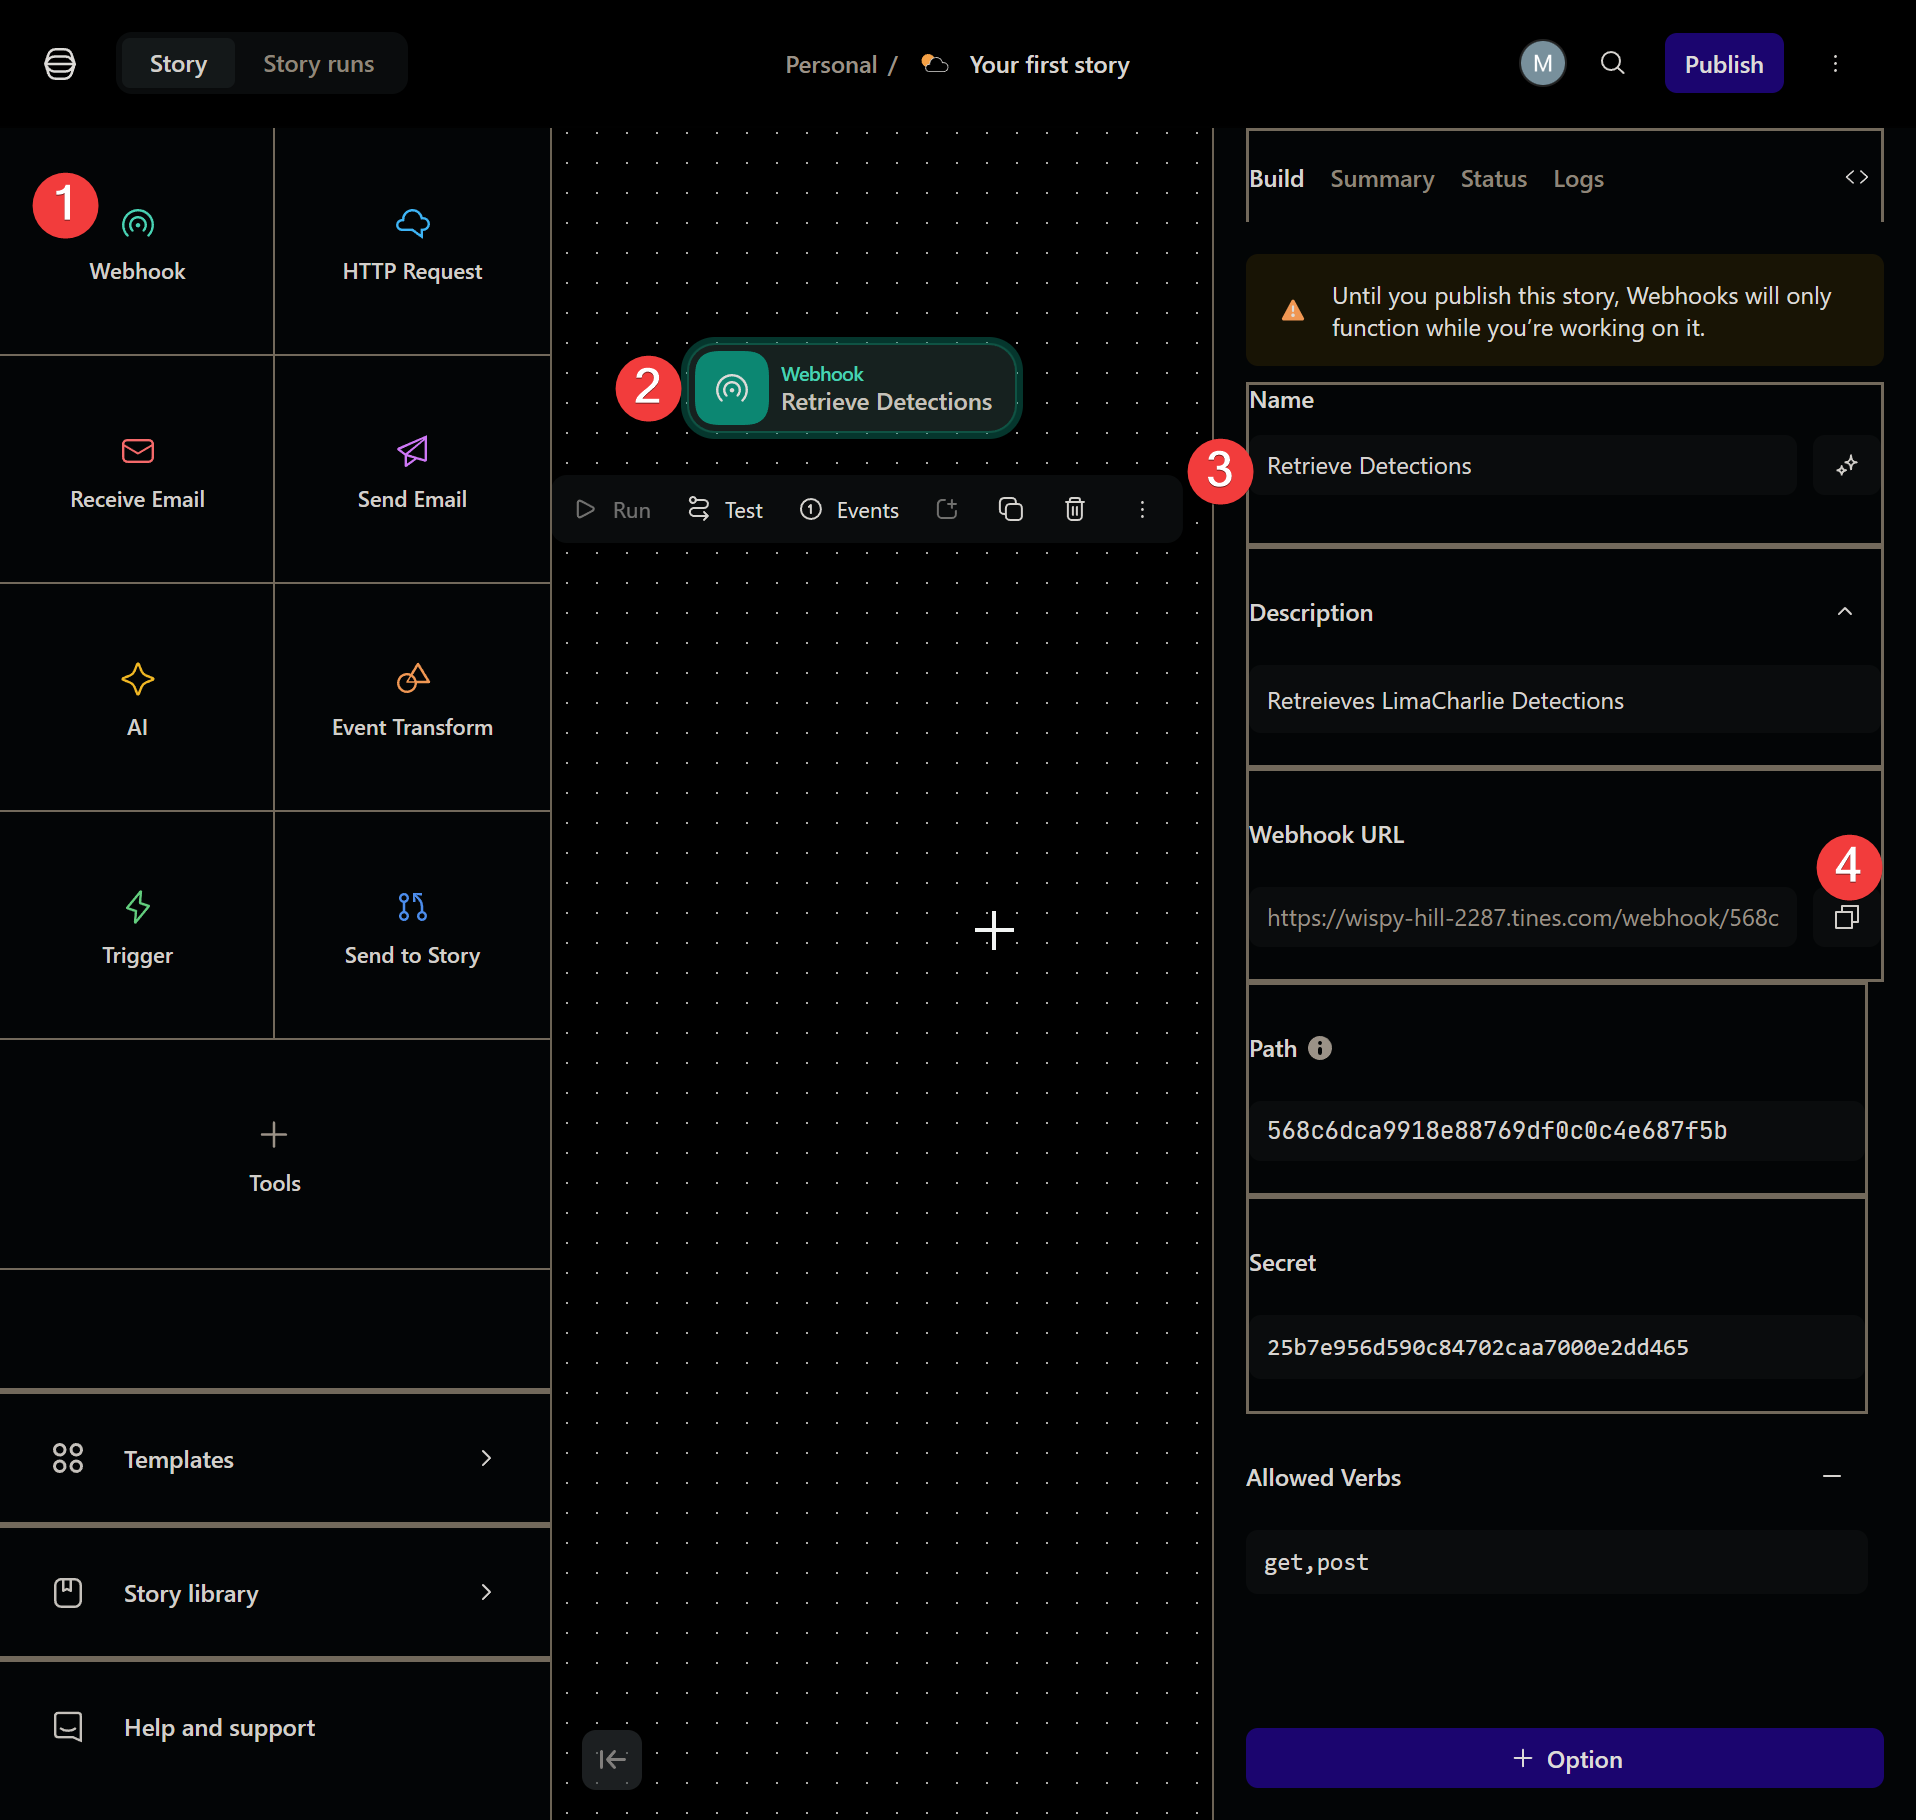 !
!
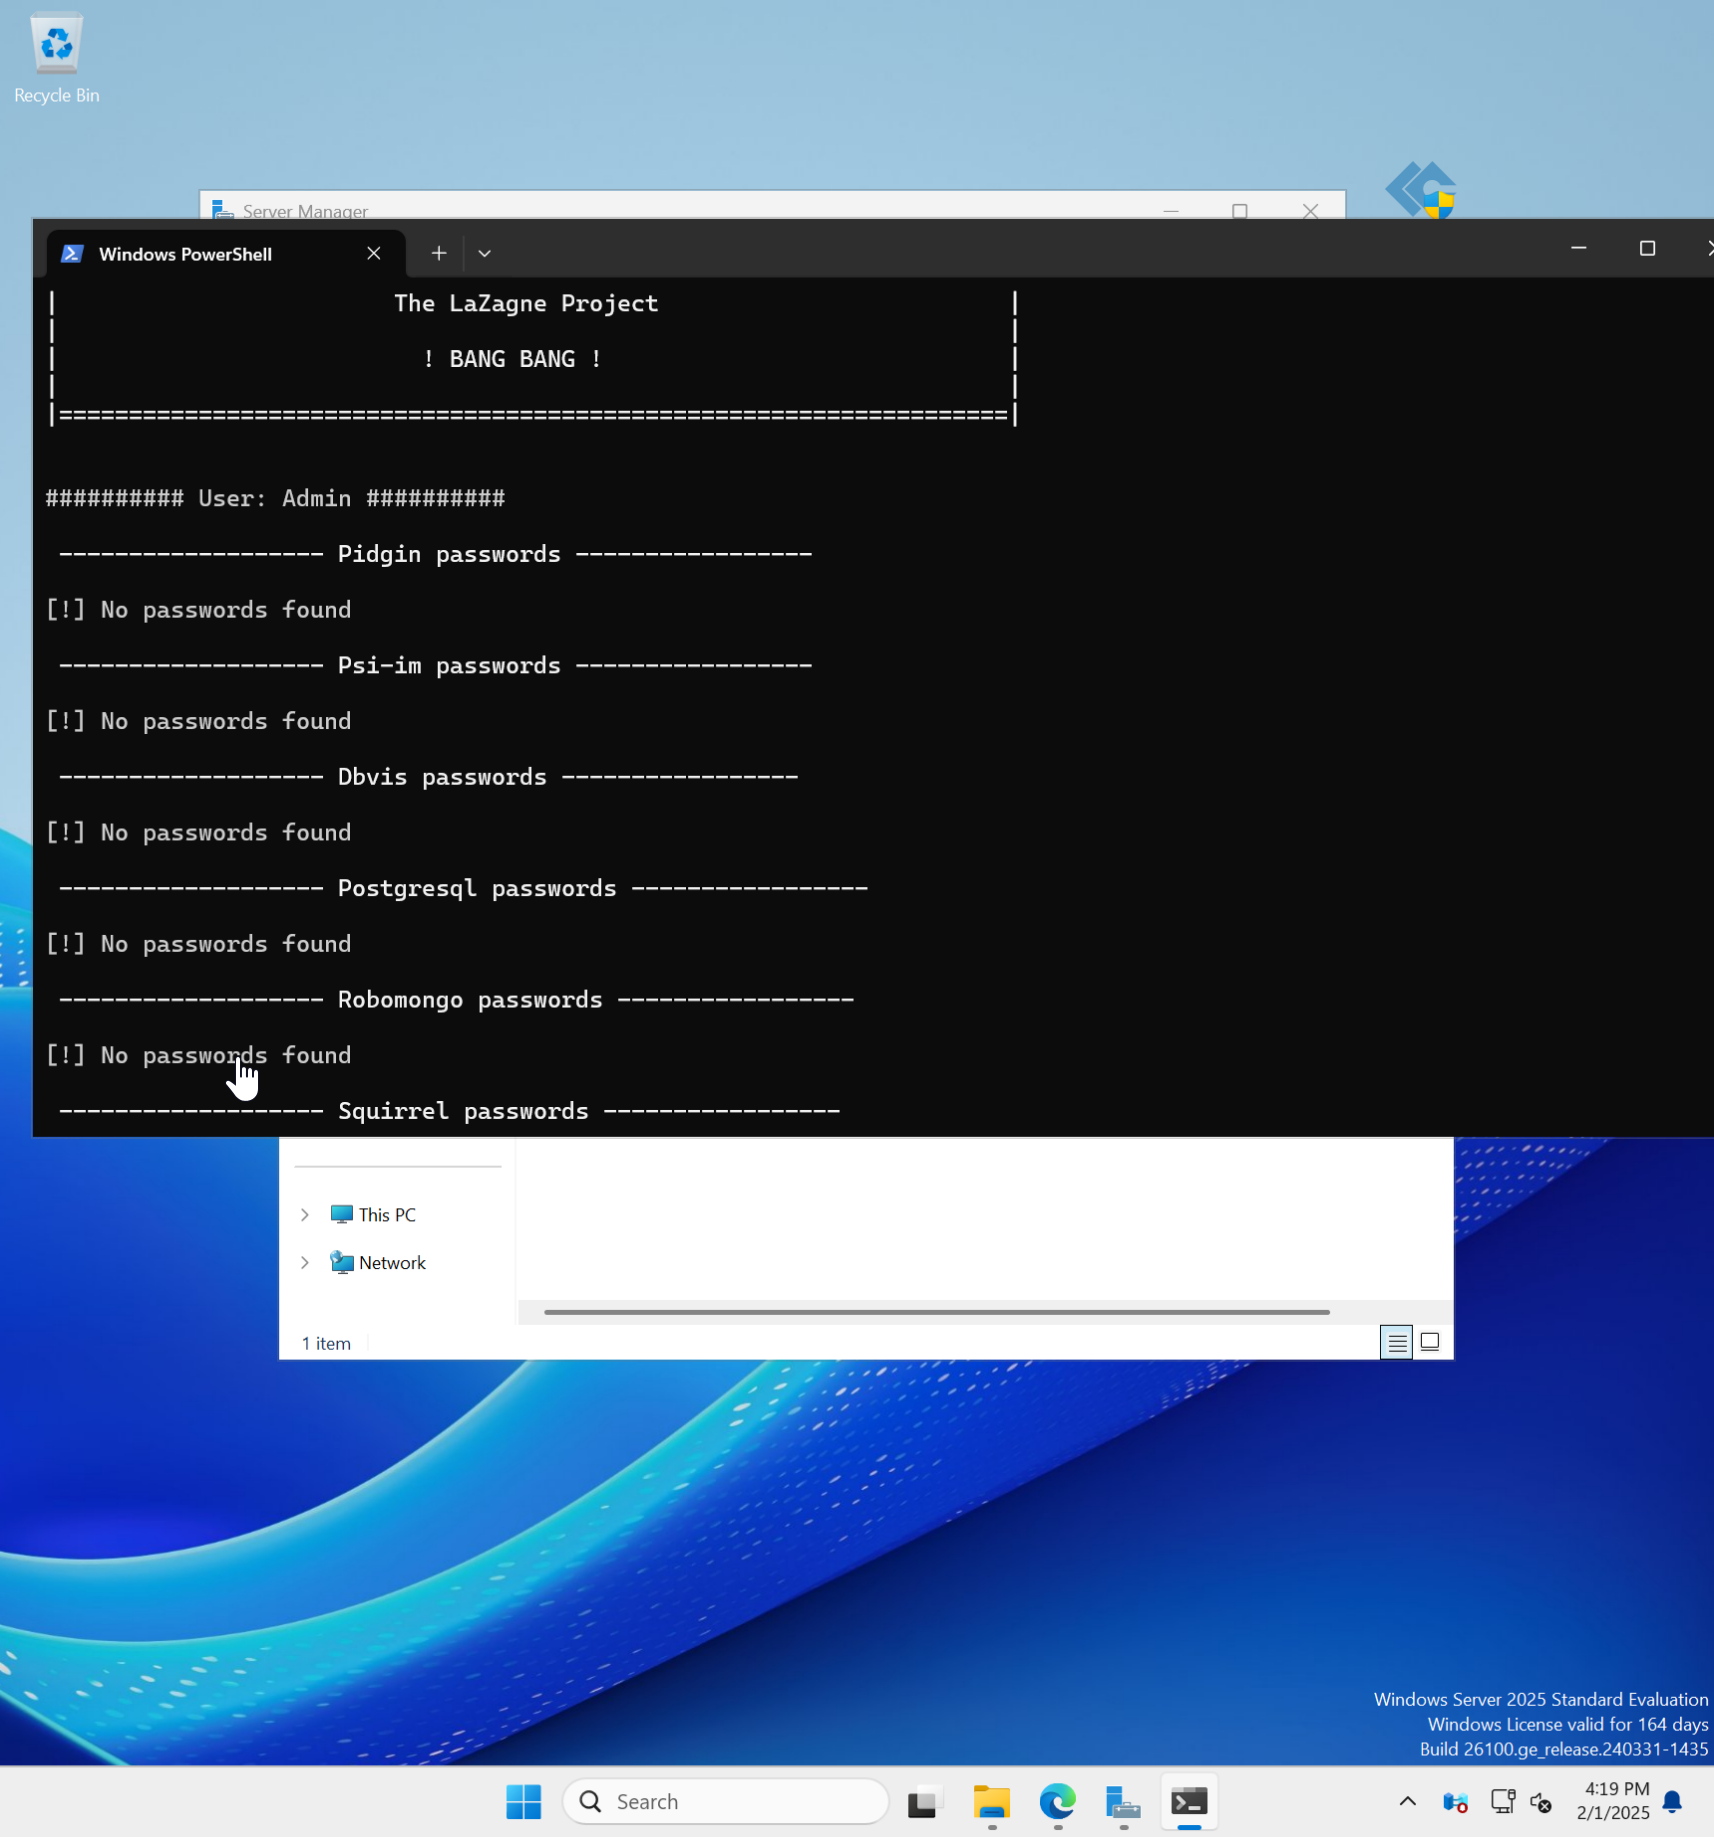
Run LaZagne again on the server to produce an output in LimaCharlie for Tines to identify a valid webhook.
!
LimaCharlie should recognize the webhook as active
!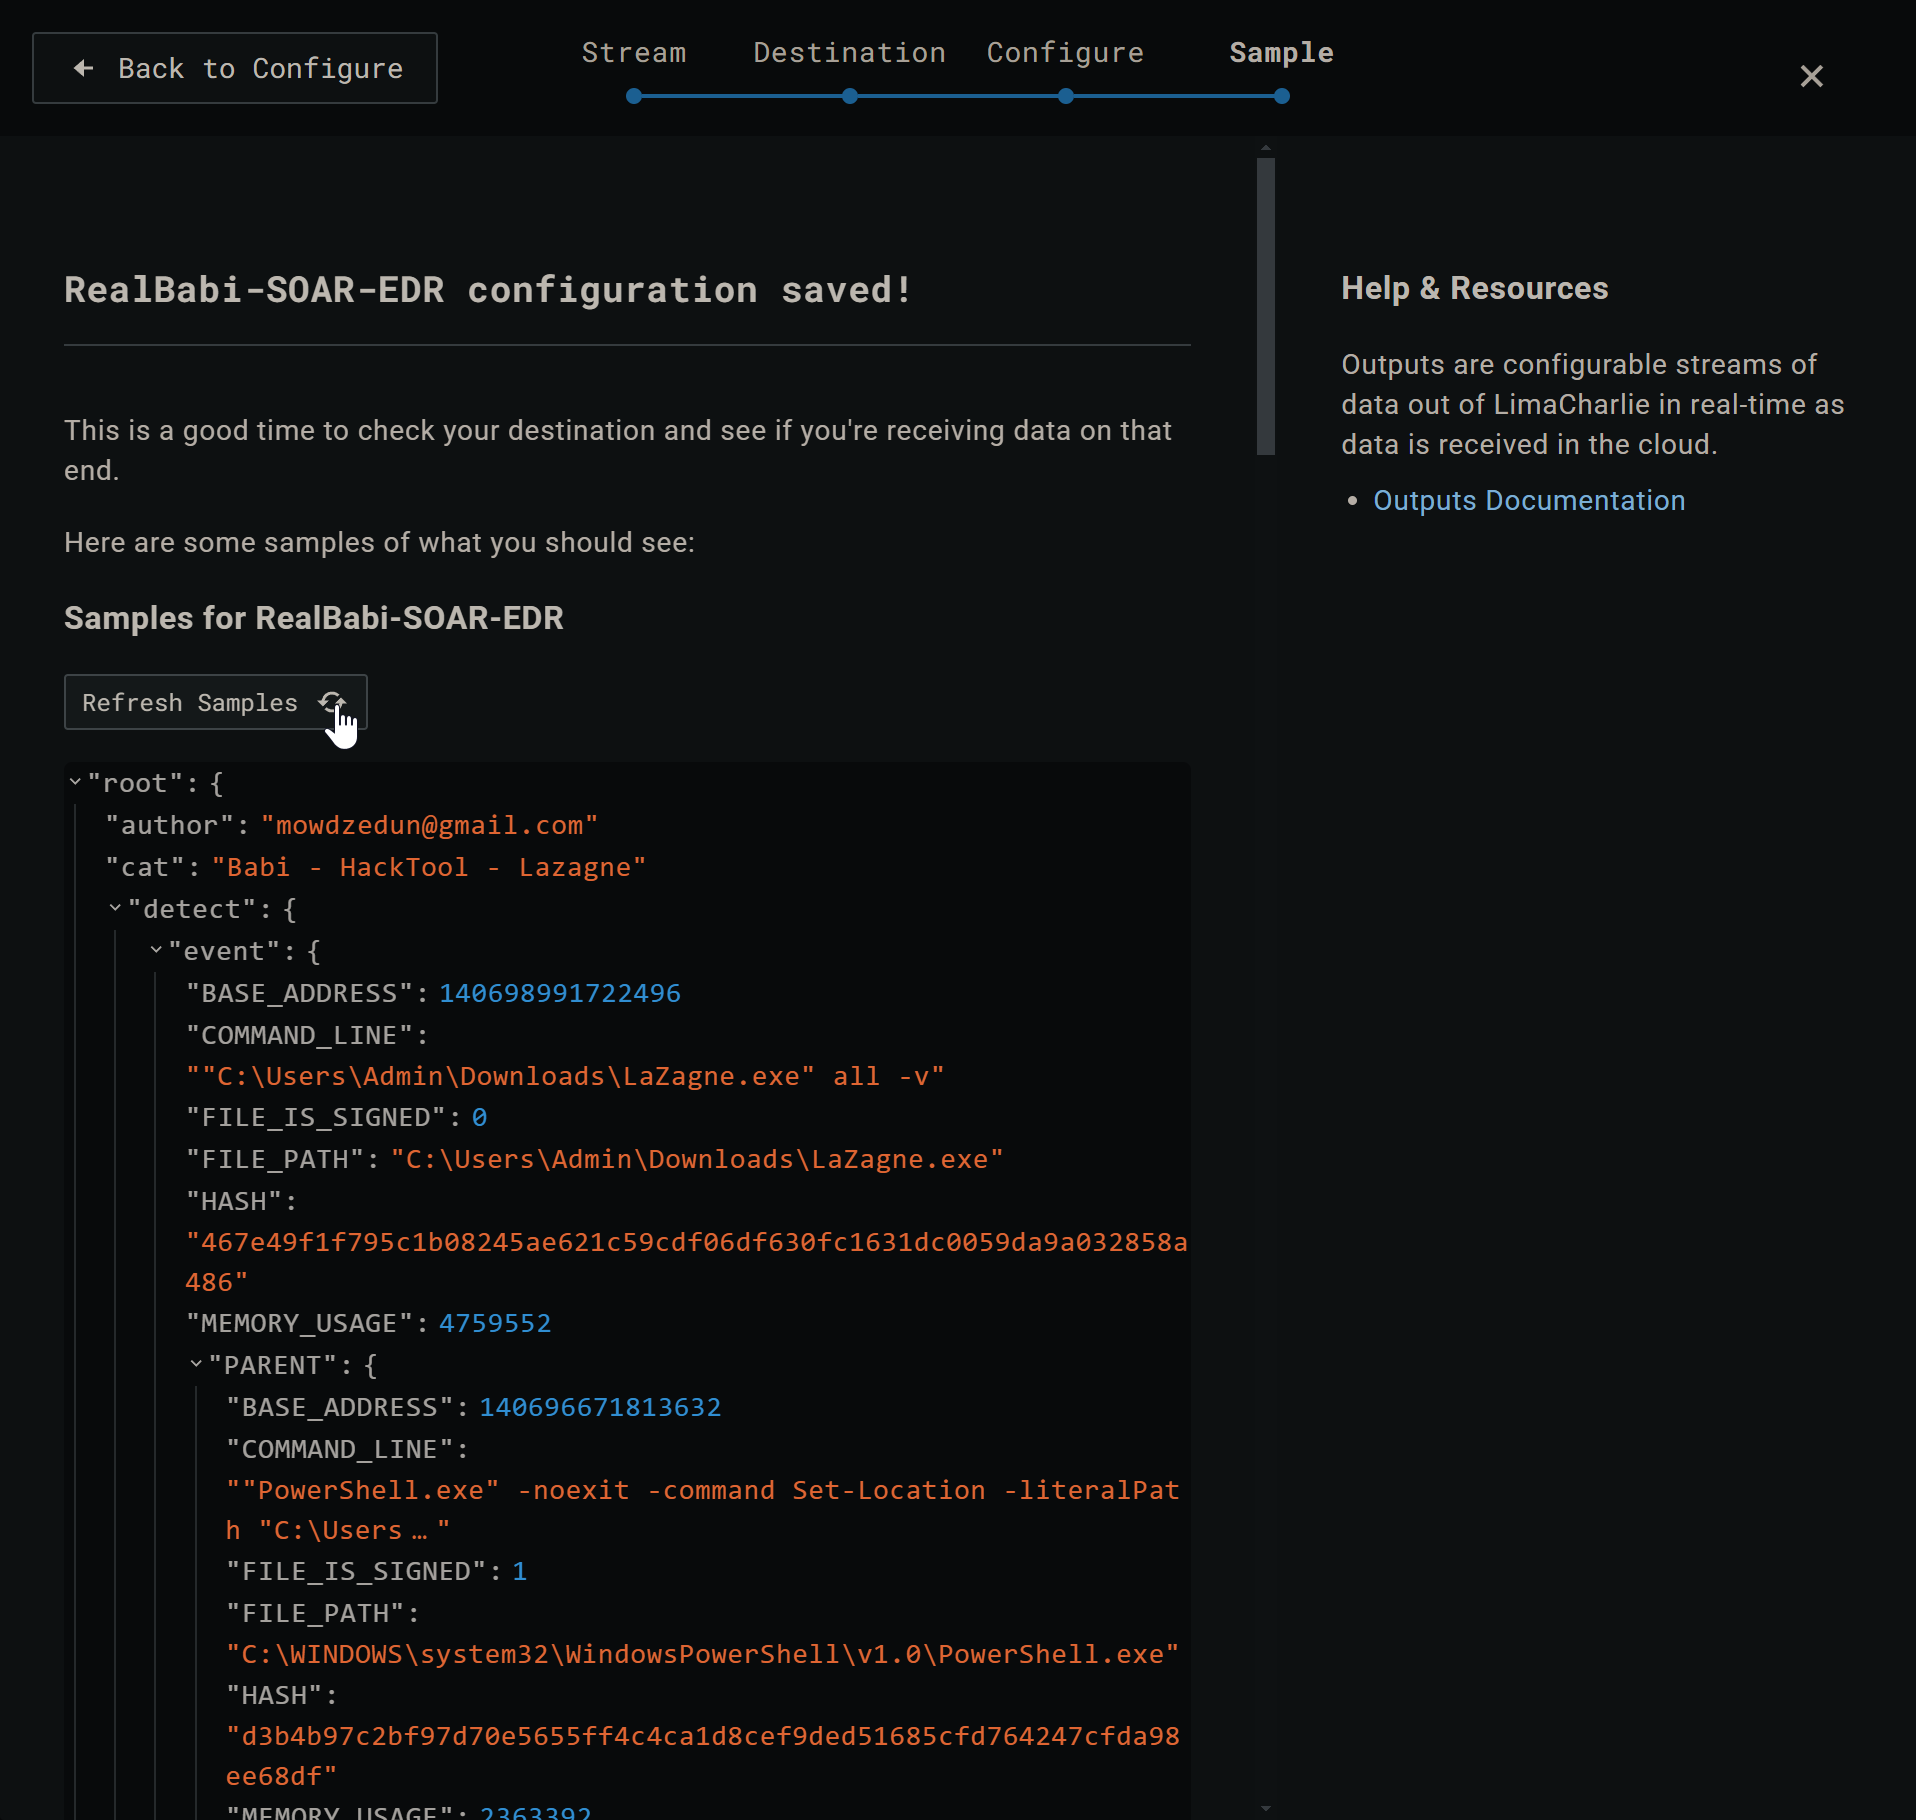
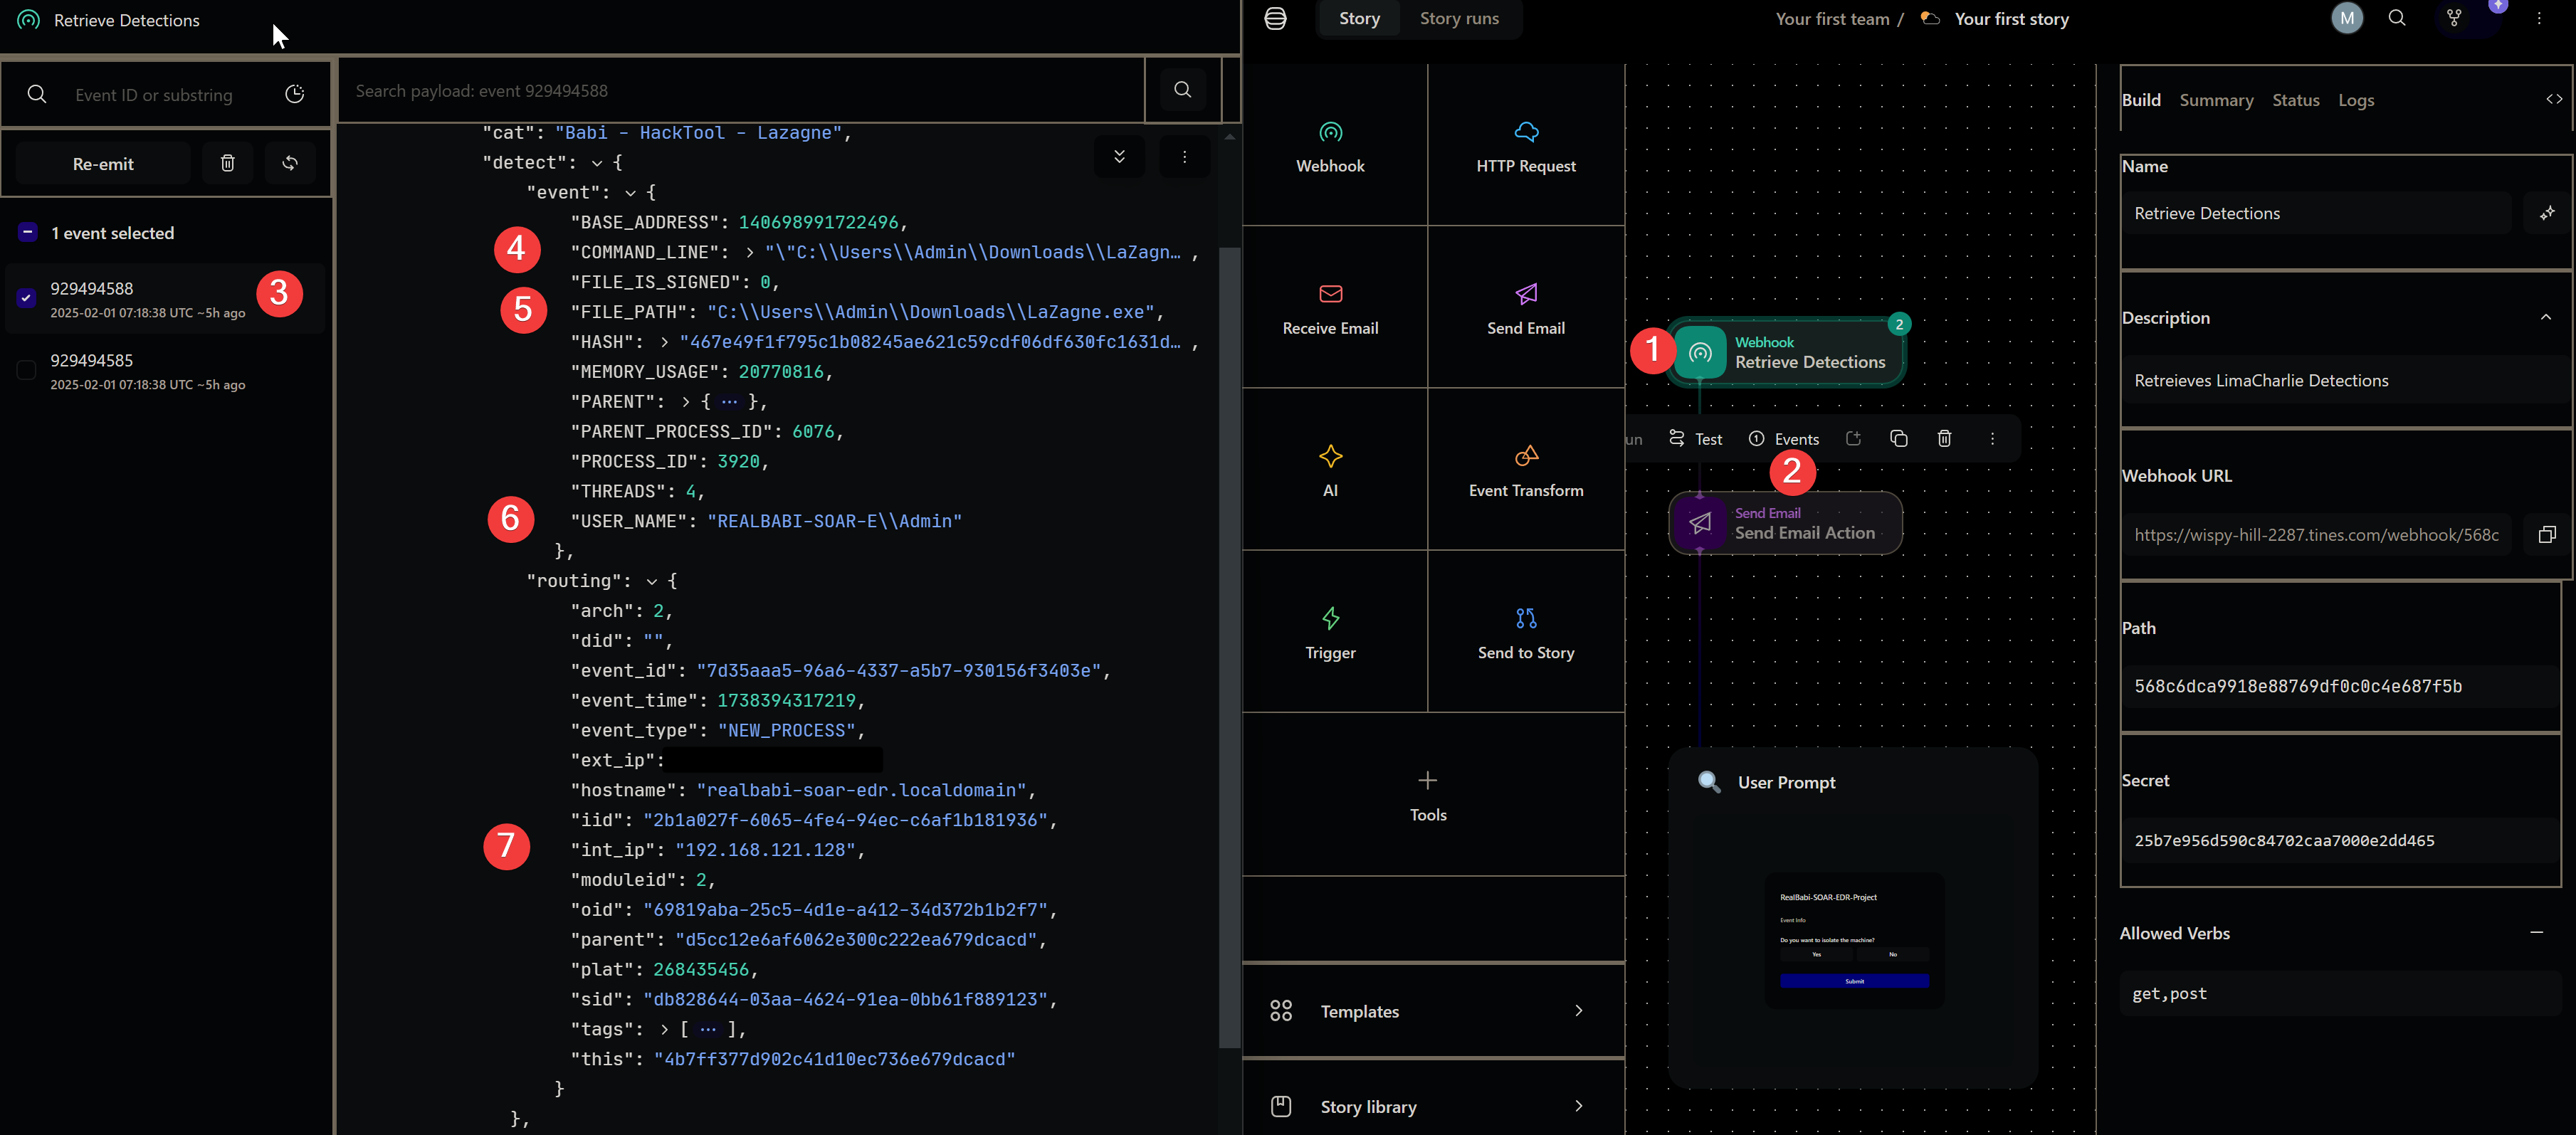
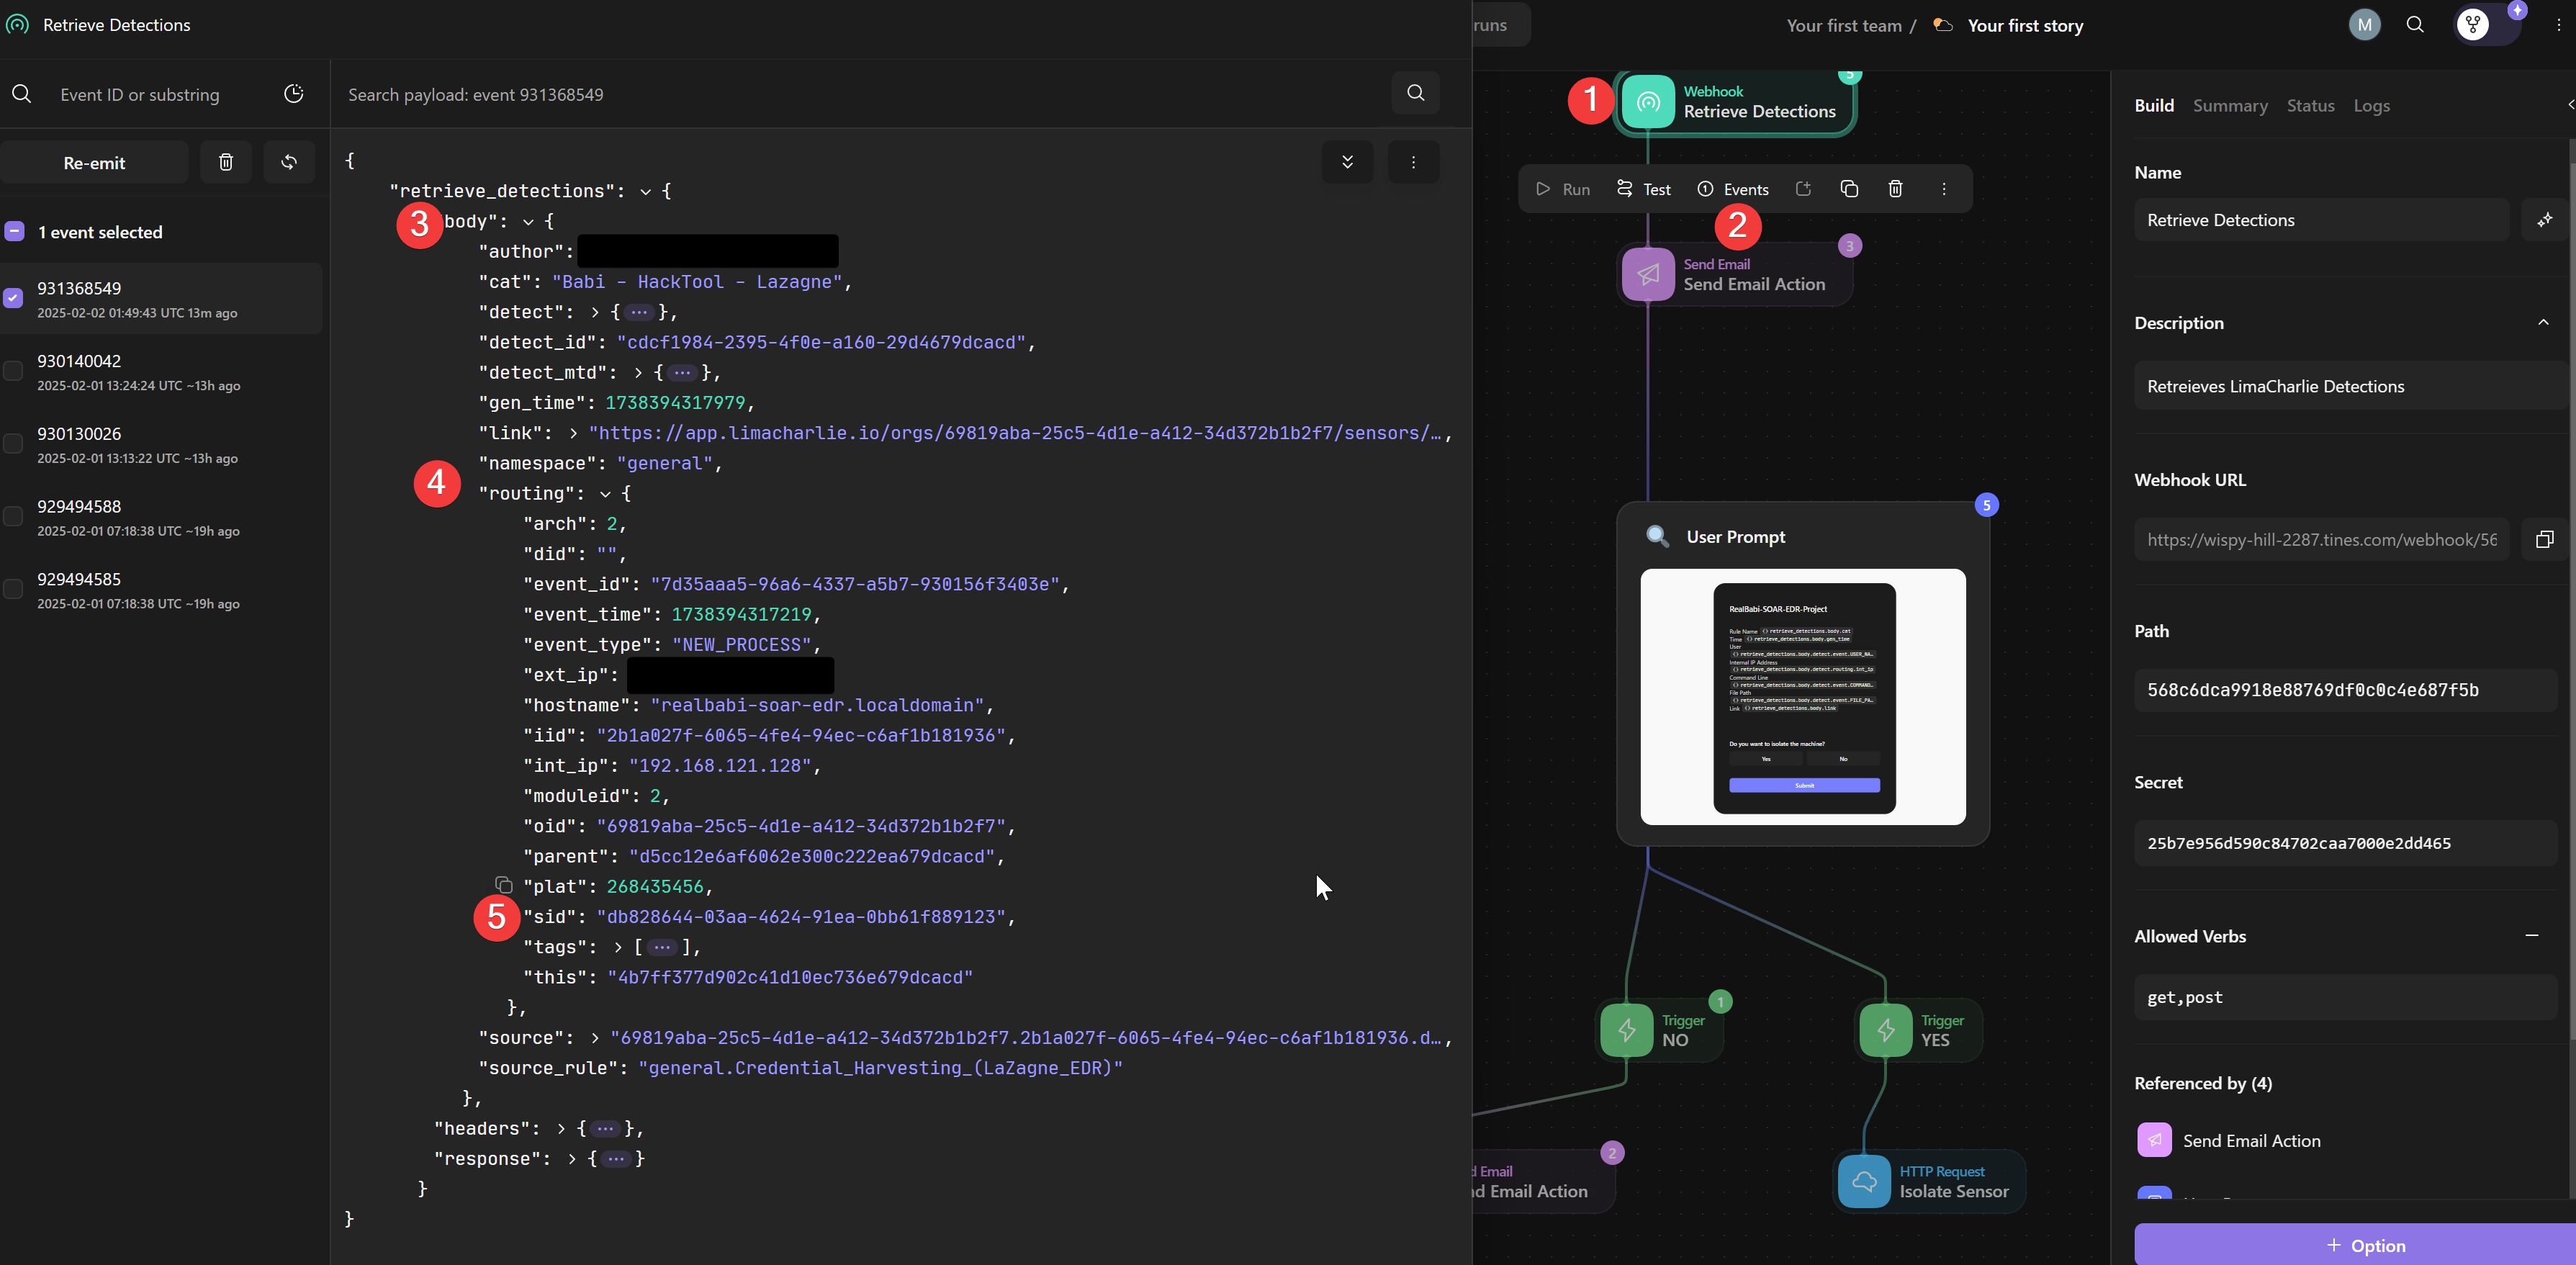
To check if Tines is receiving detection from Lima Charlie, head to the webhook in Tines, access events and expand the body which contains event details.
!
Creating Playbooks in Tines#
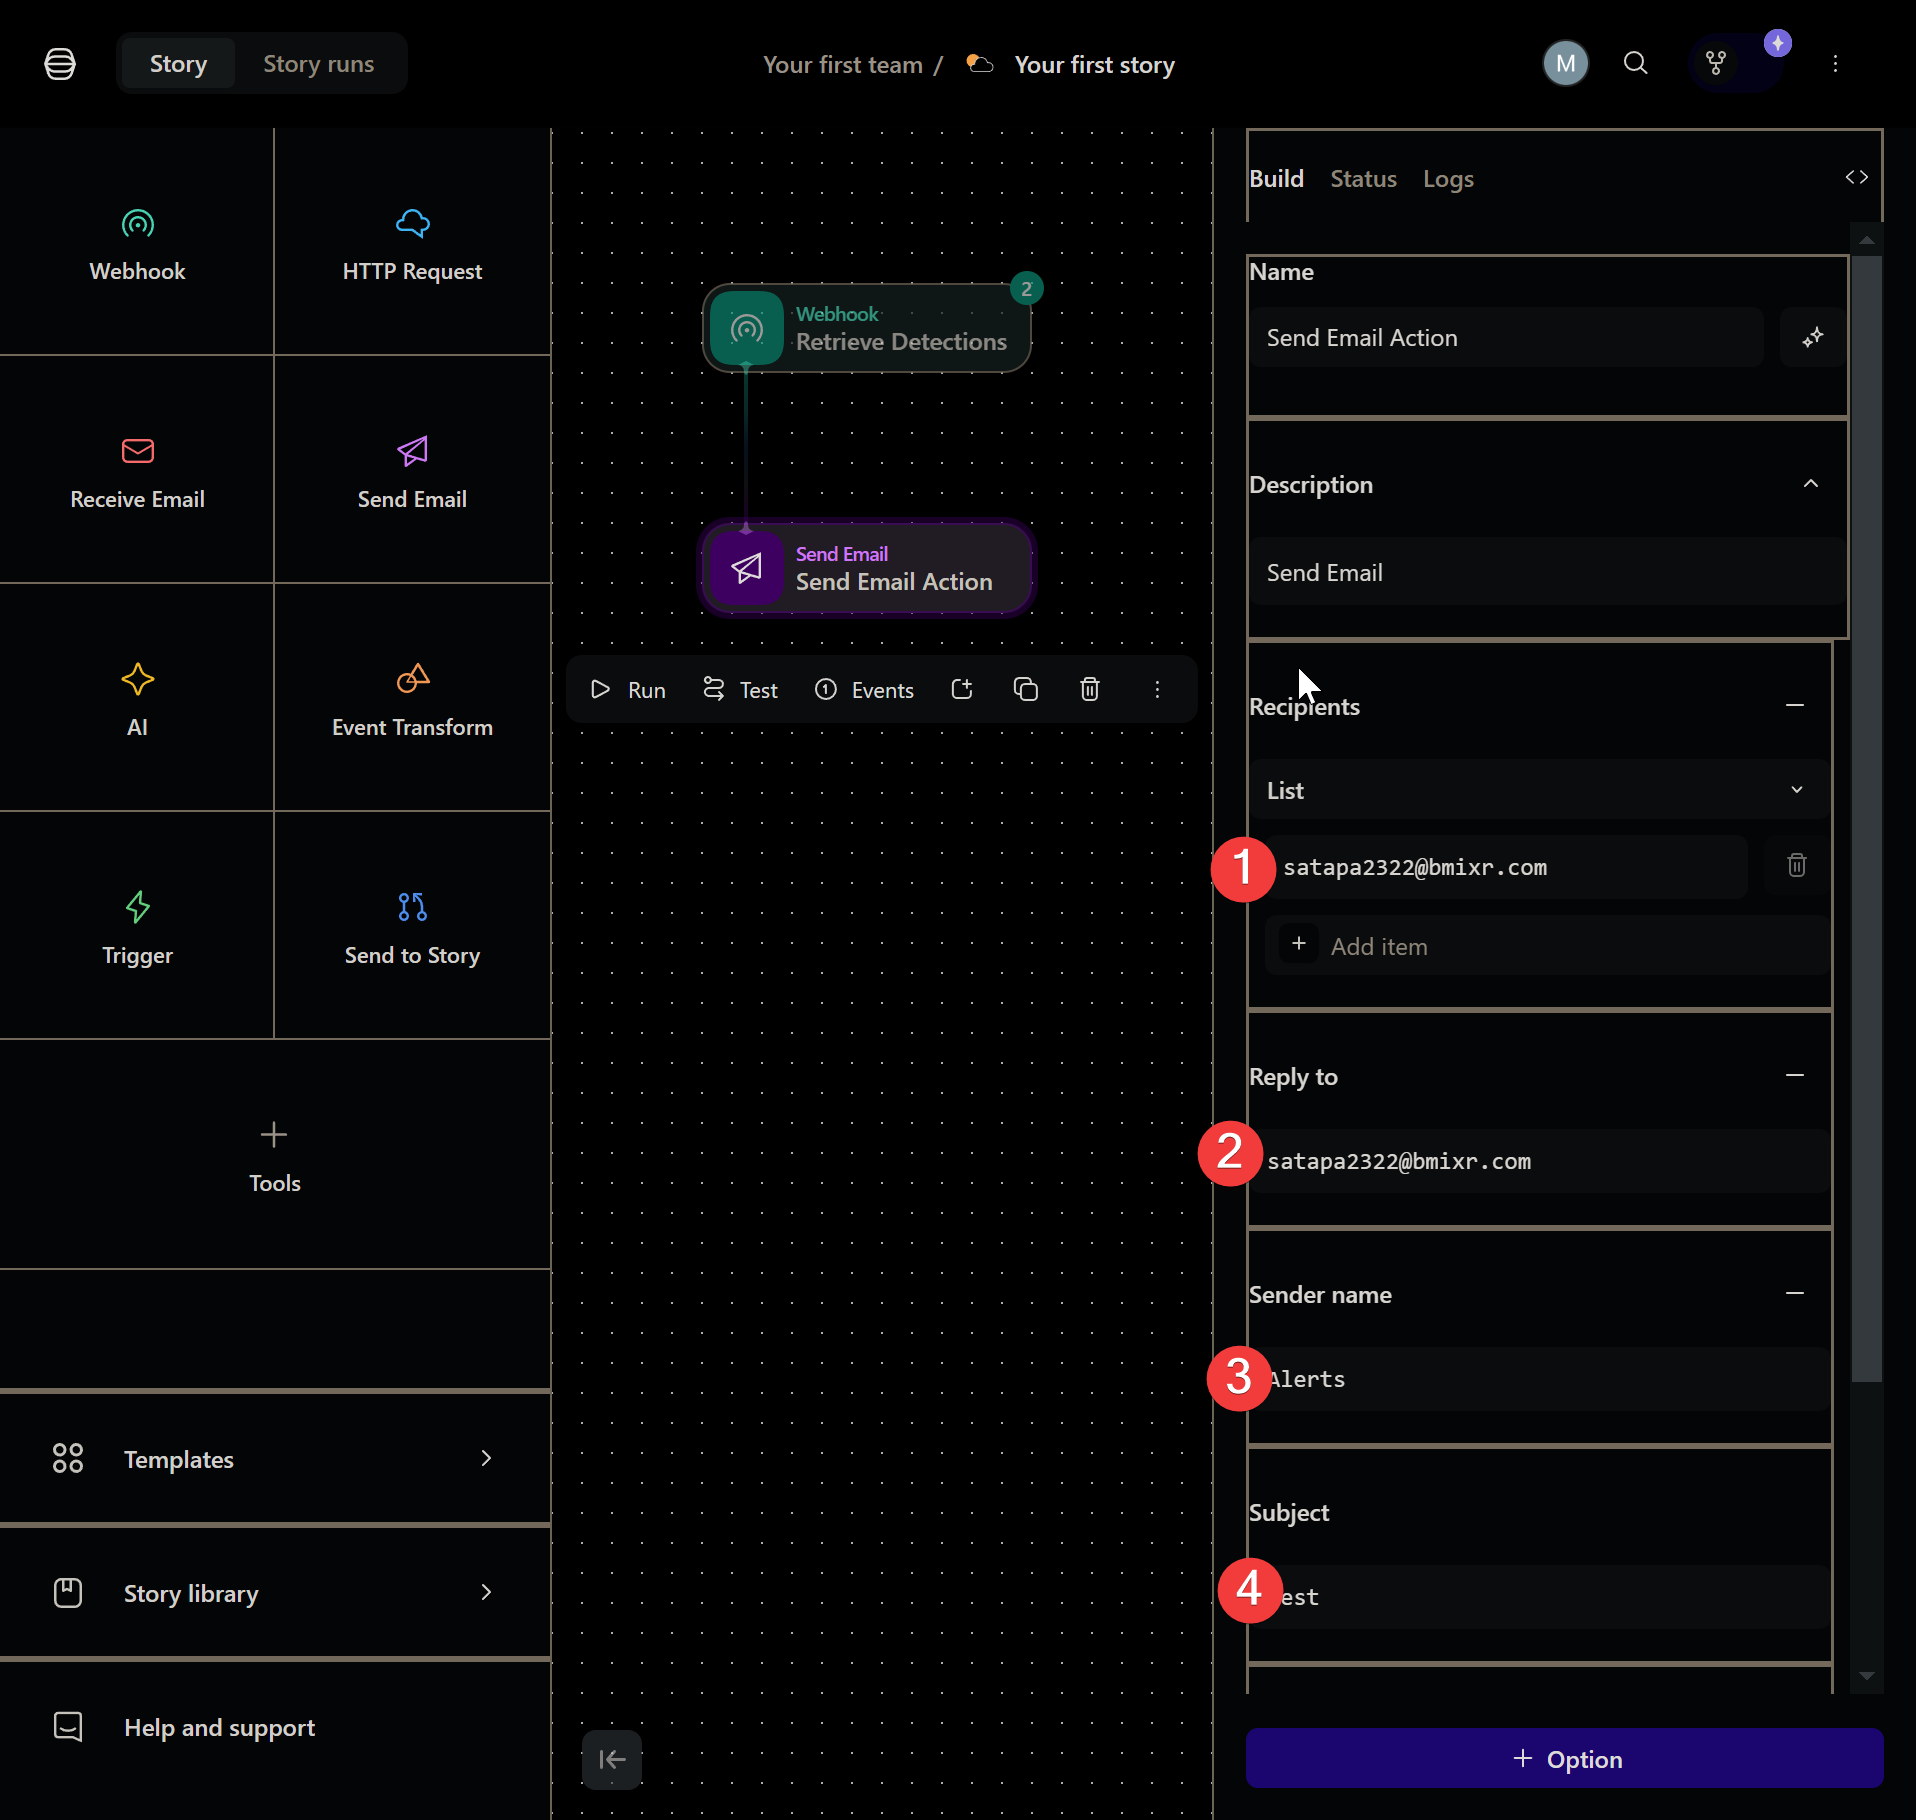
Now lets add a “Send Email” action and will fill out the required information.
!
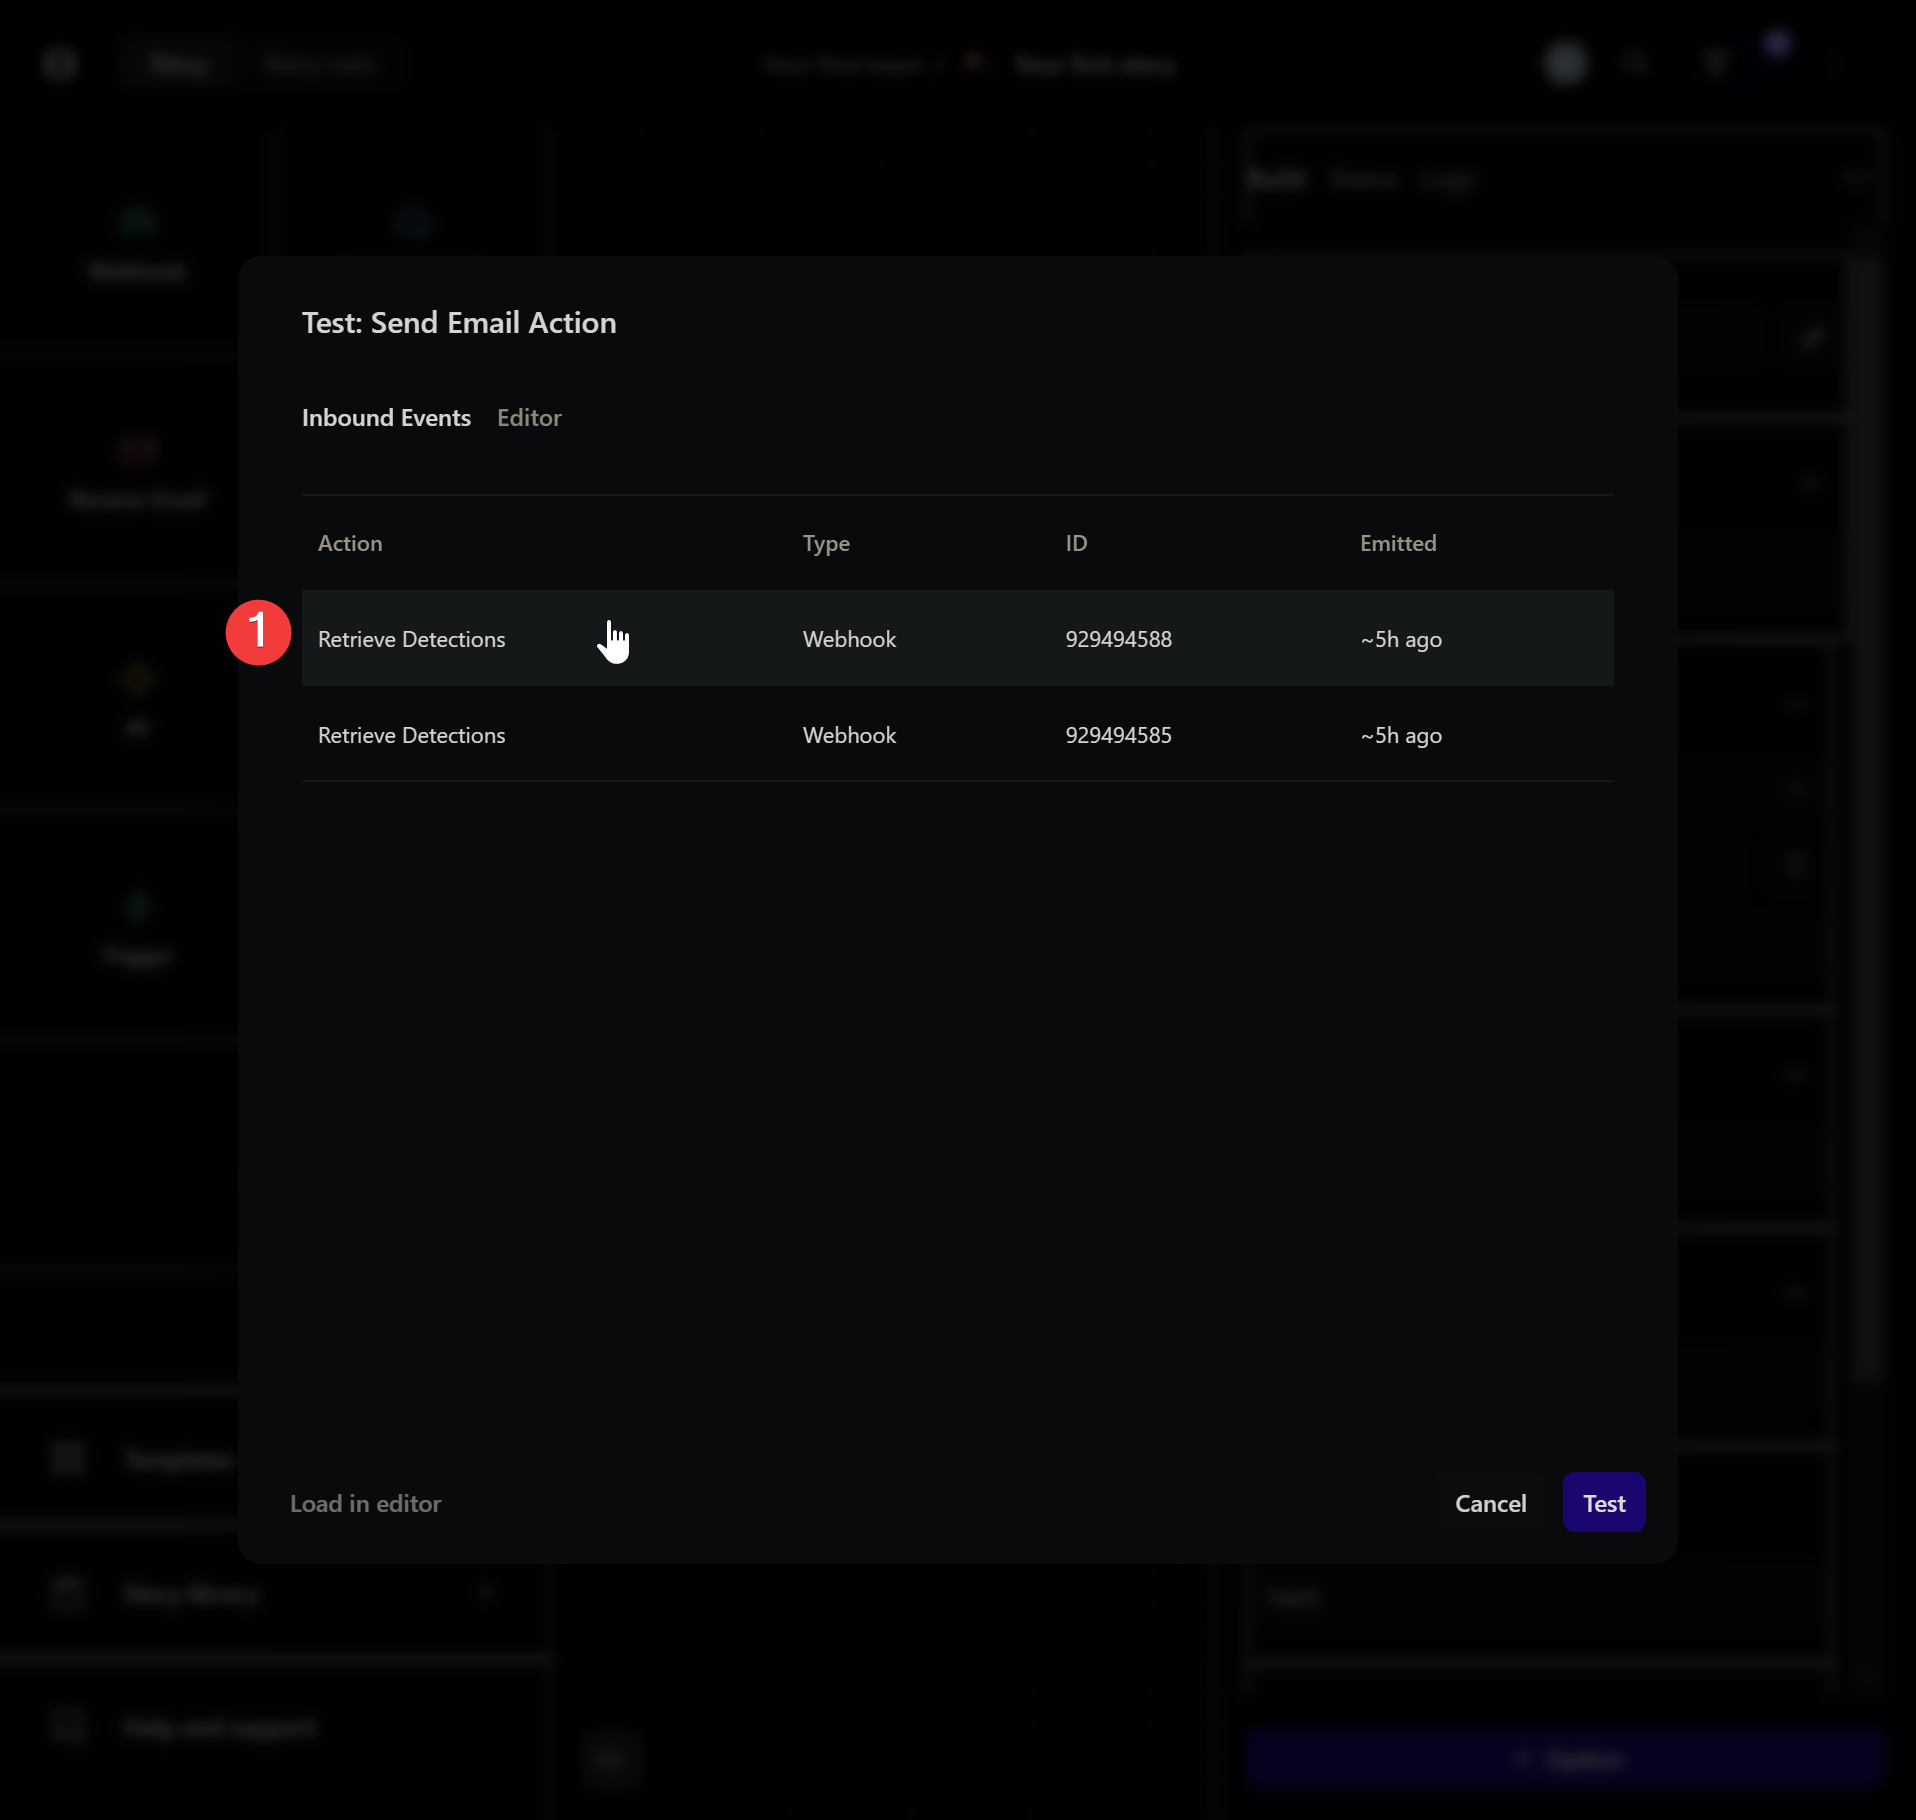
Then test it using “Test” function and choosing the first webhook available. This will rerun our actions and test the email function.
!
To add a prompt sent to the user, drag a “Page” located in the “Tools” section, fill out information as needed and change actions for the page. This is the metadata for the page, not the portion controlling actions.
!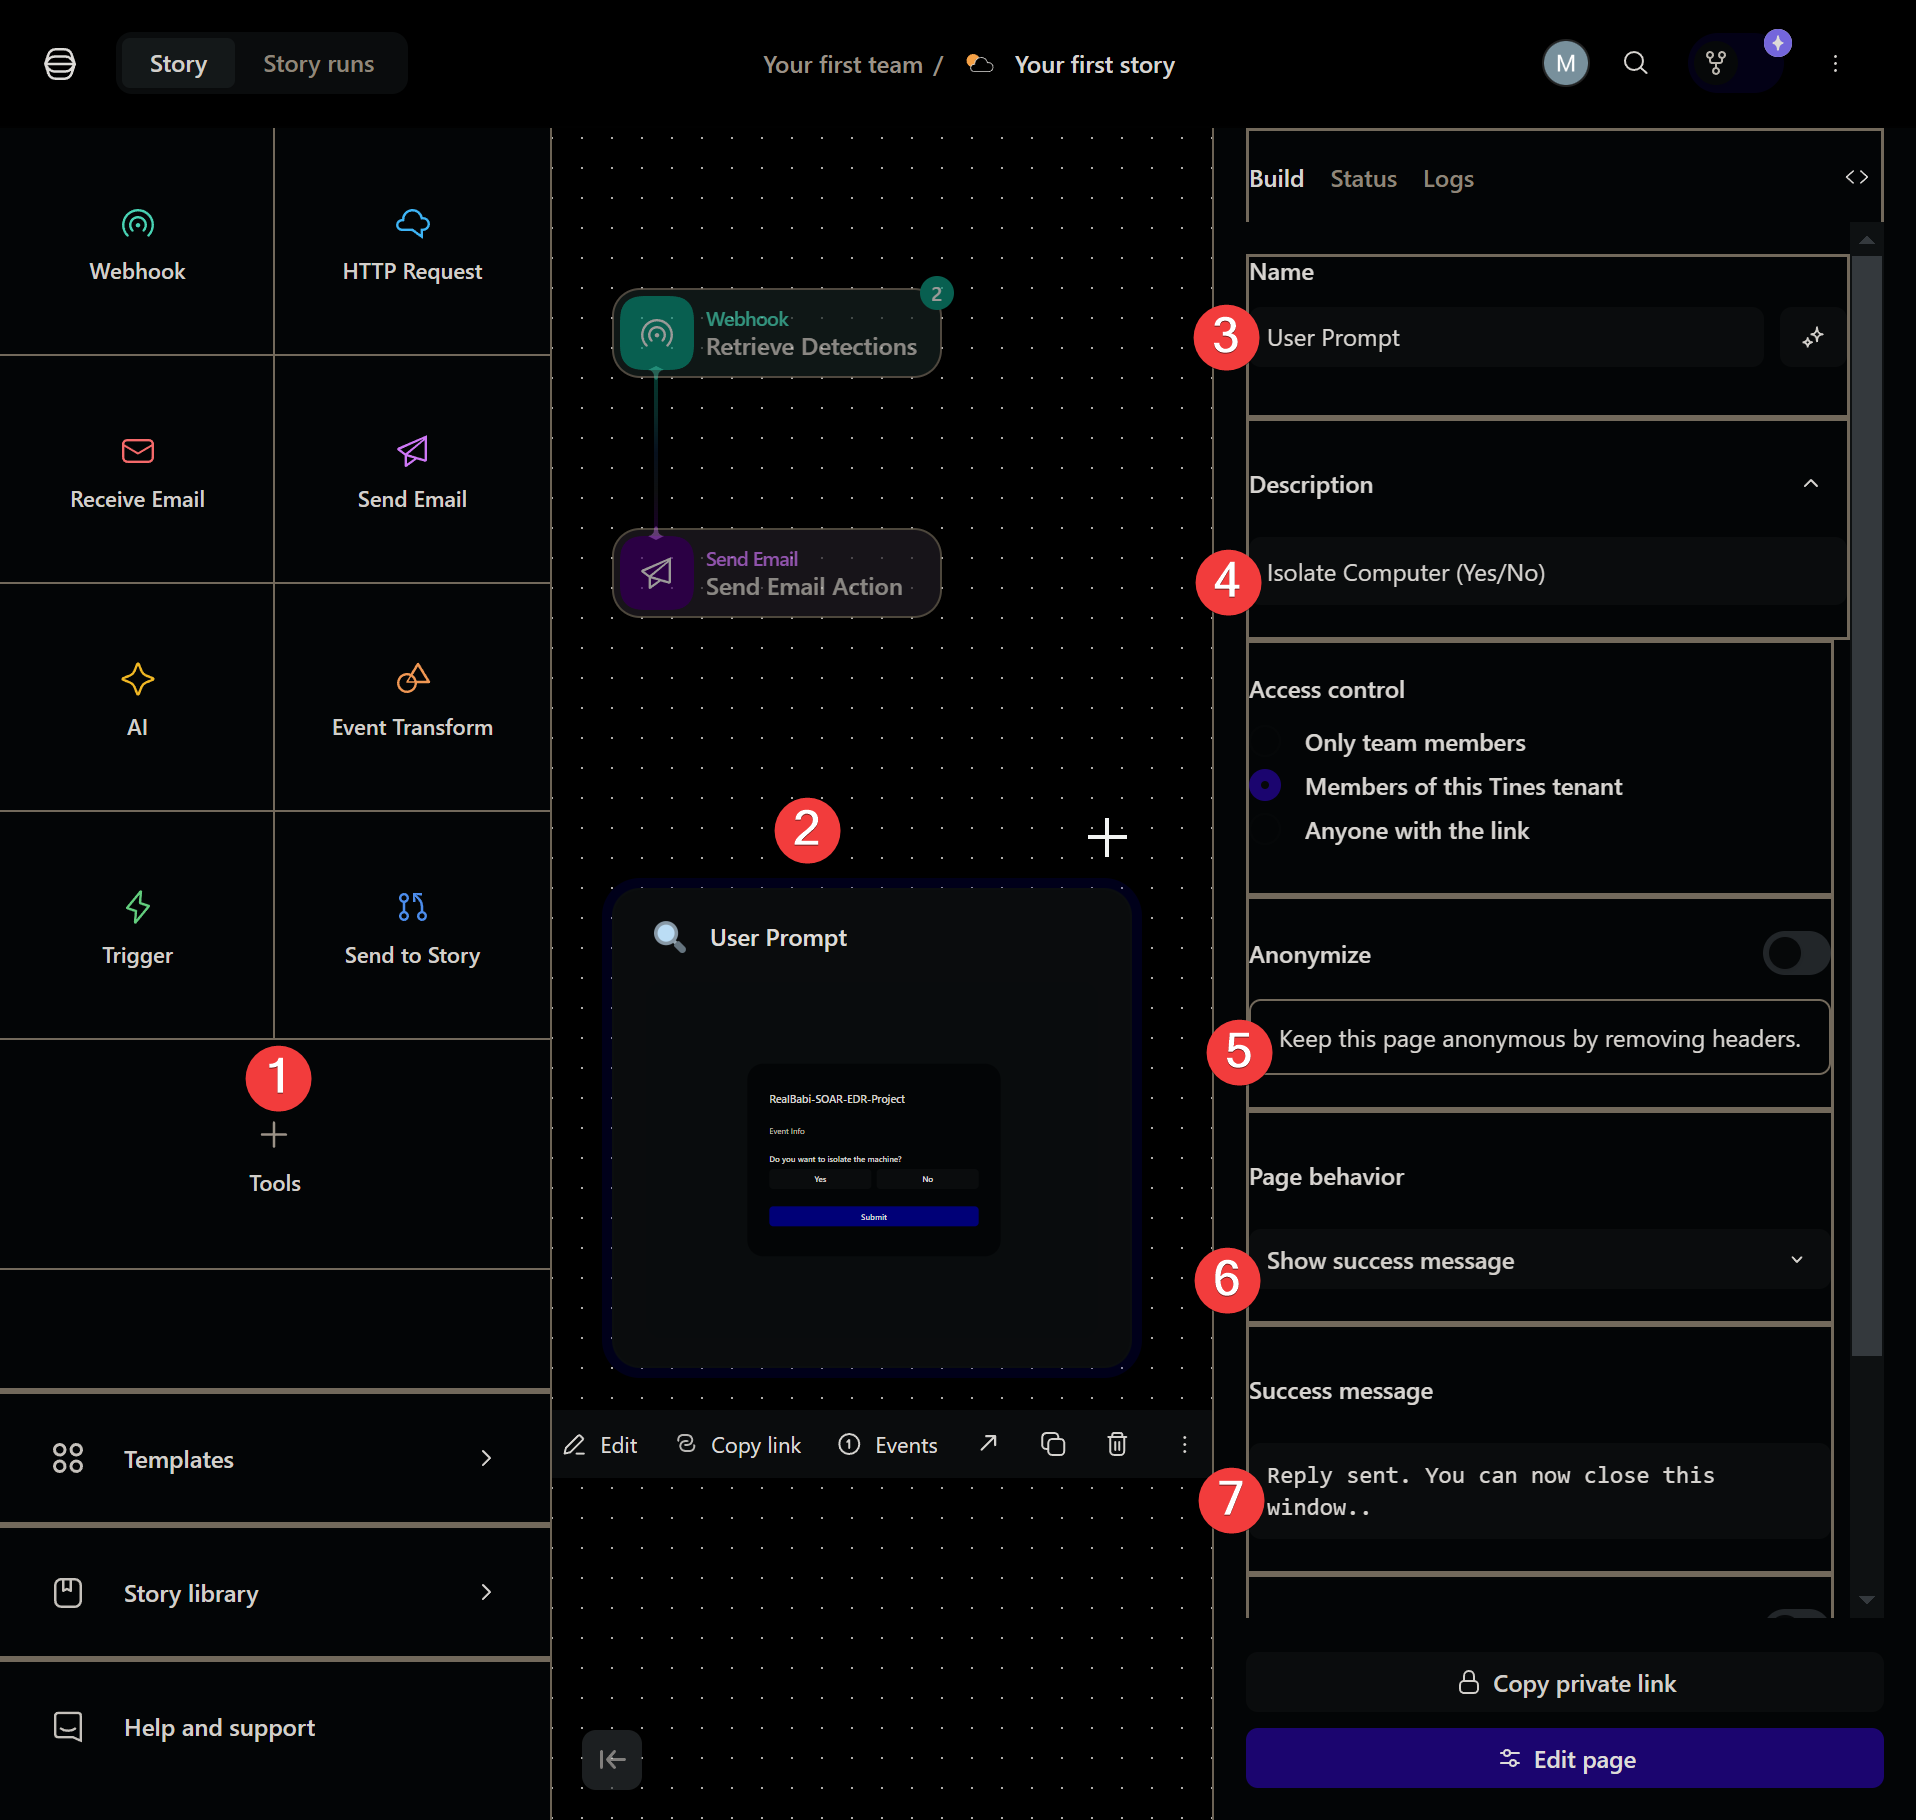
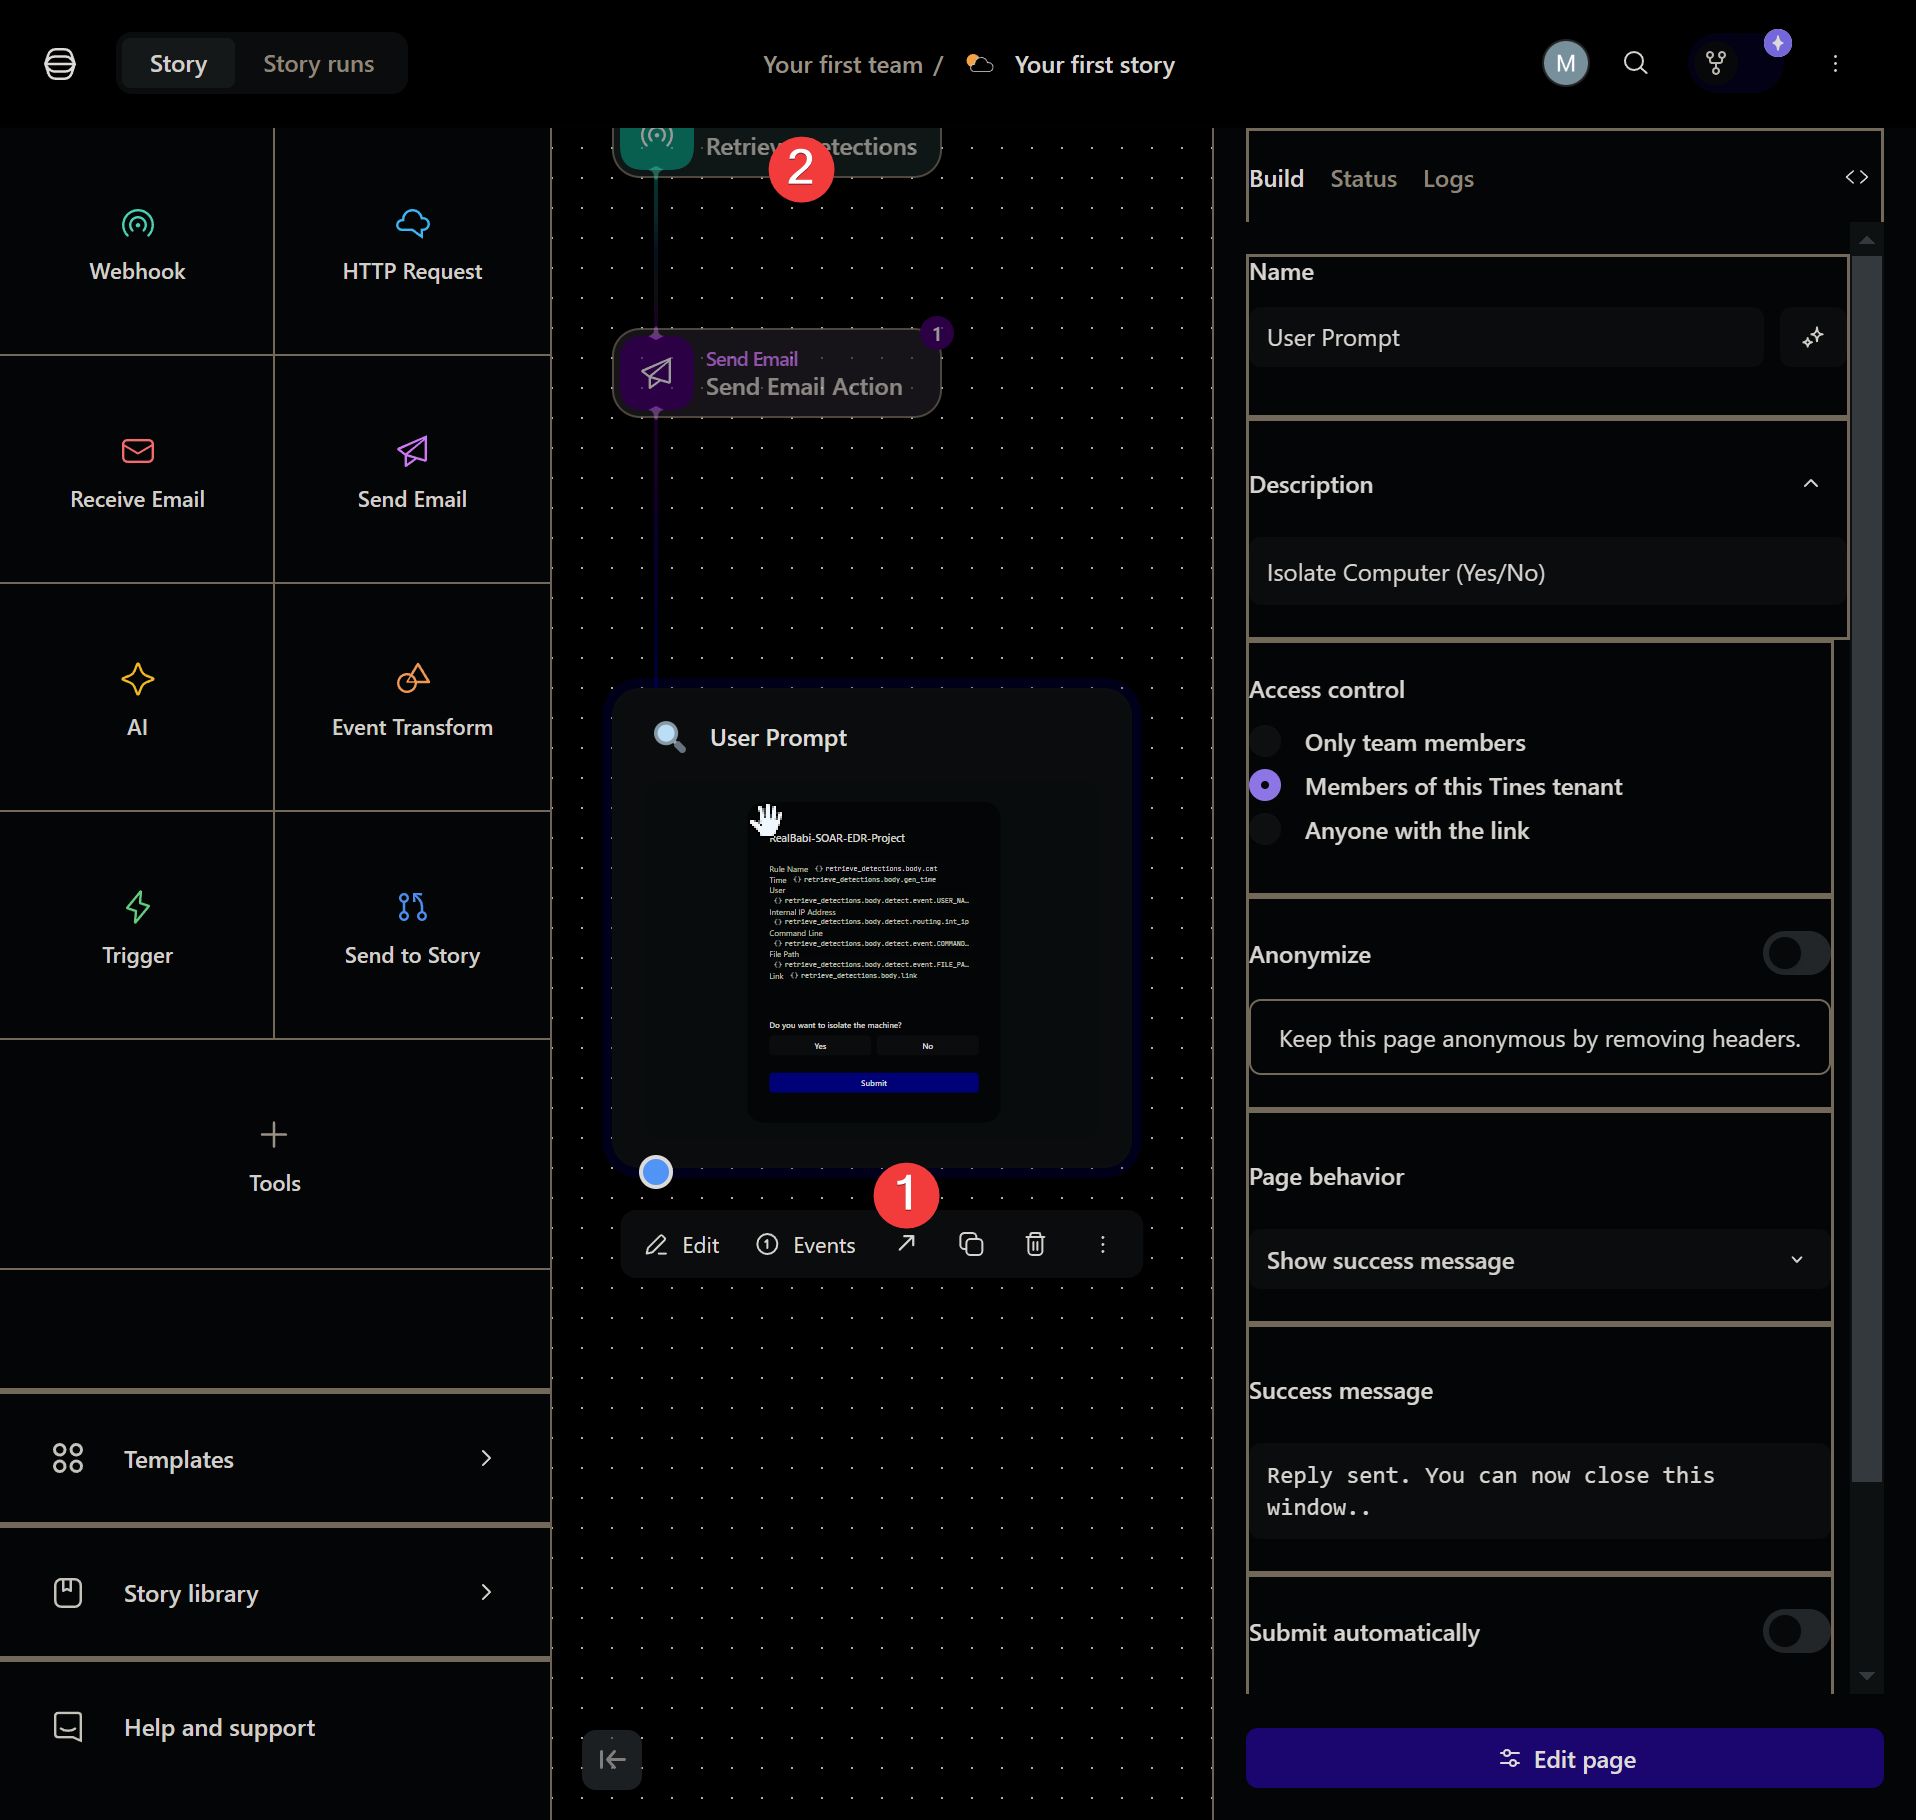
Double click the page. Now add a “Boolean” from the input fields as our action and change the description of the action and Name for the Boolean to a question prompting the user what to do.
We will later add event information into the description to allow users to make decisions based on presented information.
!
To get event information into our prompt, (1) go to the playbook (2) Access Events through the webhook (3) in the first event access the Body (4) now use the copy function next to each field of interest to copy the absolute path, not the information. and will place that into our Event Info field.
!
Click “Visit Page” to check if its working. Note: IF there is no page available, (2) reemit the event from the webhook selecting the first event. This is sometimes required to make the sequence playout to properly funnel information to all branches of the playbook.
!
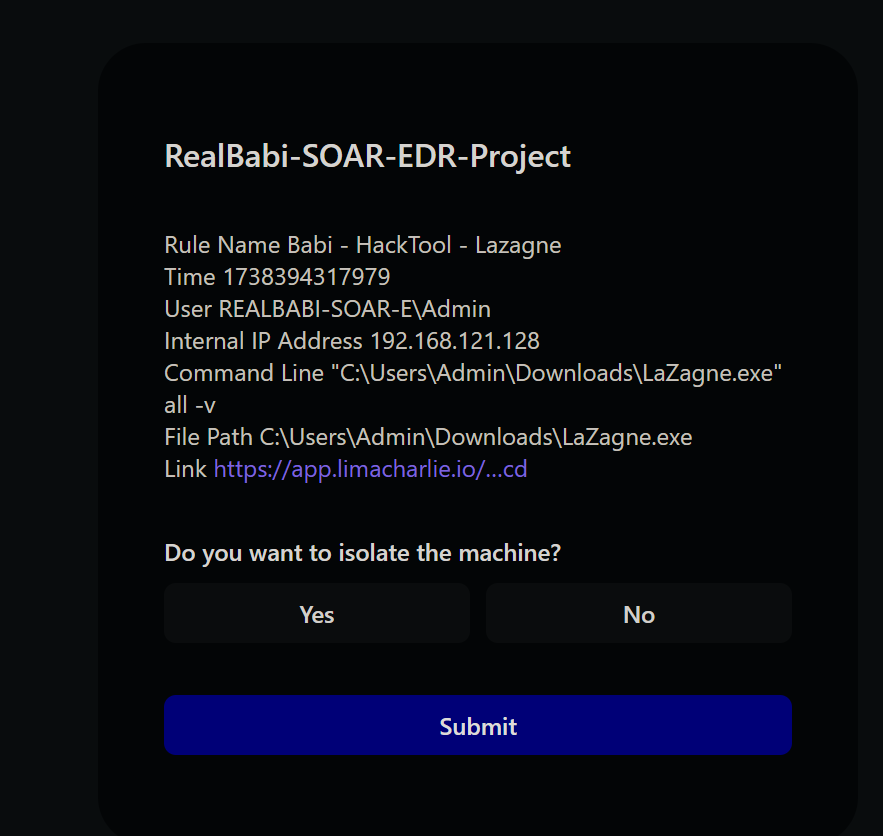
Result should look like this, with the link working properly since it is written in Markdown.
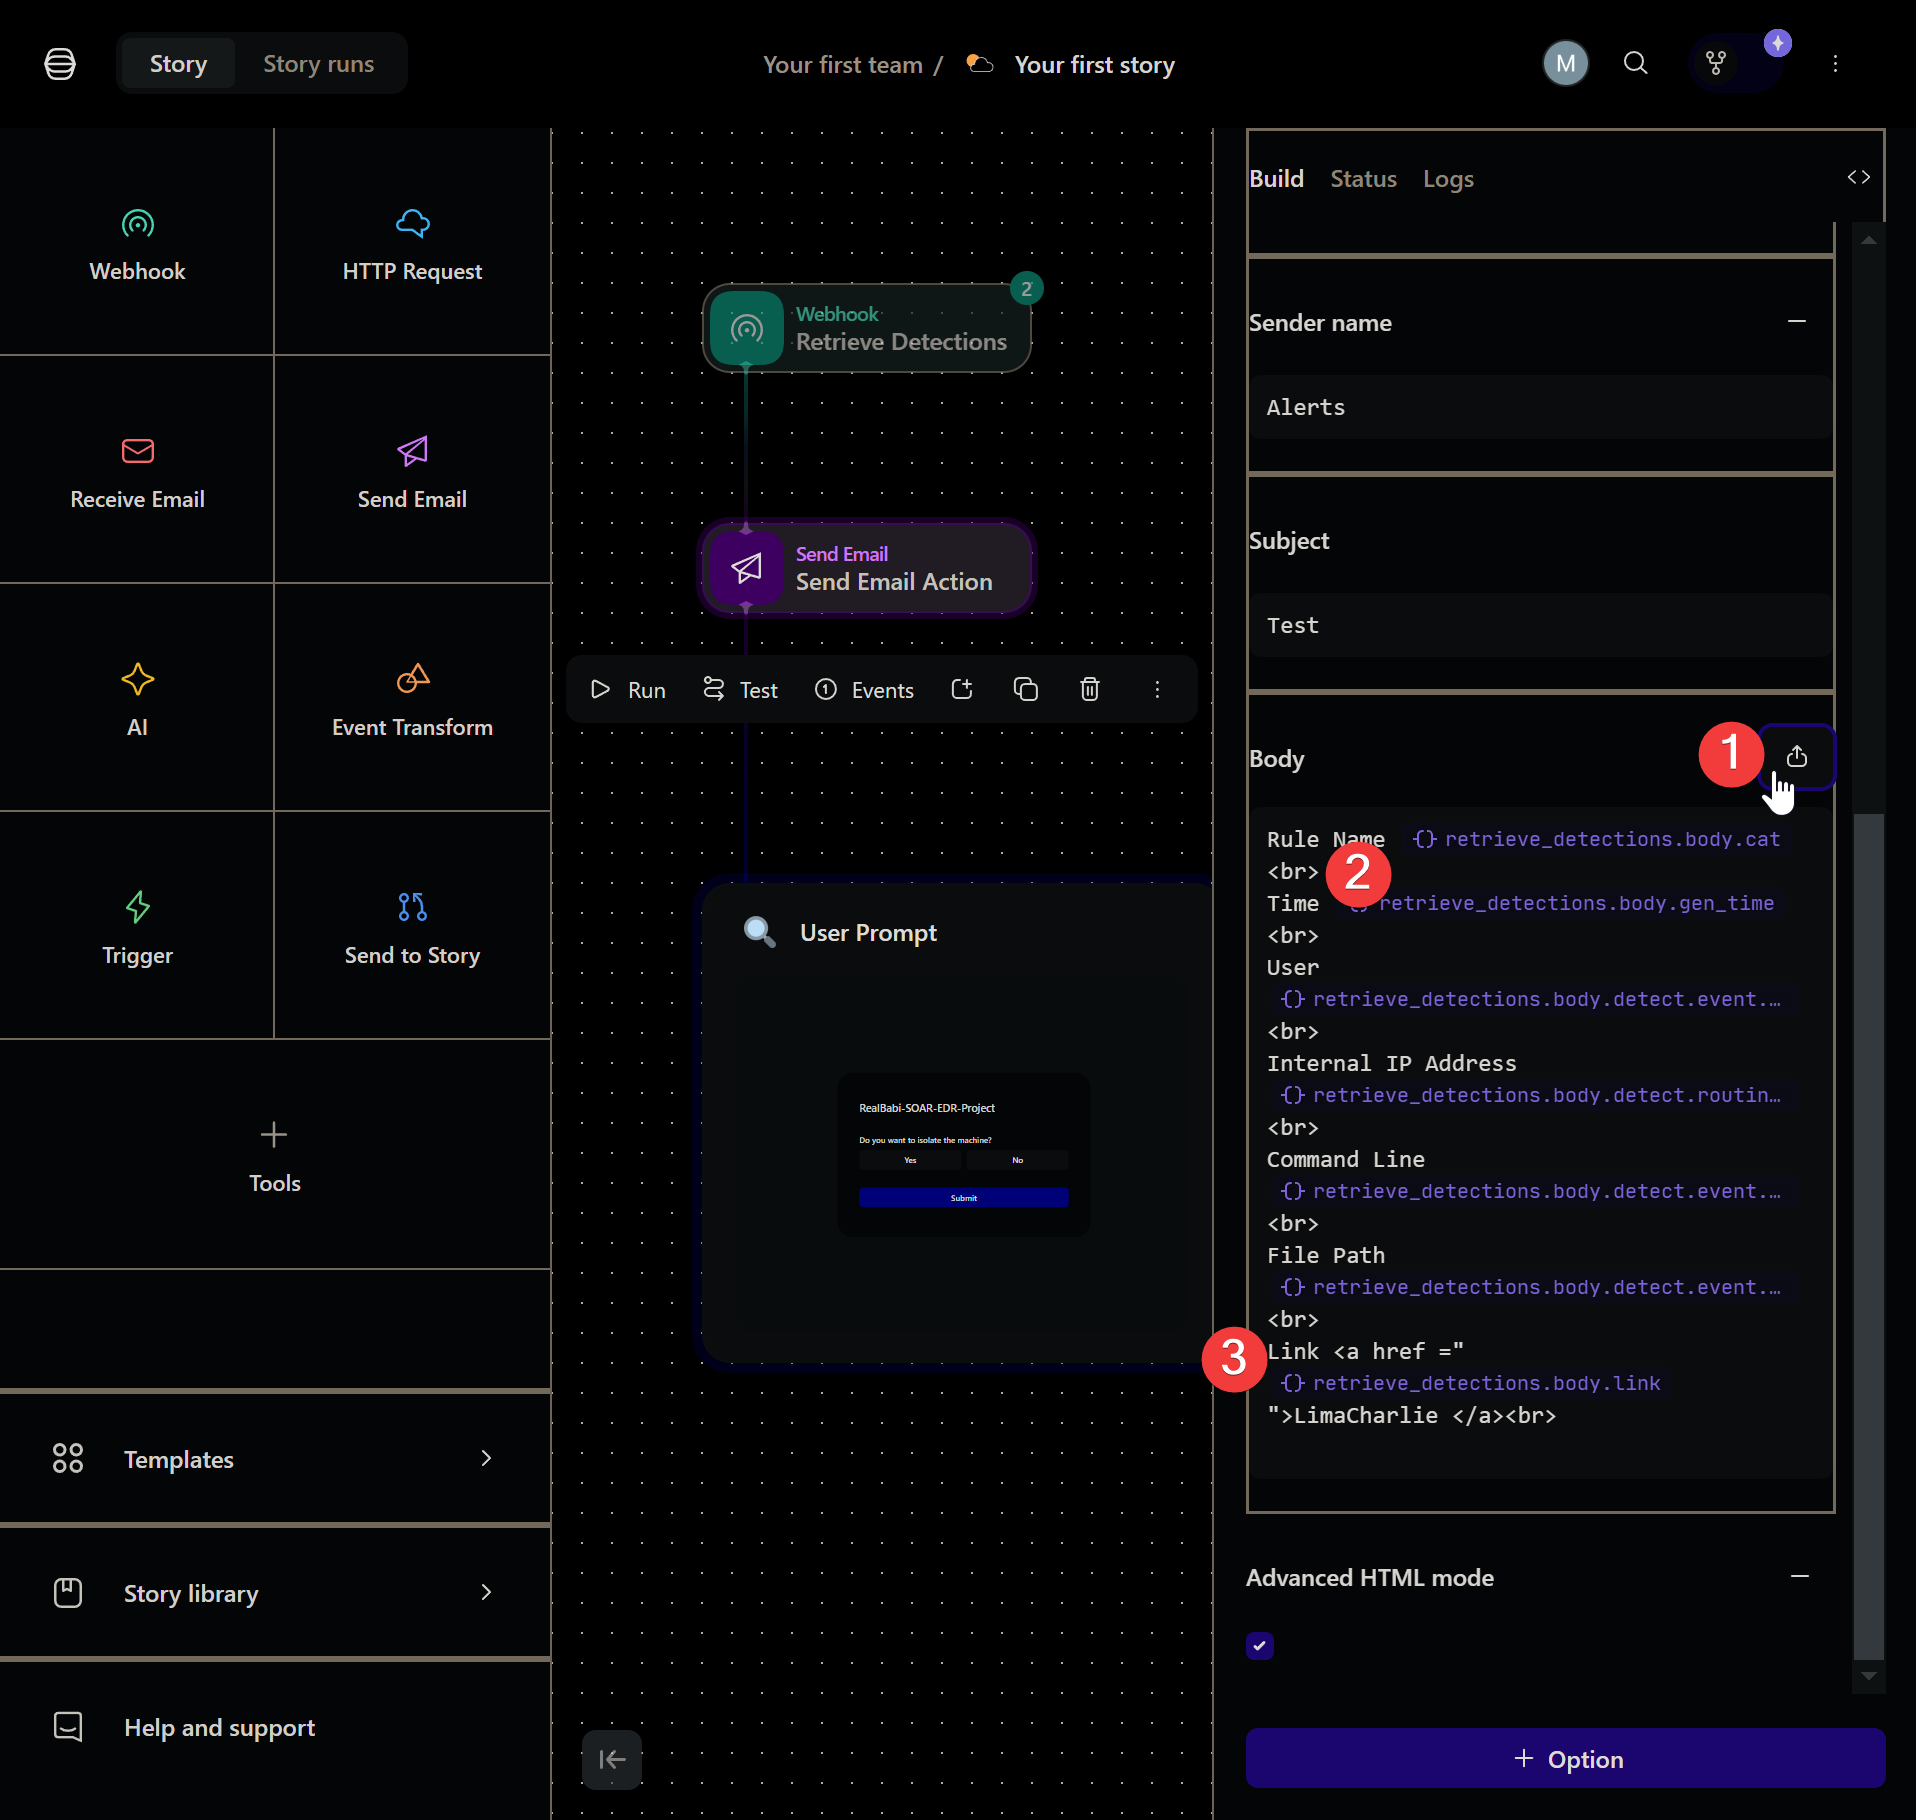
! Do the same with the Email portion, but make sure to click “View HTML” and add
 <br> = Break and <a href{link}>Title</a> = clickable link This will make our text look good in the email instead of showing as one big string.
!
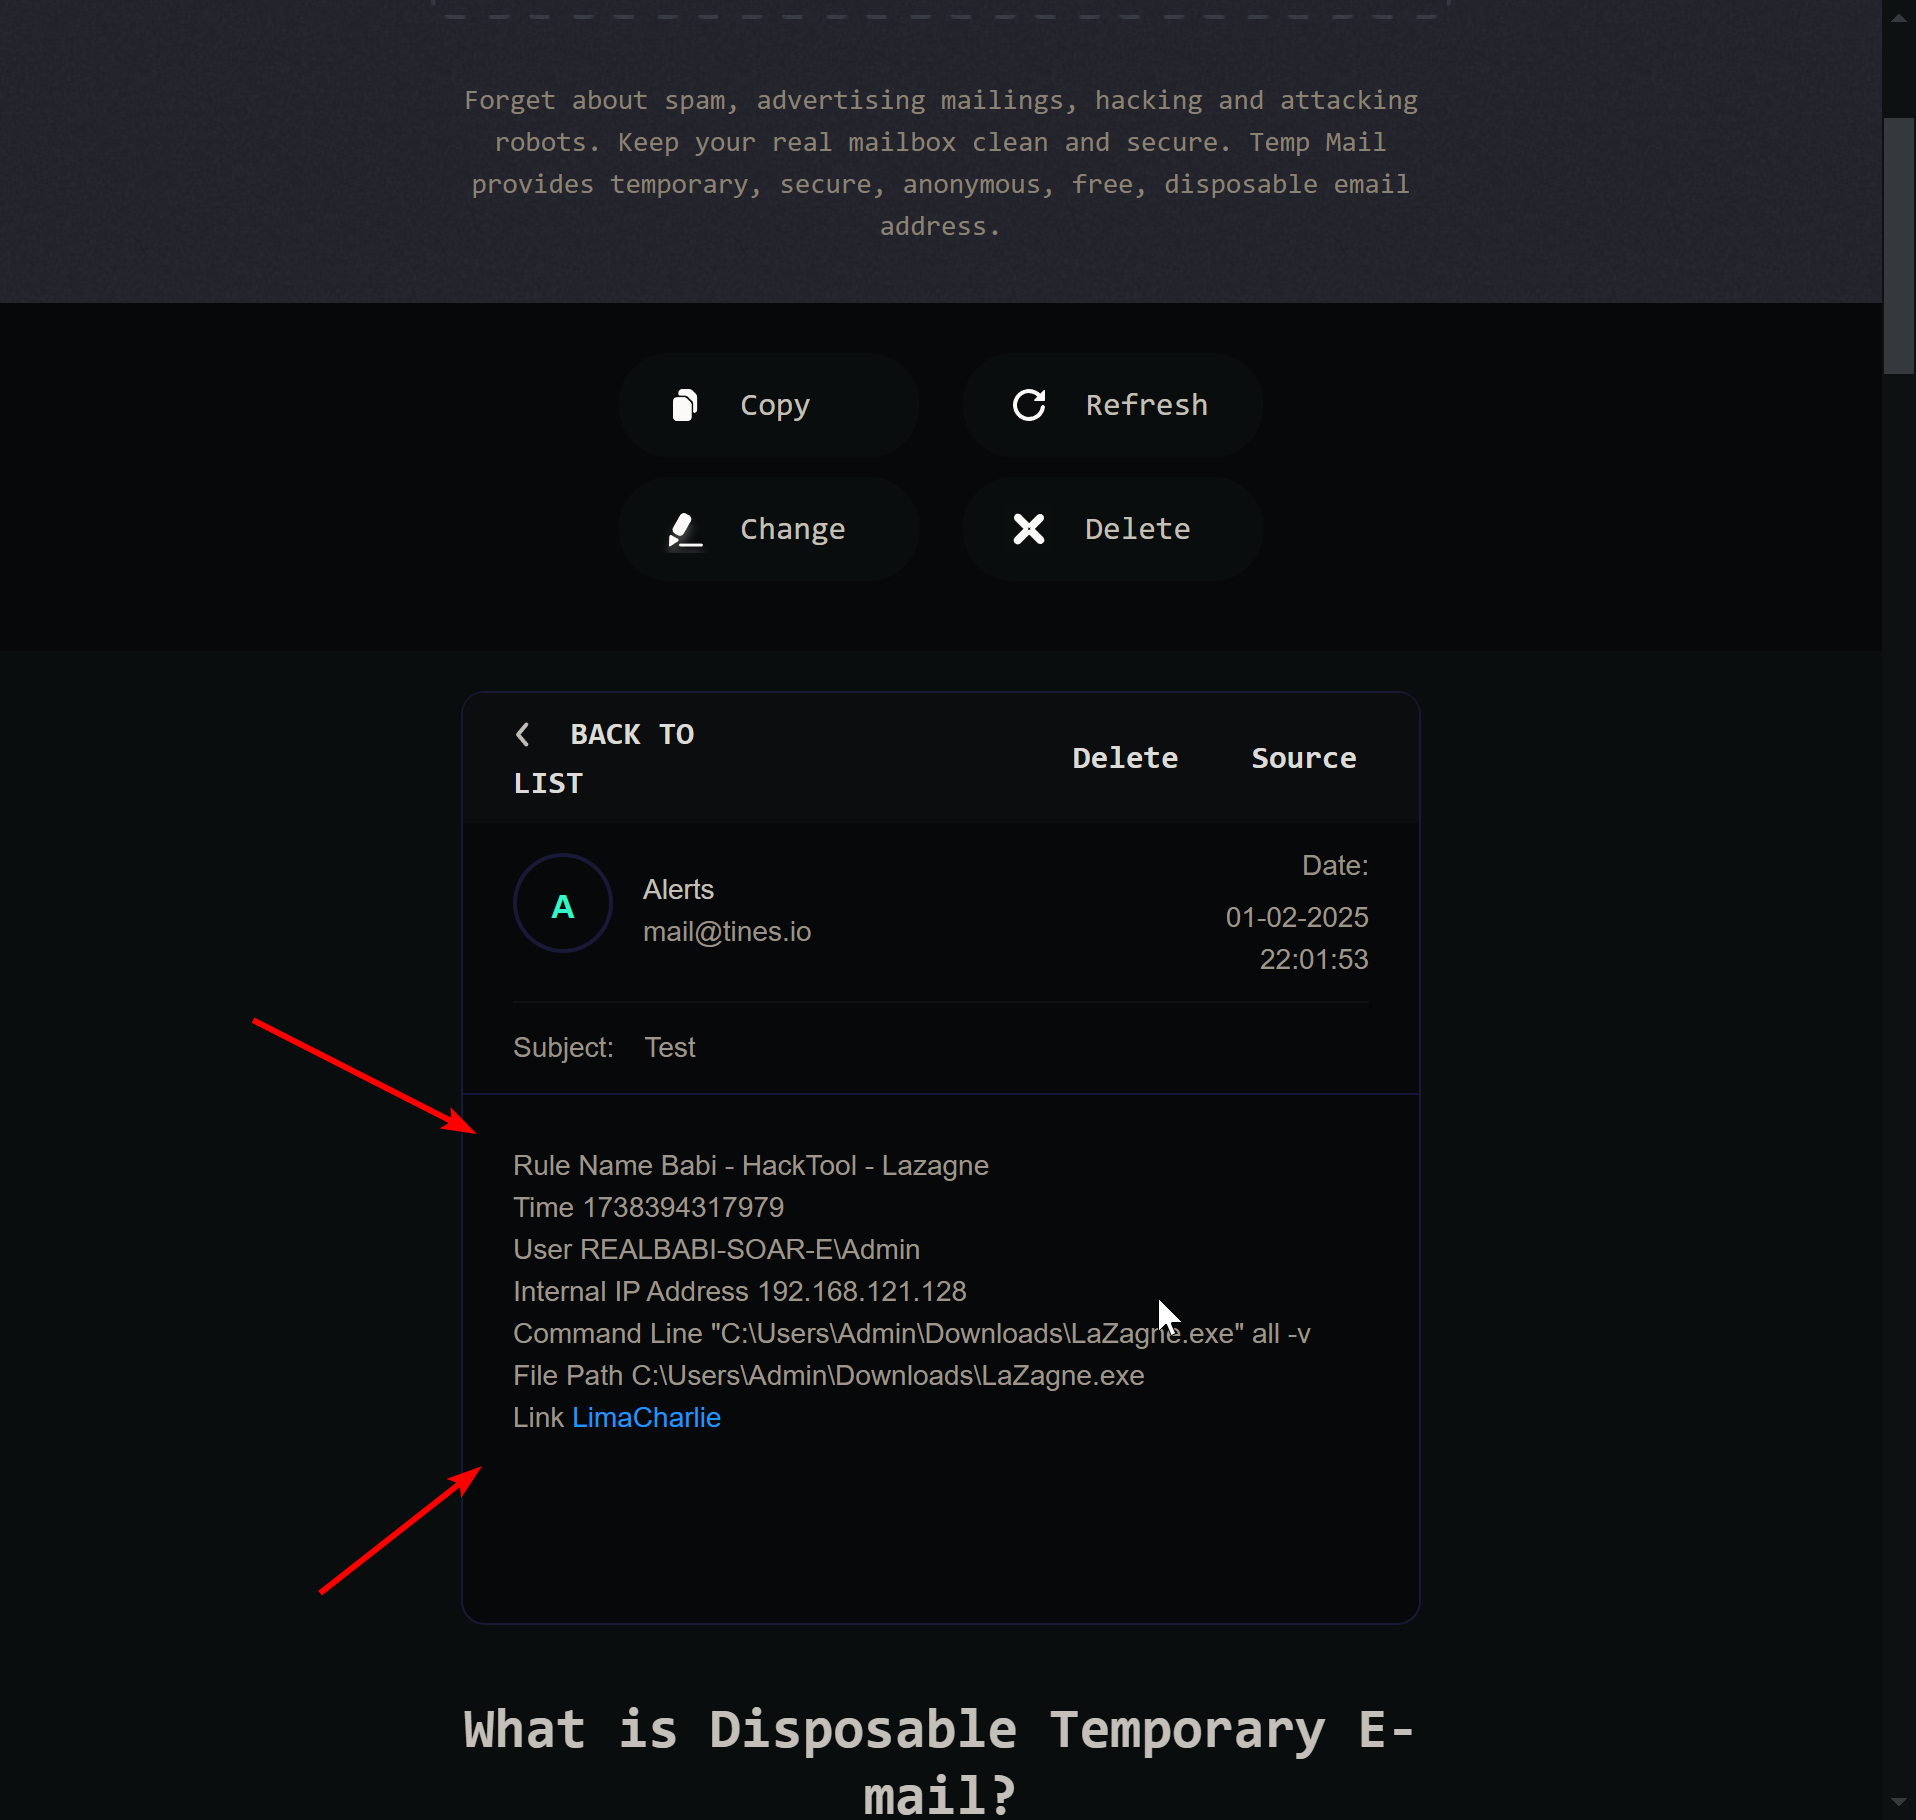
Test the new configuration using “Test” button for the email and select the first event. The link is clickable and takes me to the event in LimaCharlie, success.
!
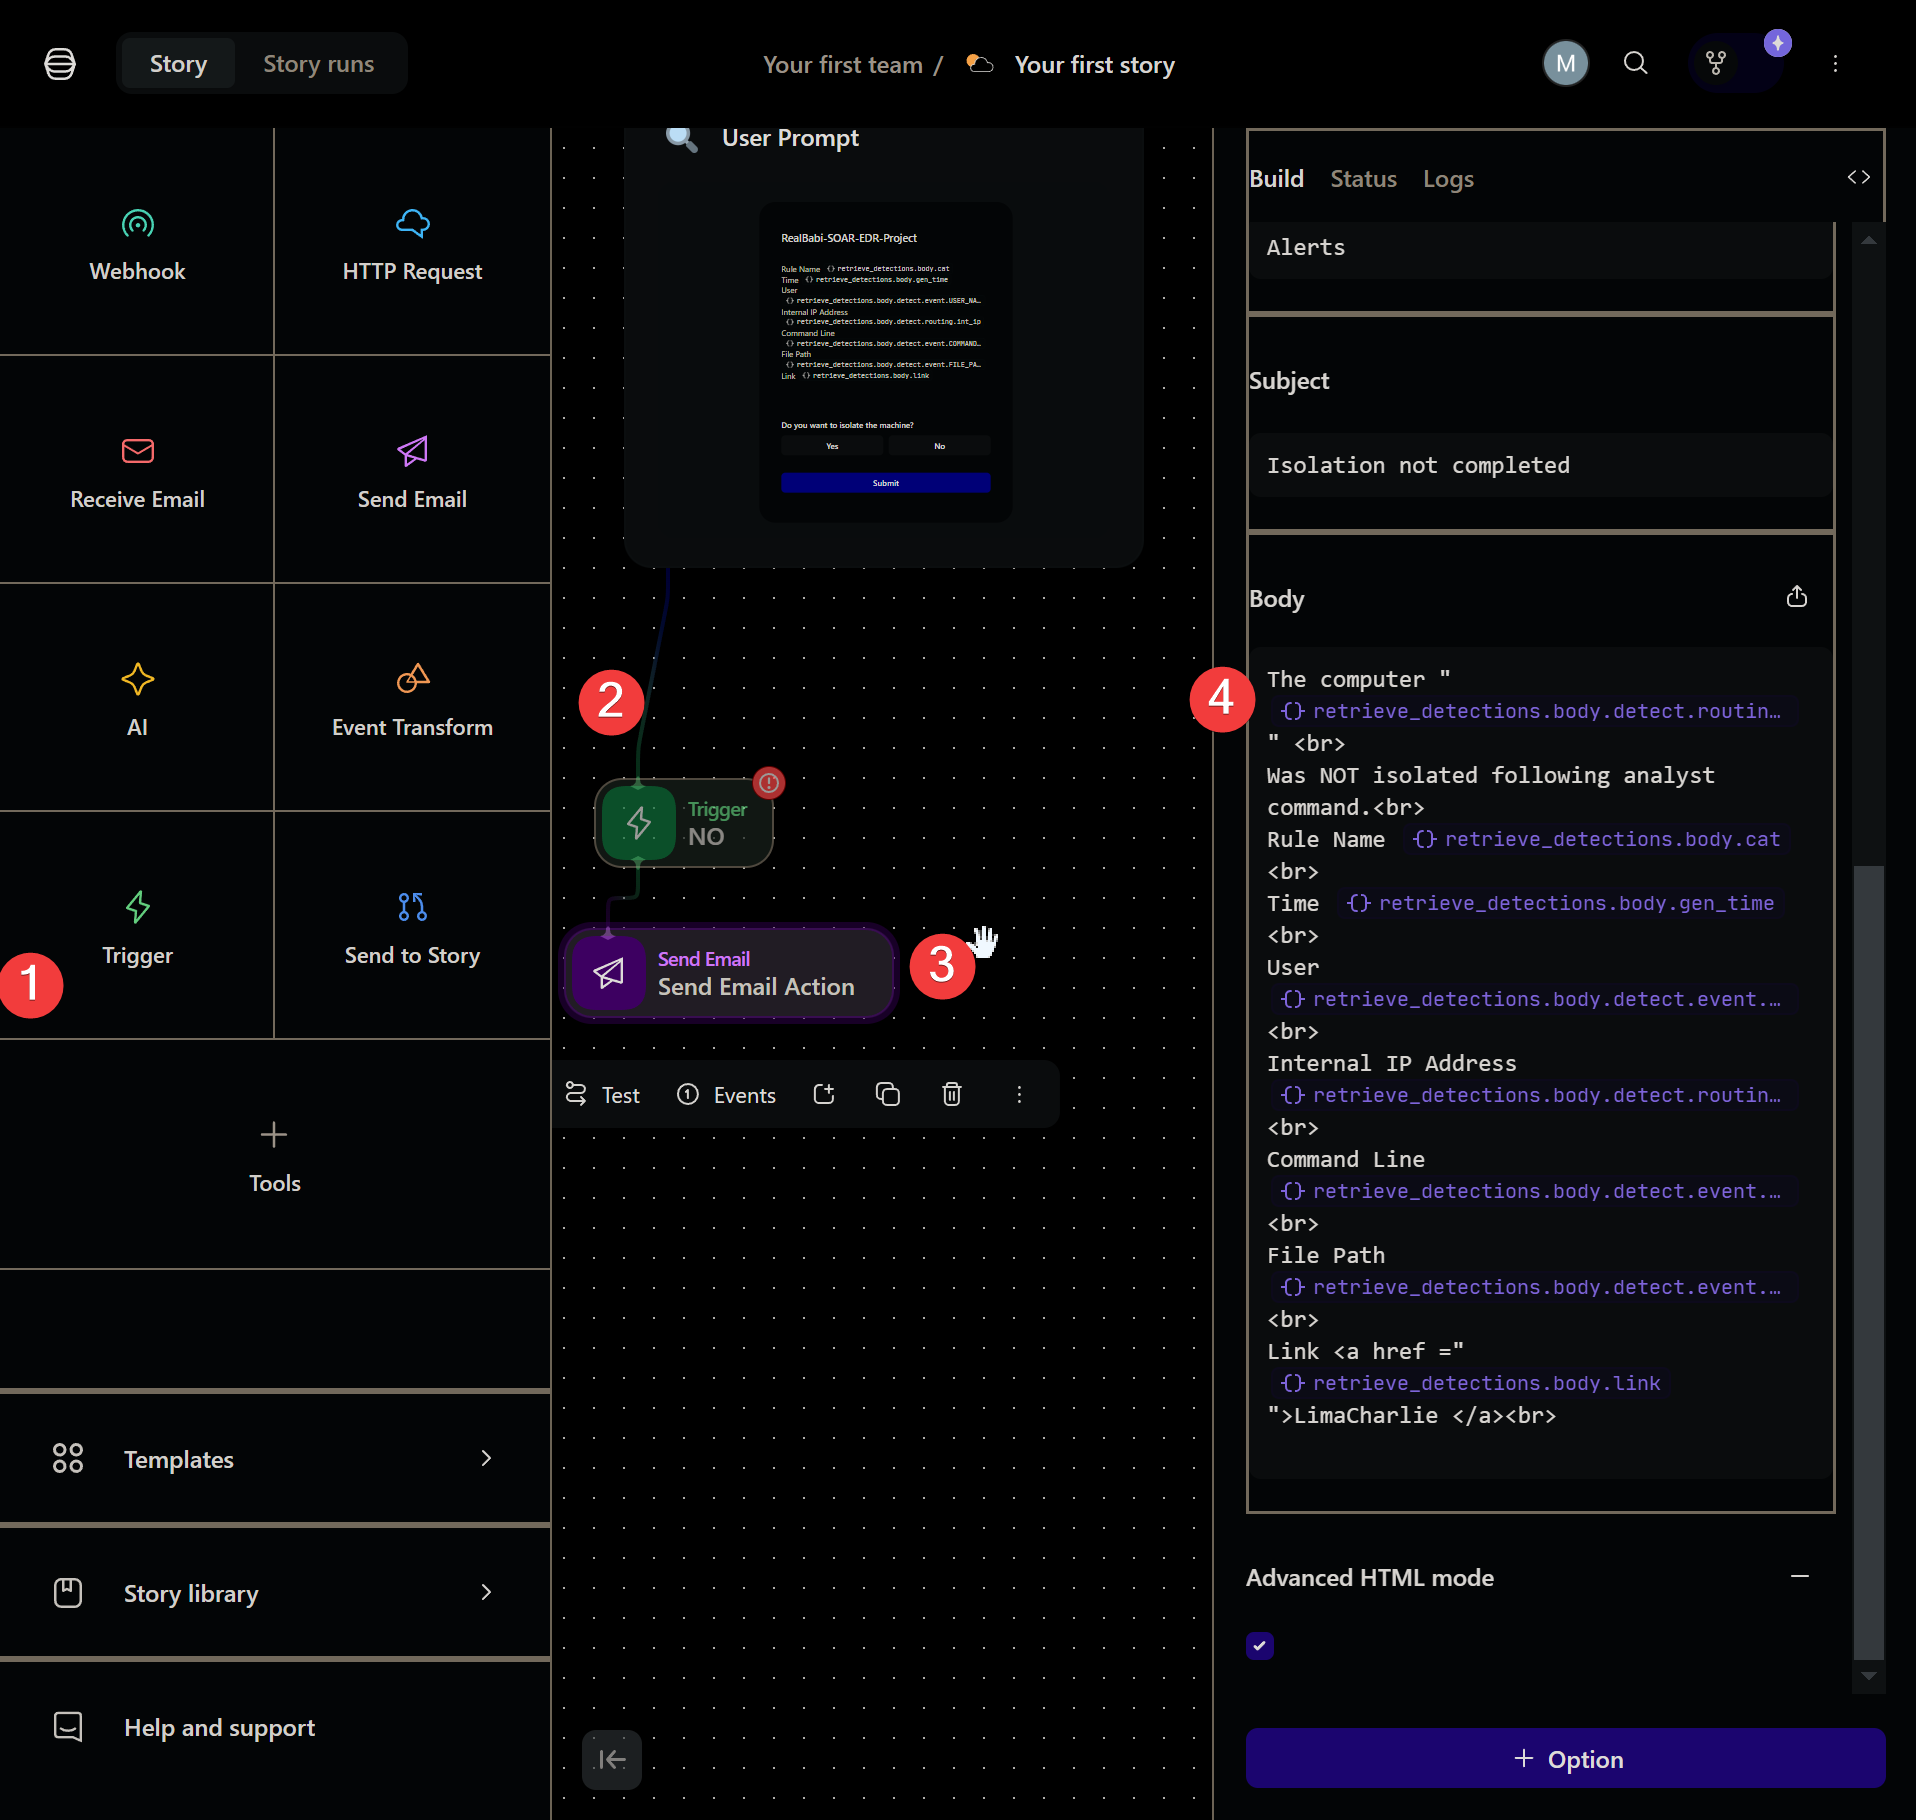
Add “No” action for the response by dragging a trigger and don’t forget the connections. Note: if sensor information to be included cannot be found, the connections are probably missing.
(4) Add appropriate text to signify that the machine was not isolated and include the machine name by following “Detection>body>detect>routing>hostname.” Note: It is best to let analysts know which machine is mentioned to eliminate the need for manual searching.
!
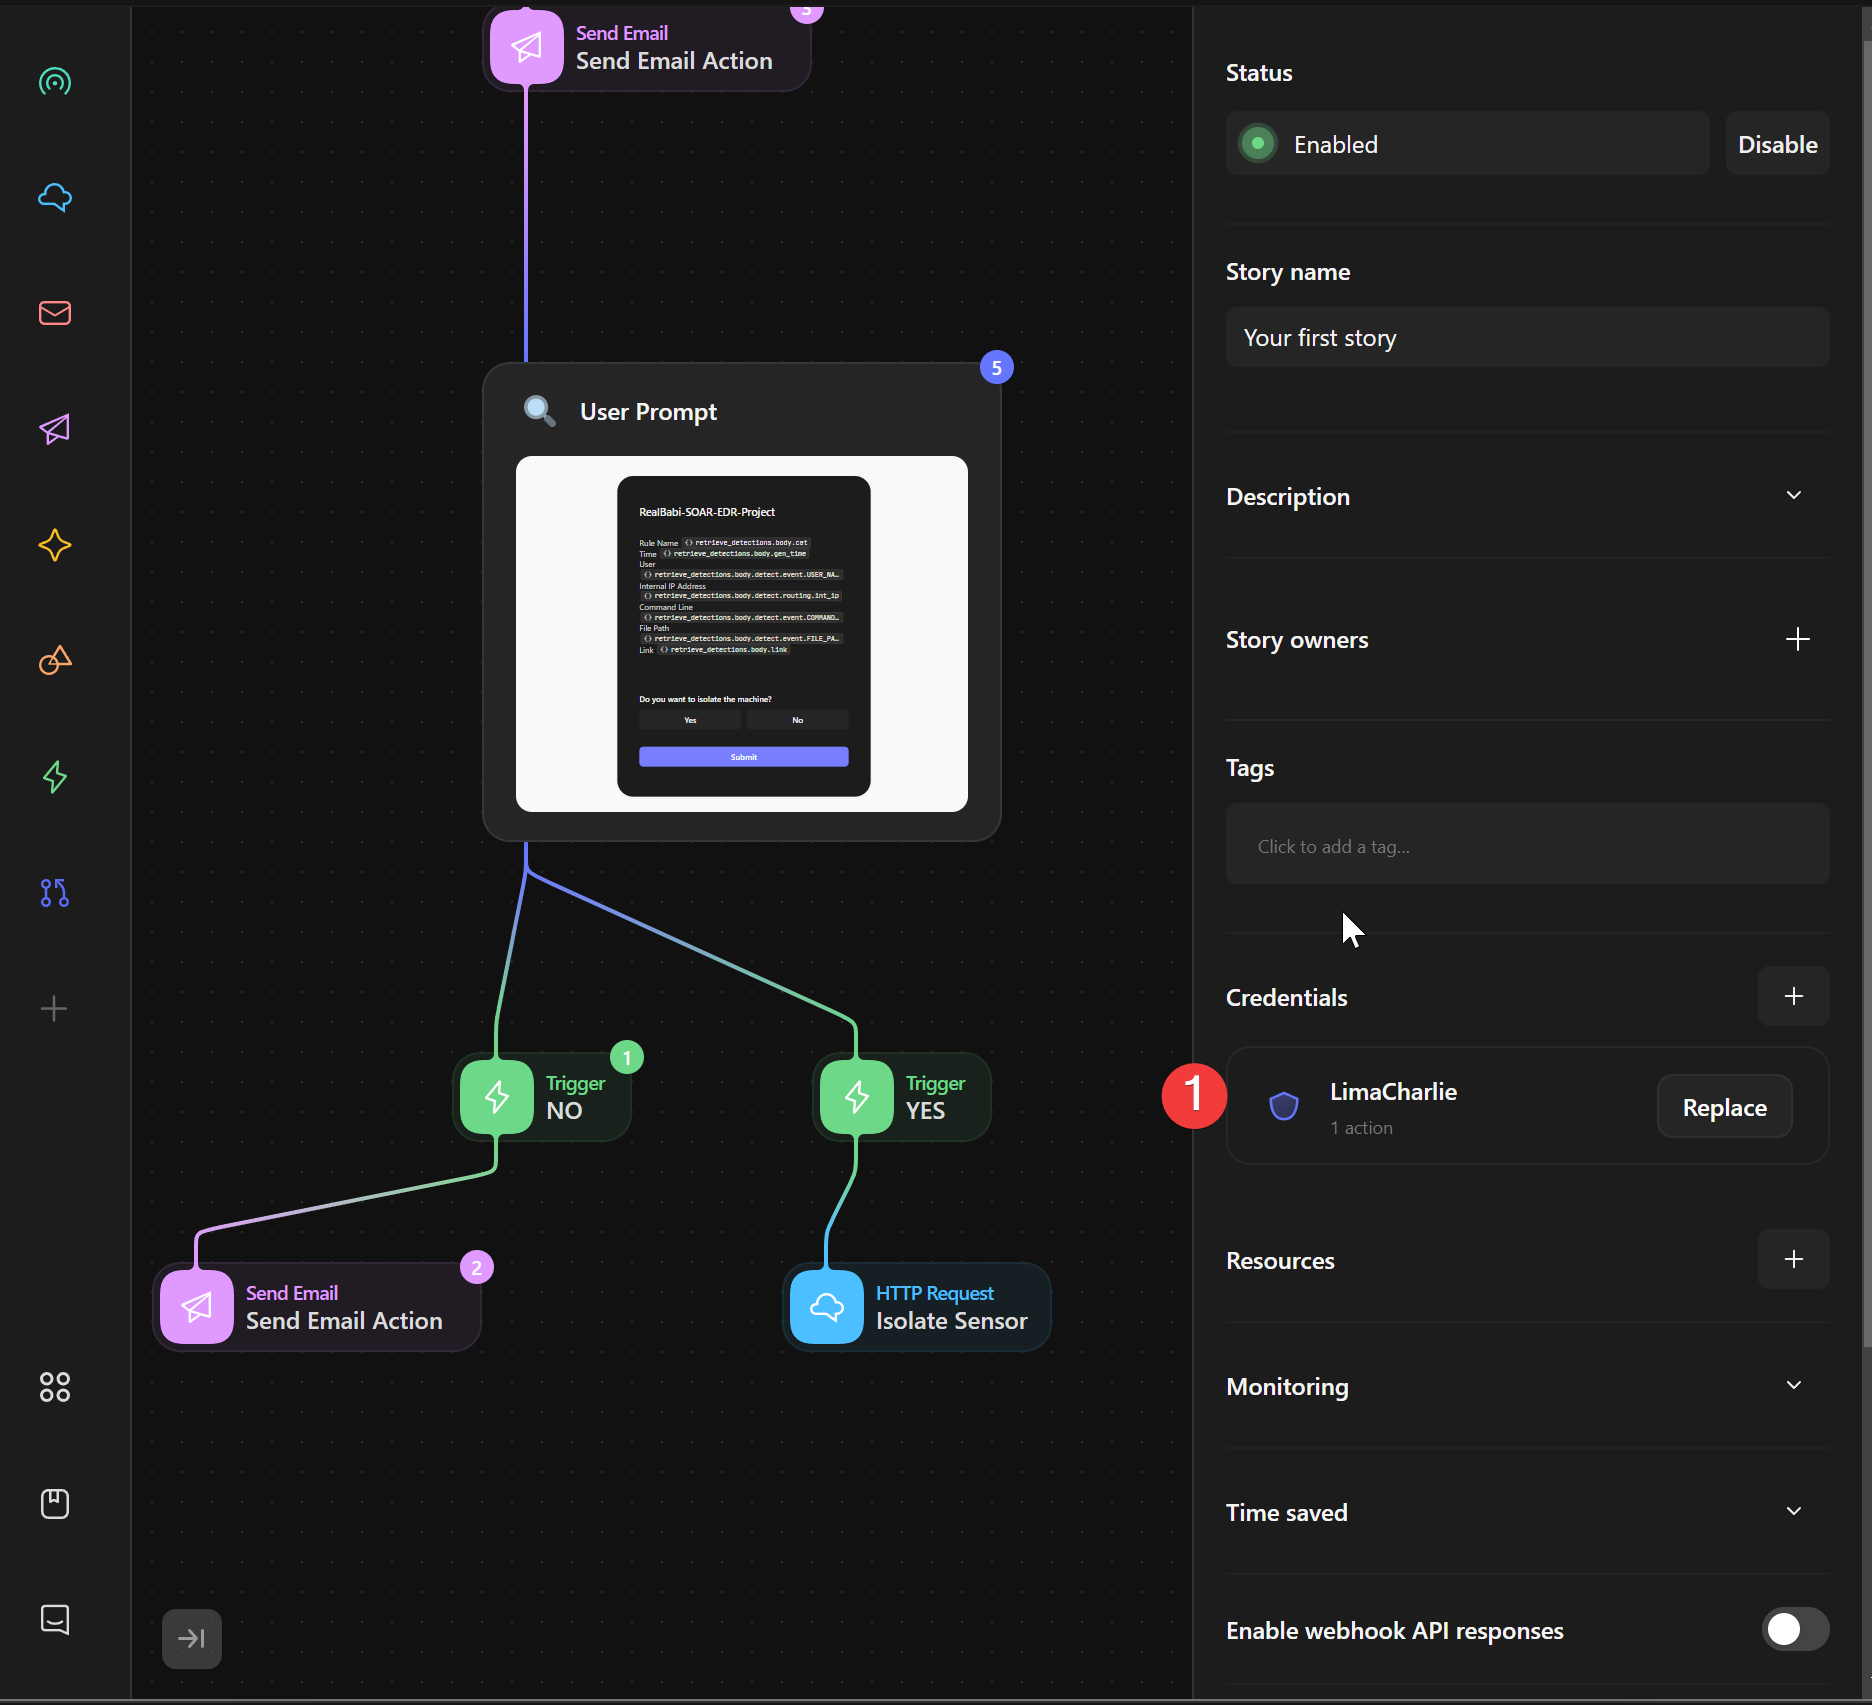
Add a Trigger for YES action and copy the Rules section from NO because we are going to follow the same path to retrieve our argument and set the action to true.
!
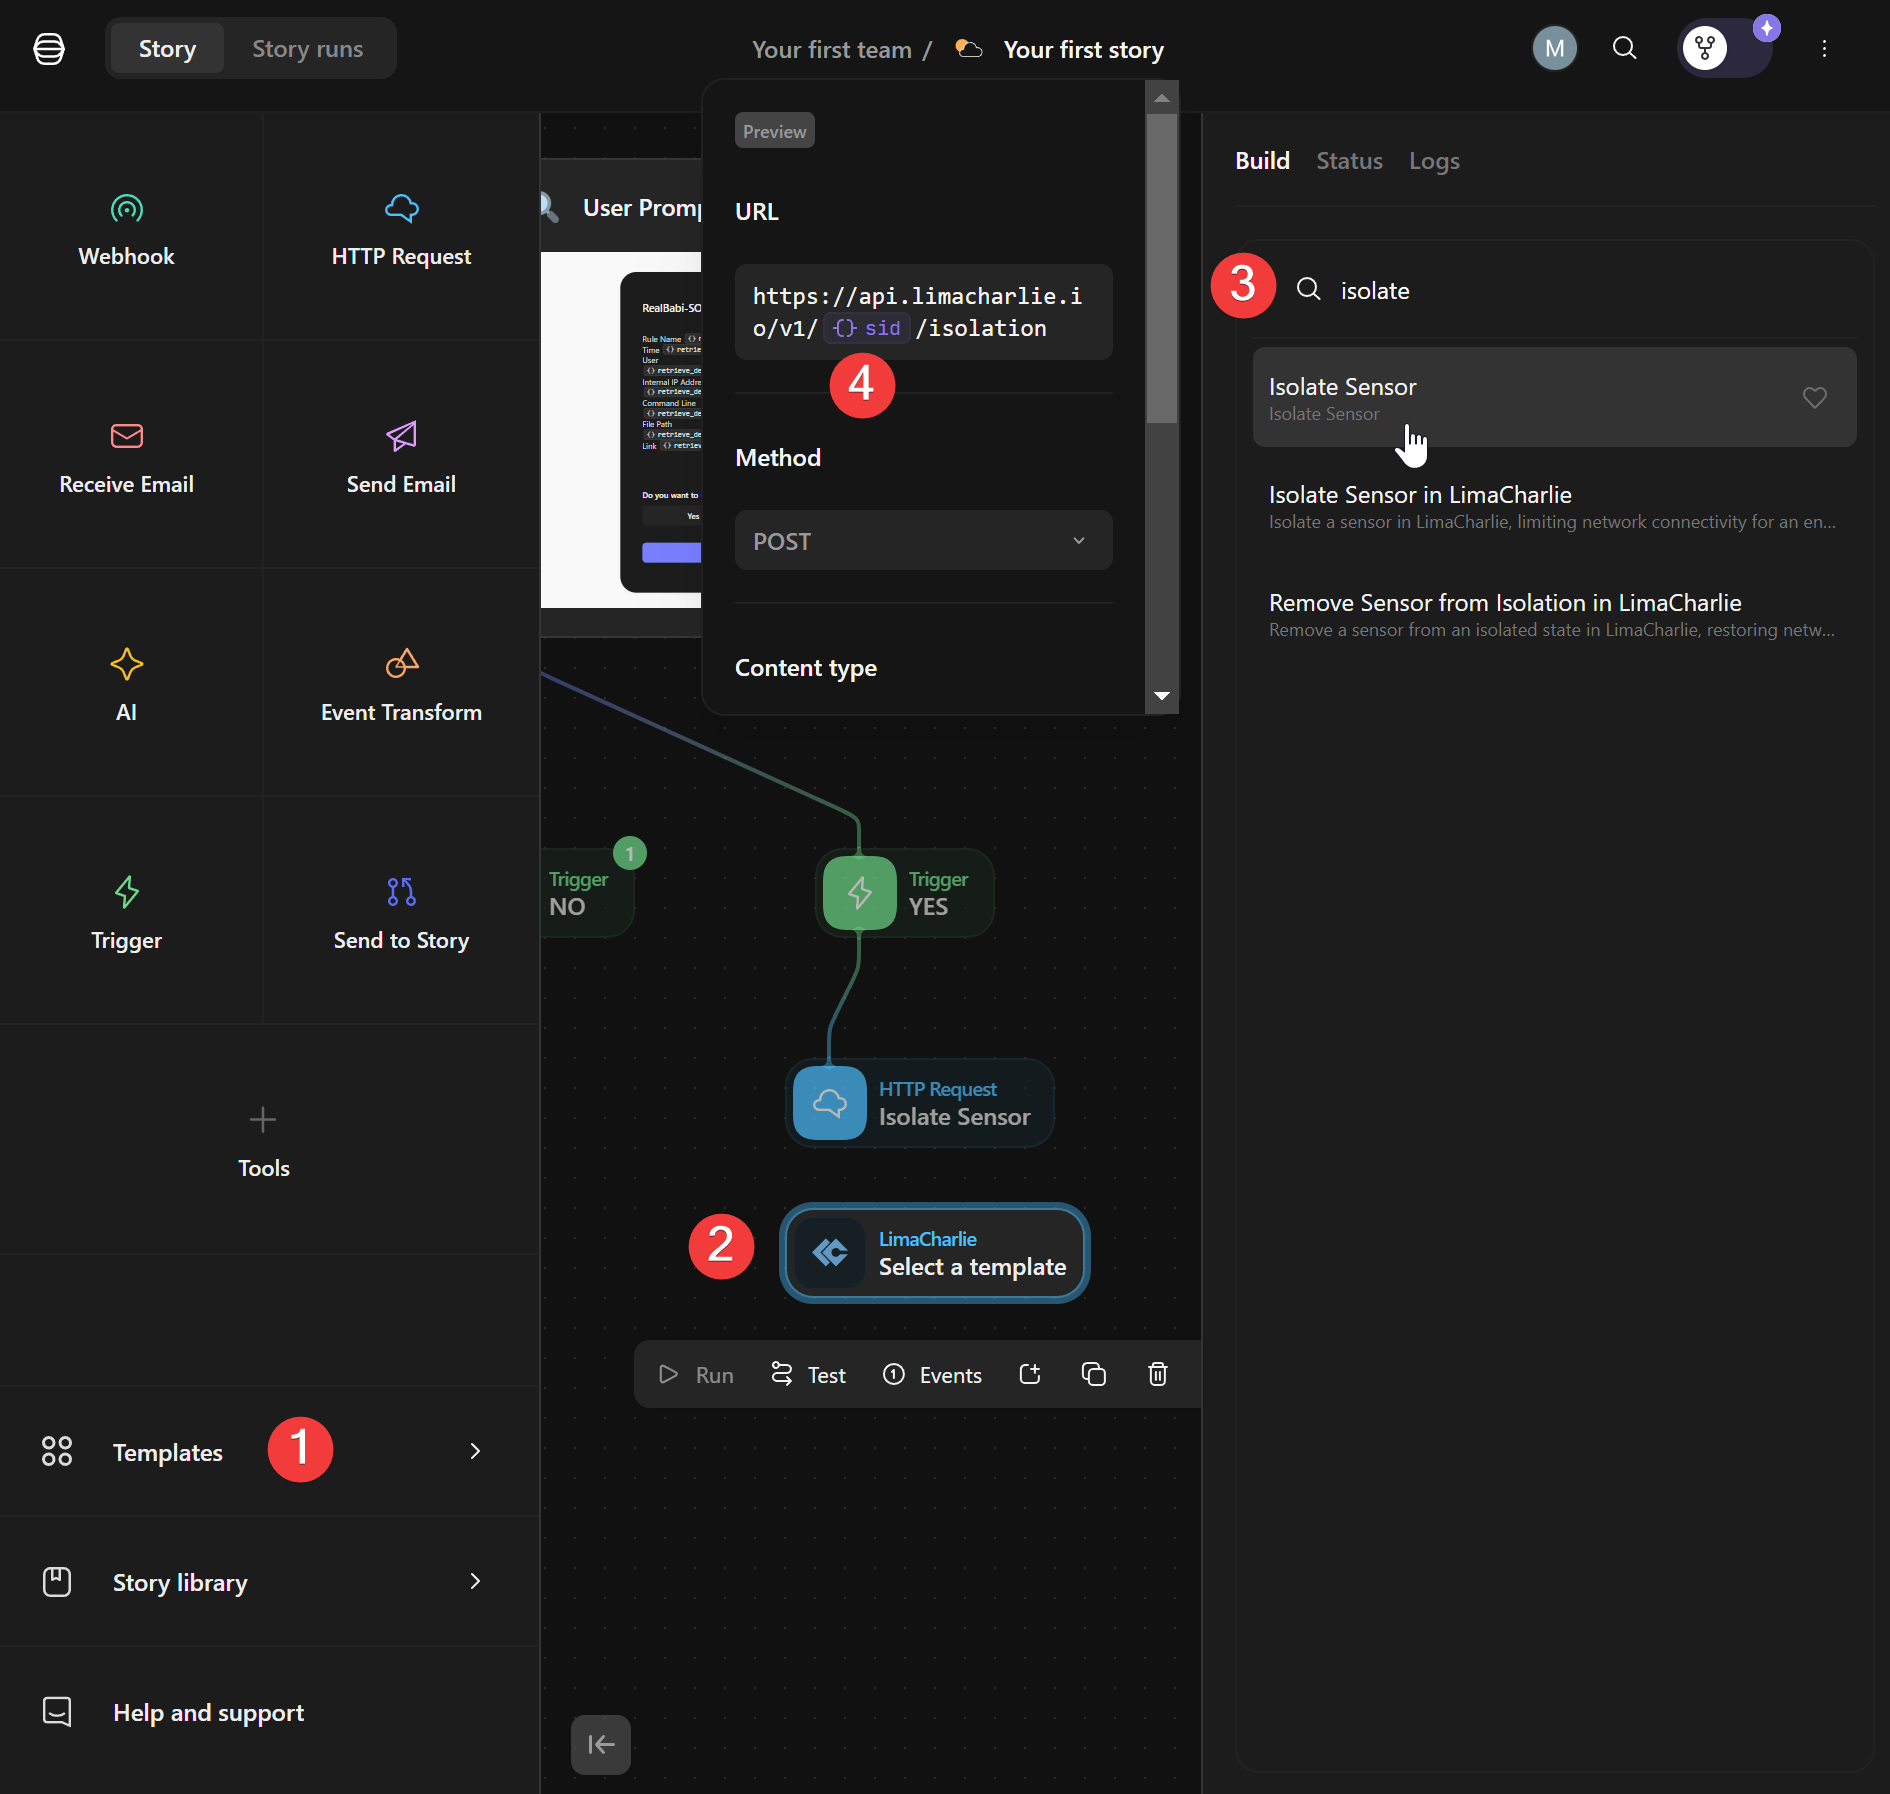
For the response section, go to Template and search for LimaCharlie. This will tell Tines how to route actions to LimaCharlie. Drag that template to your screen and search for “isolate” in the search bar for the template. Will use the template using {}sid since that is retrieved by the webhook.
!
Replace the {}sid with {}retrieve_detections.body.routing.sid to get the Sensor ID retrieved by the webhook. Double check the path through webhook events.
!
Click away from the HTTP Request you will see that our action require authentication credentials to access LimaCharlie
!
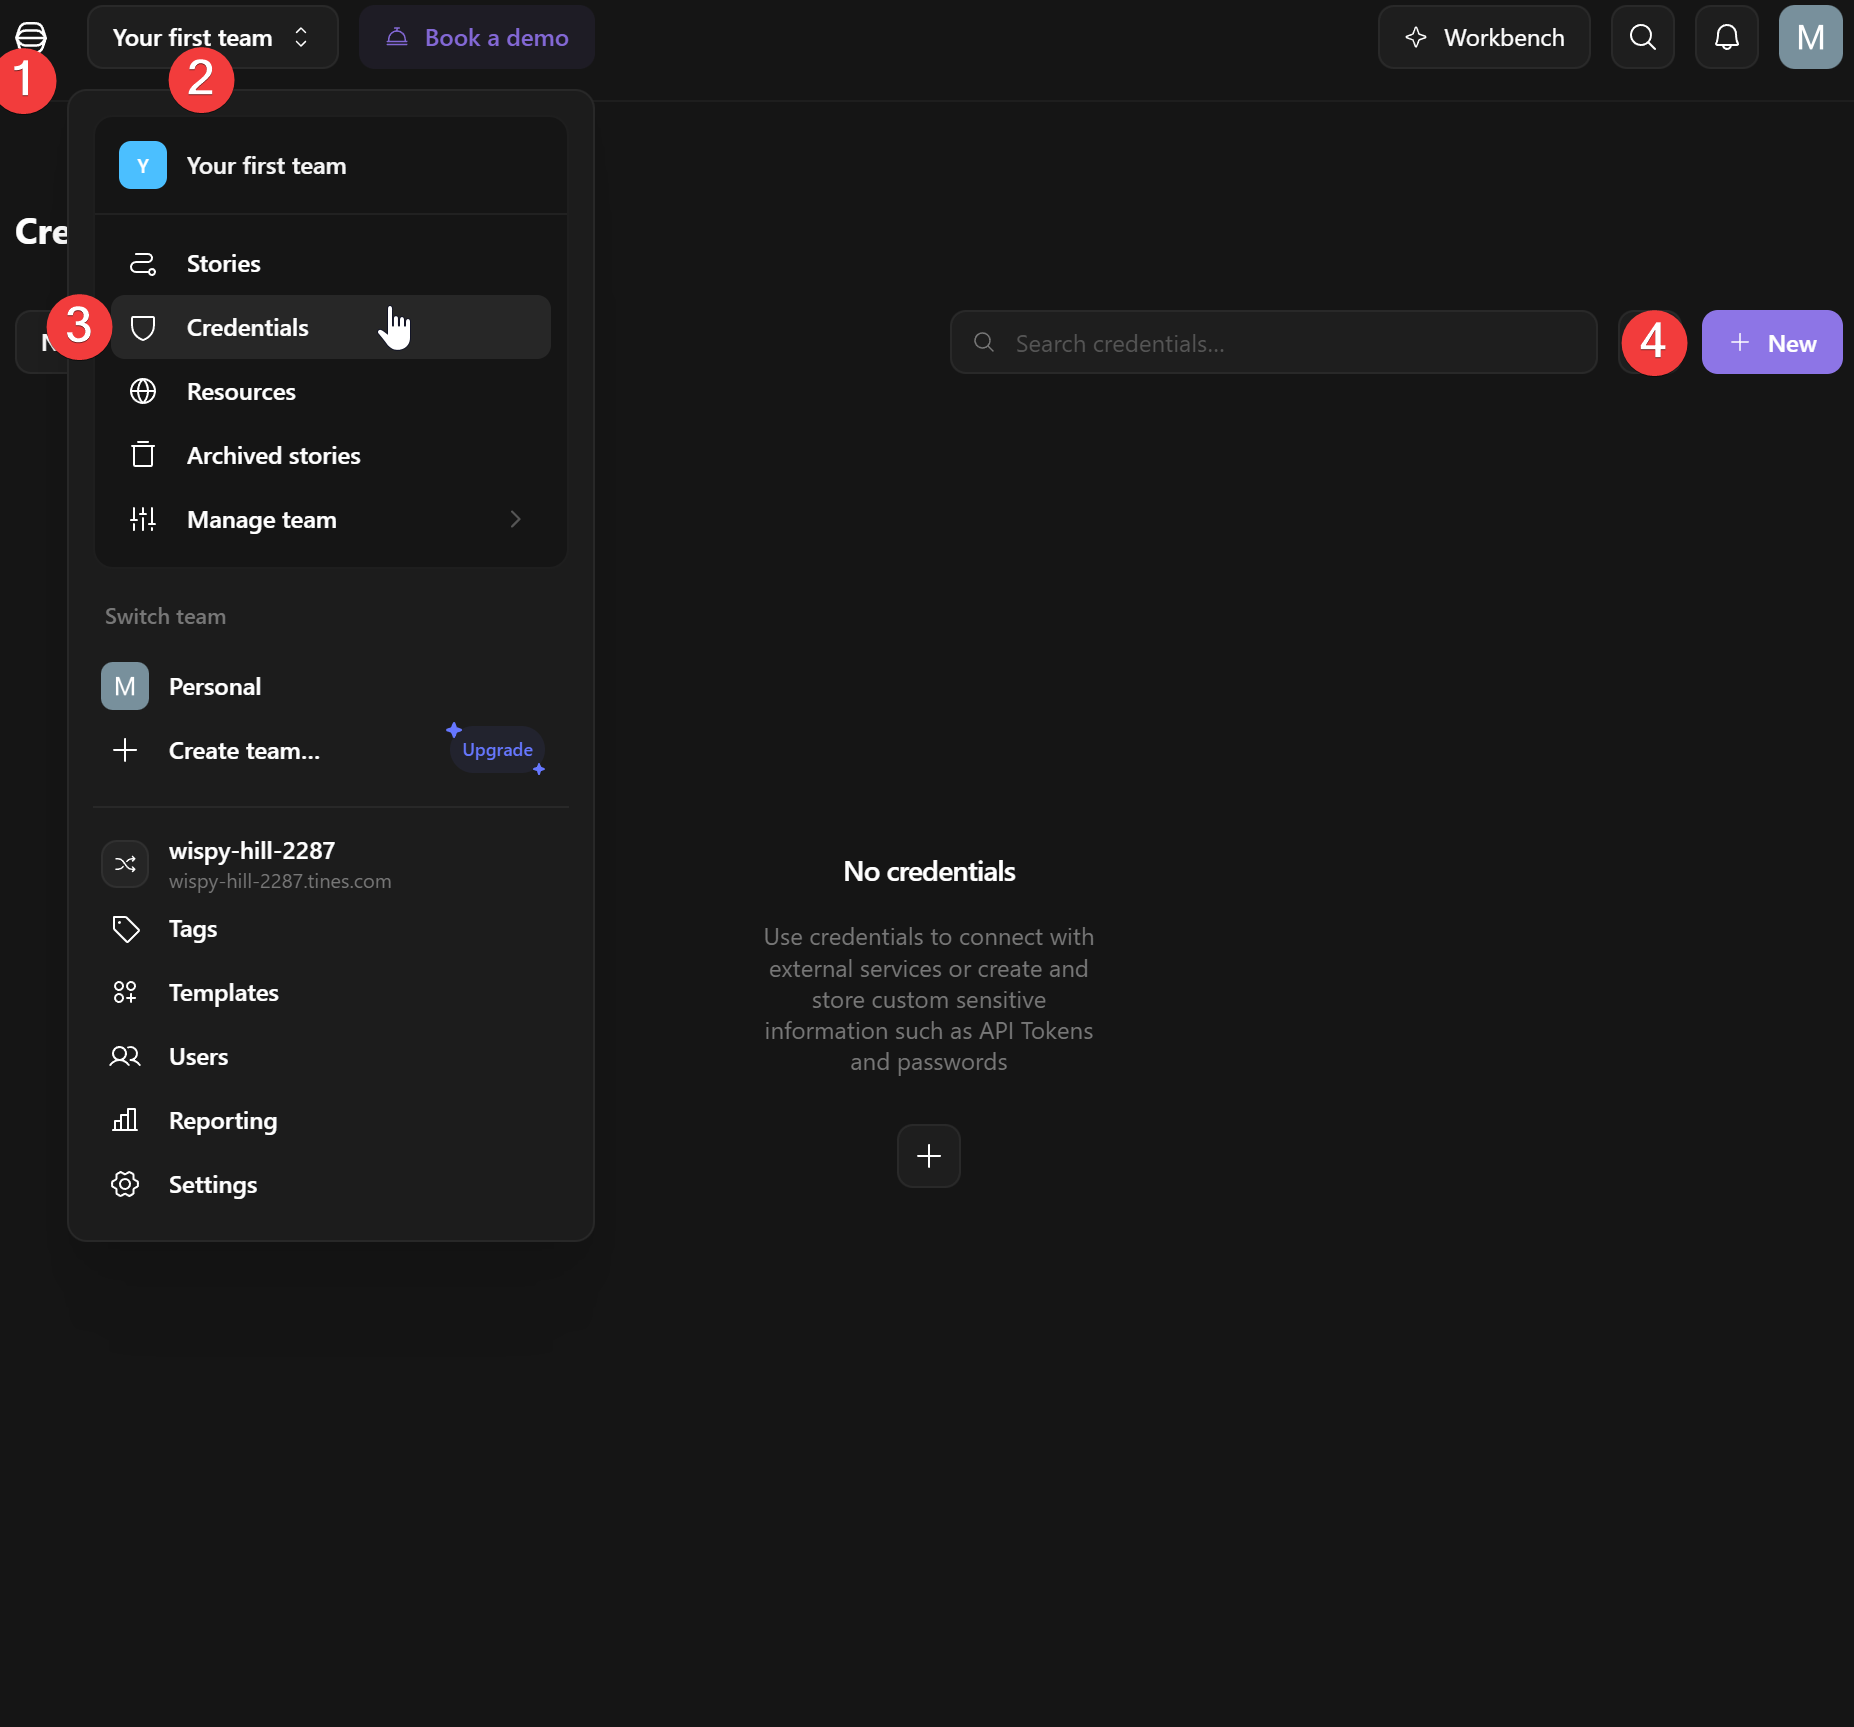
Head back to the main page, select your team and then credentials to create new credentials.
!
To get the REST API from LimaCharlie, head to their documentation. Copy the POST request. Will replace the <YOUR_OID> with our own organization API from LimaCharlie located in Access Management > Rest API. Copy the Org JWT.
!
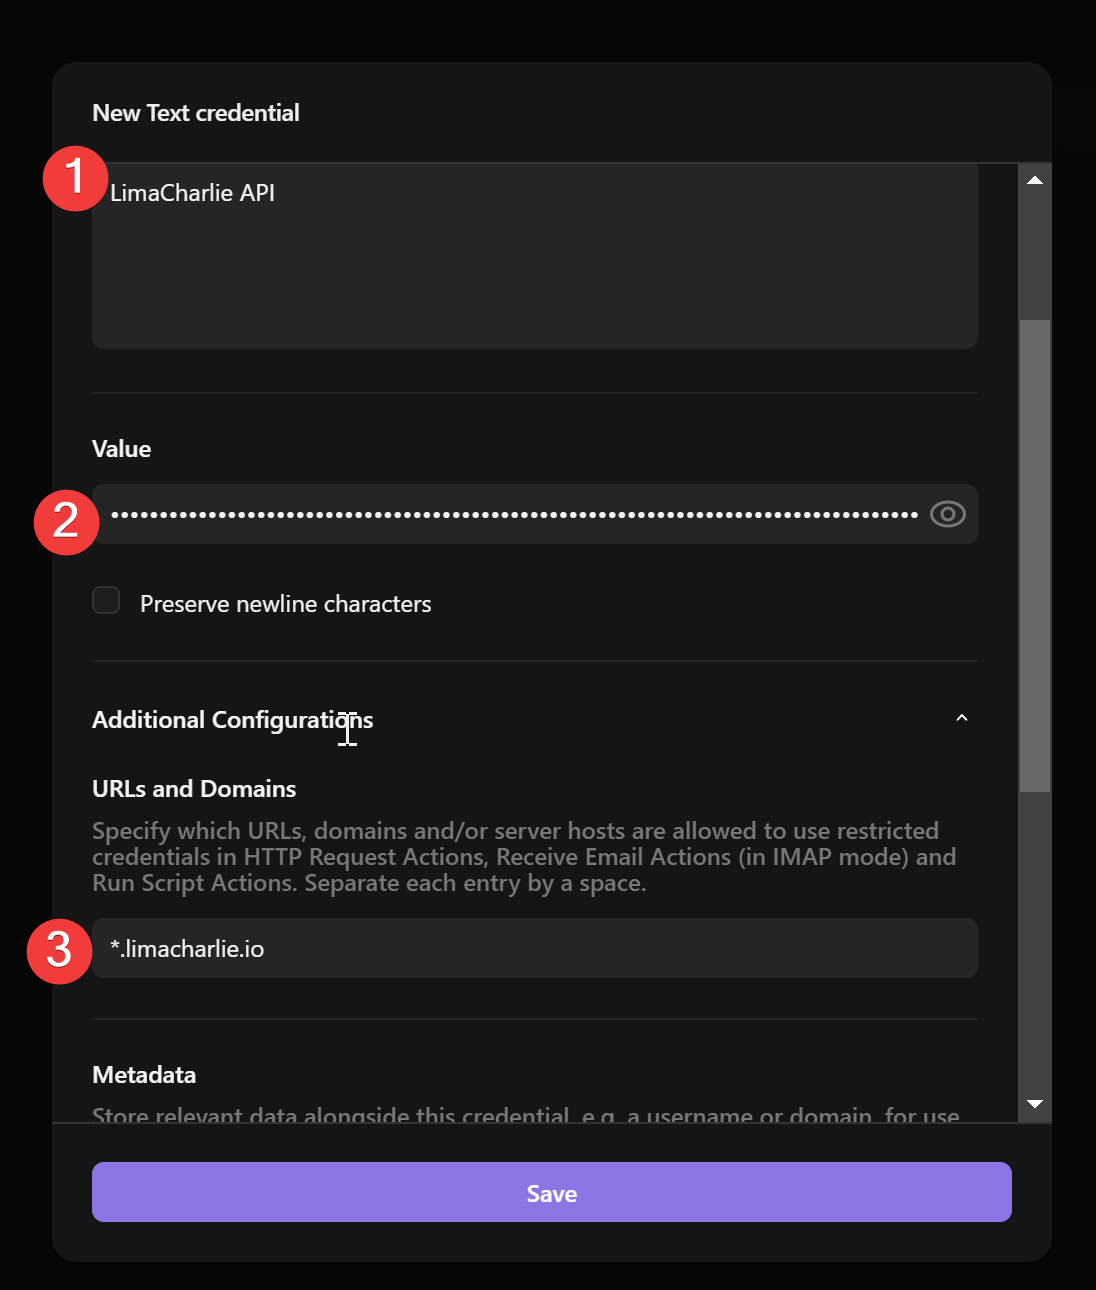
In Tines add new credentials by clicking the plus symbol then Text. We will add our own API as Text. Then fill out the description and title, paste the JWT key into the Value and add *.limacharlie.io into URLs section to denote that we want those credentials to be used for all subdomains of LimaCharlie.
!
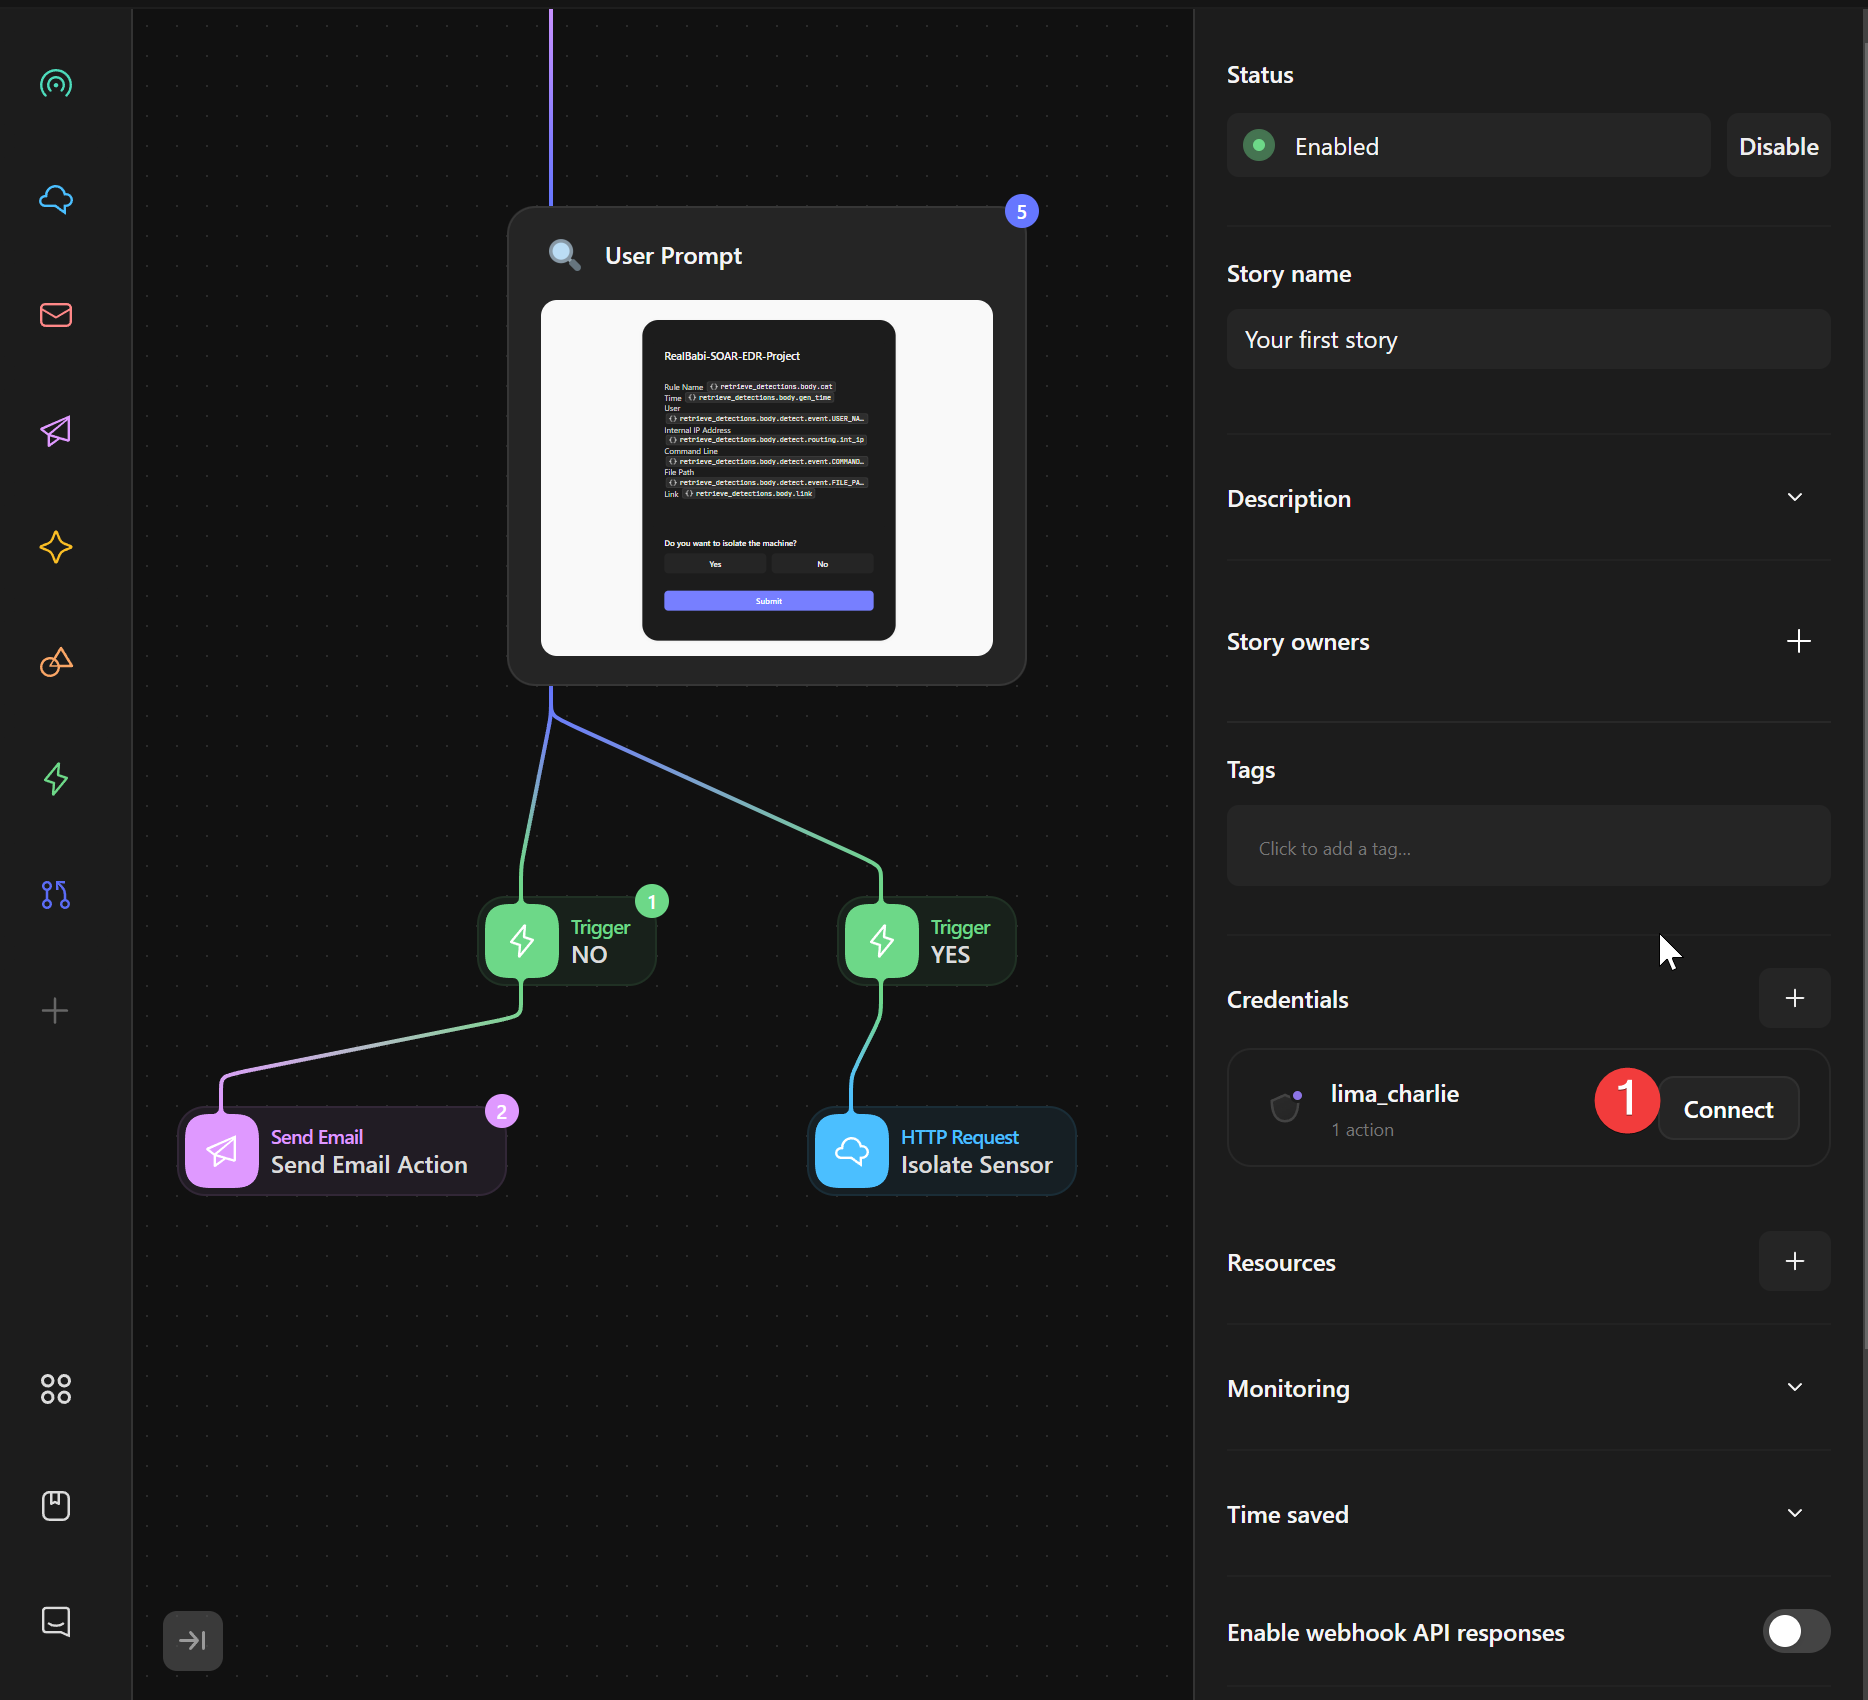
Now reload the story page and connect credentials.
!
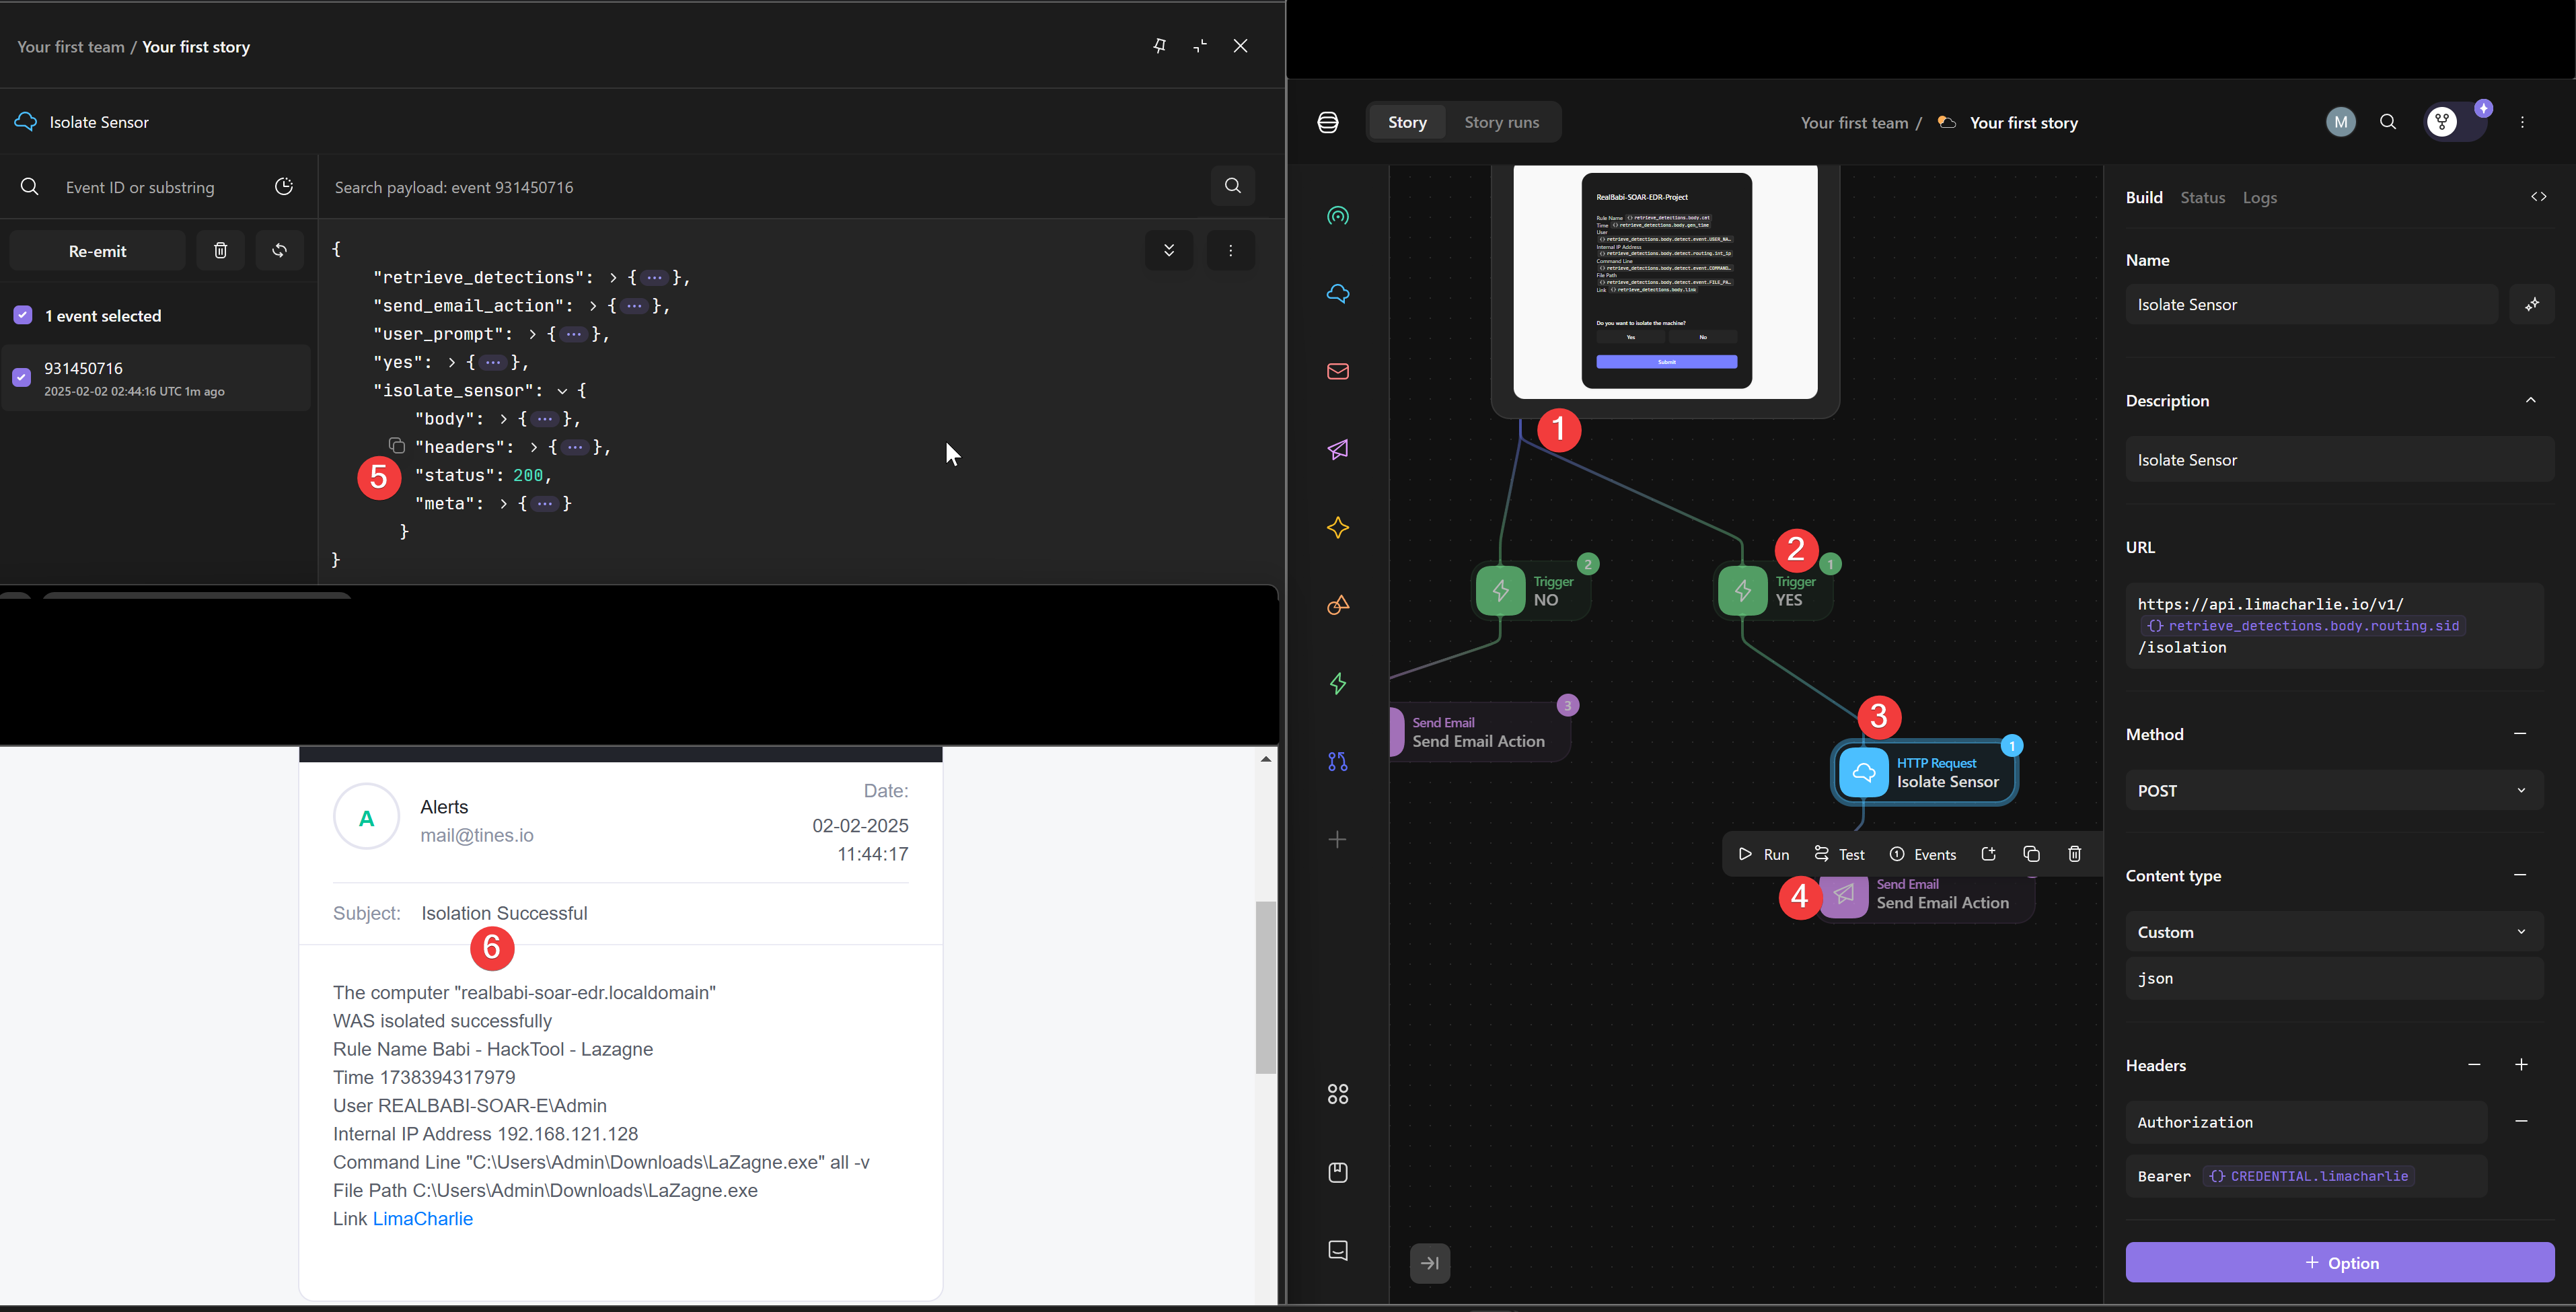
Lets reemit the YES action. We should see positive confirmation in Events for the trigger with “200” code in the isolate section of the body and an email stating that our endpoint is isolated.
!
FIN